Epoxy Resin River Table
Google ‘River Table’ and look at the pictures. So many beautiful pieces of art and I really wanted to know how to make it. Learn by doing…So I did just that. In this post i’ll share the whole experience!
Following instructional material from the internet I went ahead and started a project to make my own resin table.
Step 1 – The Wood
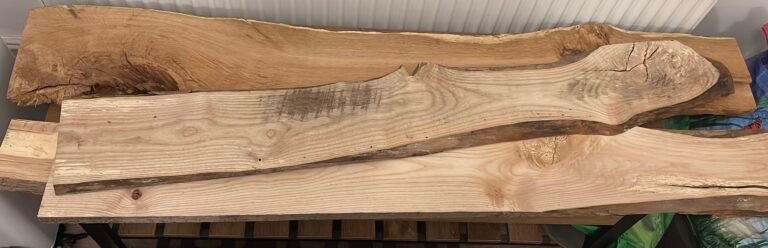
Walnut…..The nicest tables I saw were made using Walnut wood. The bad news was that there was a worldwide timber issue so prices were a bit higher than usual with everyone doing DIY during COVID and ultimately I found a nice piece on eBay. It was an Italian Walnut slab measuring 1200mm x 540mm (at its widest) and about 50mm thick. Most recommendations for table thickness were between 25-50mm. The walnut was kiln dried and planed on both sides which started me off well!
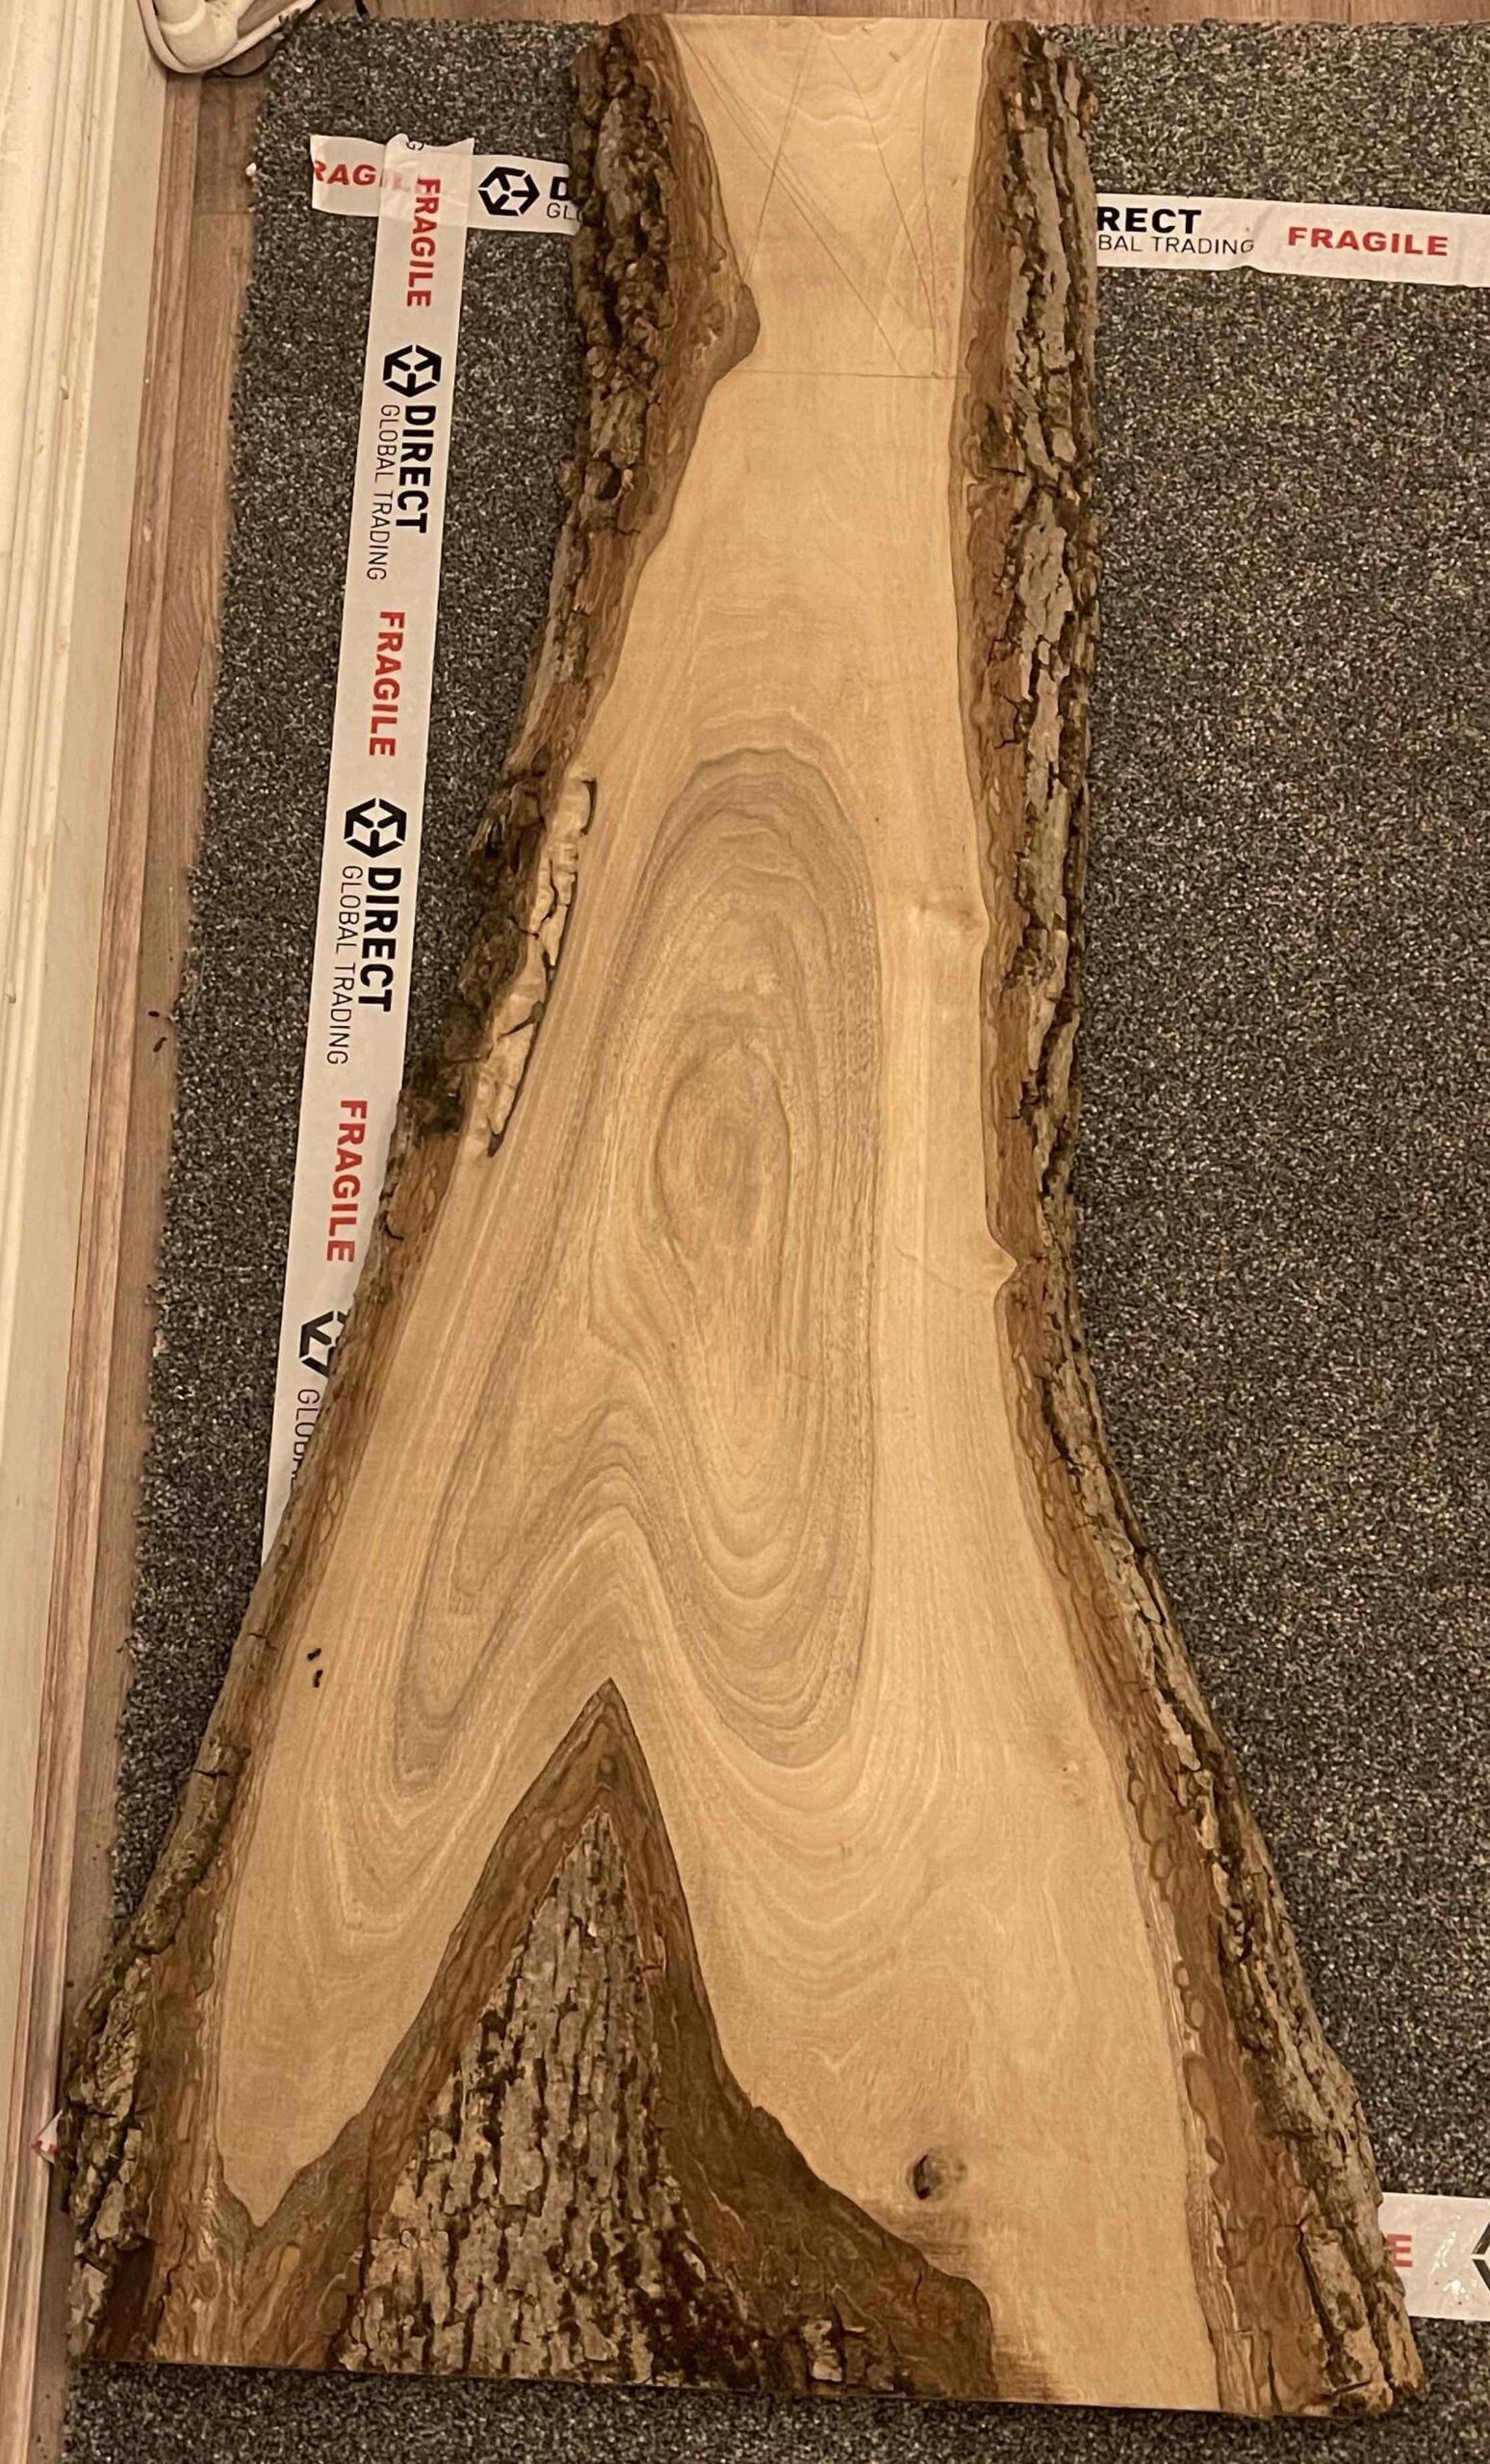
Ignore the Fragile stickers on the carpet, that was purely for planning how I wanted the table to be. The size was quite interesting and initially I was going to cut the length down but it was such a nice piece I opted to keep it at length a length of 1200mm.
Step 2 – Preparation
I started off with removing the bark, a lot of it was already peeling off but a sharp chisel and hammer helped knock it all off. The only downside was that there were wormholes with worms in them! I was going to ring up the supplier but it turns out that kiln dried is not often hot enough to kill worms and they can survive.
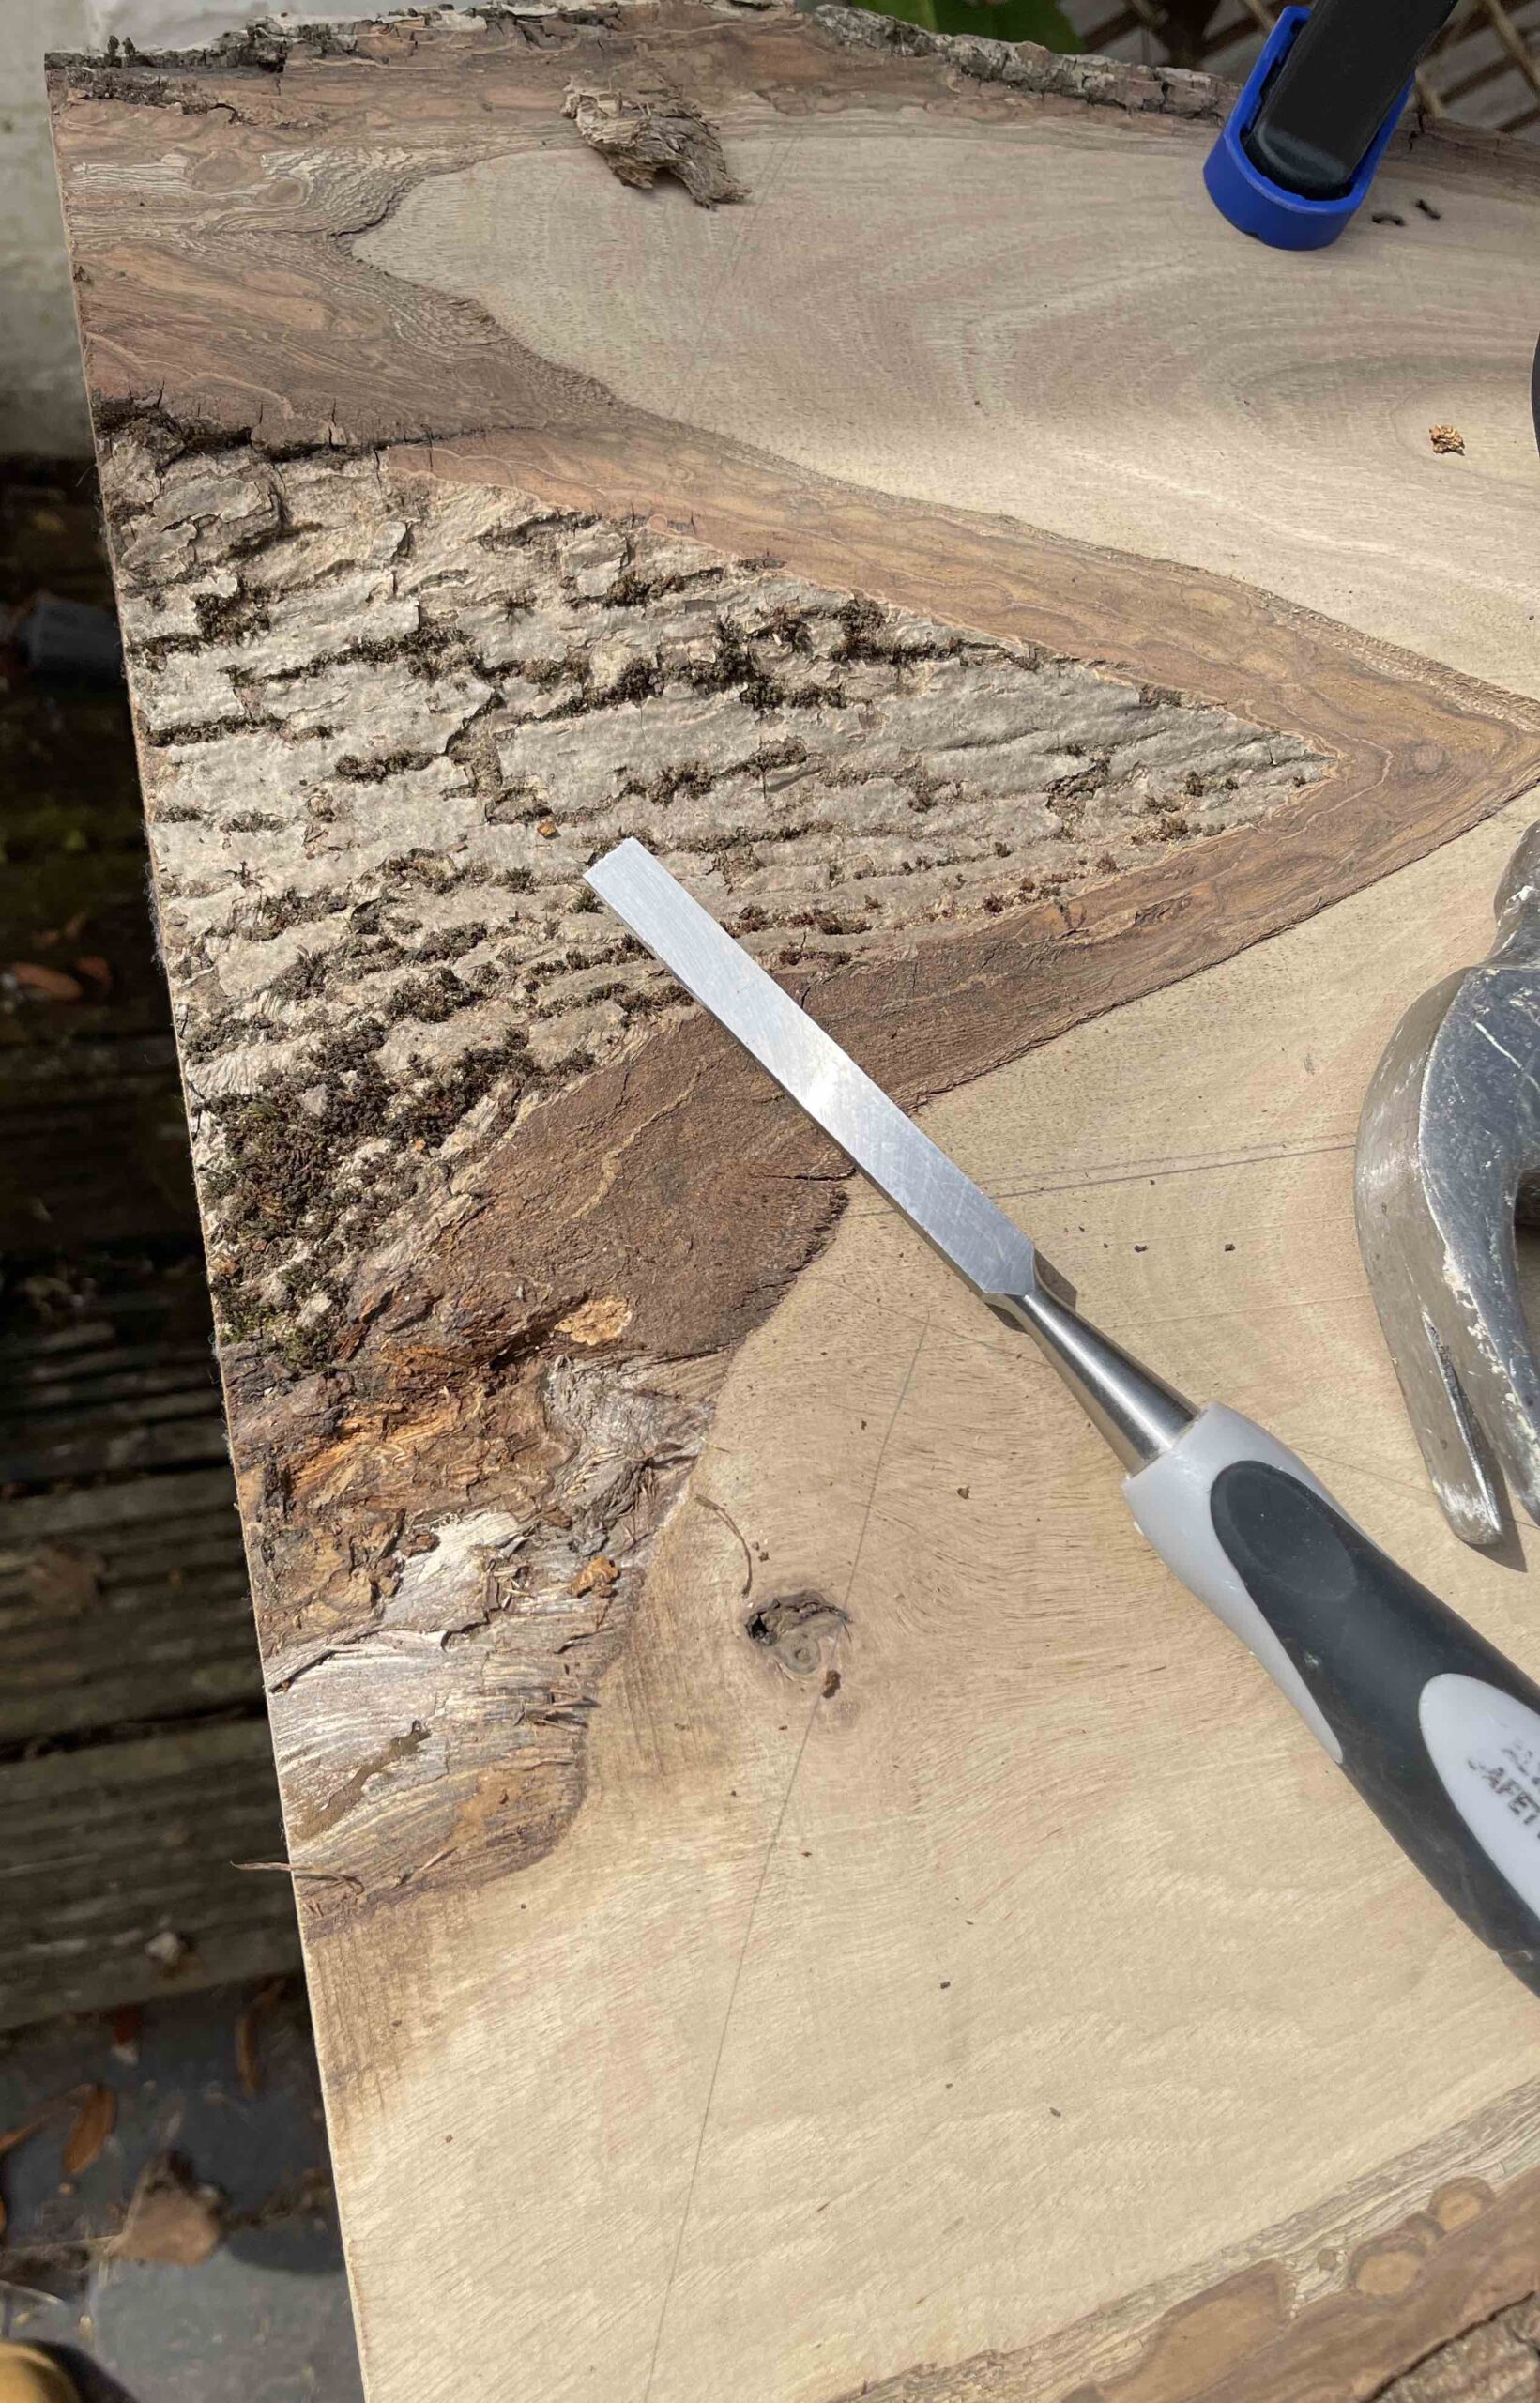
The worms themselves were not a big deal, if anything they guided me to the correct depth of bark removal. After removal I used a drill mounted wire brush and sander to smooth the edges to a nice pattern.
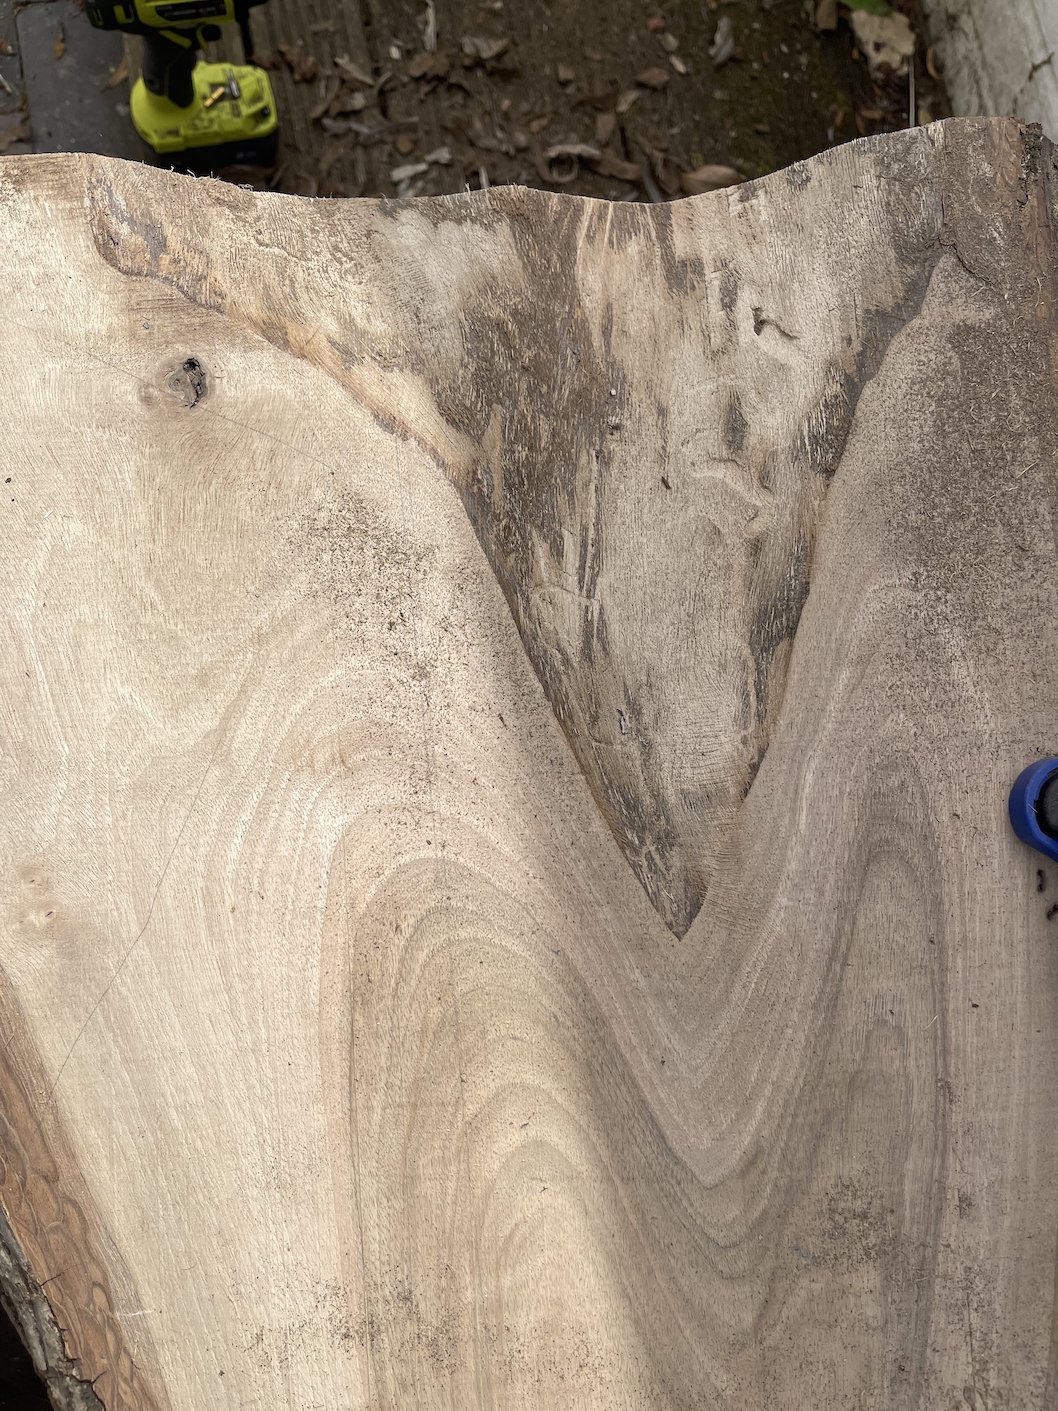
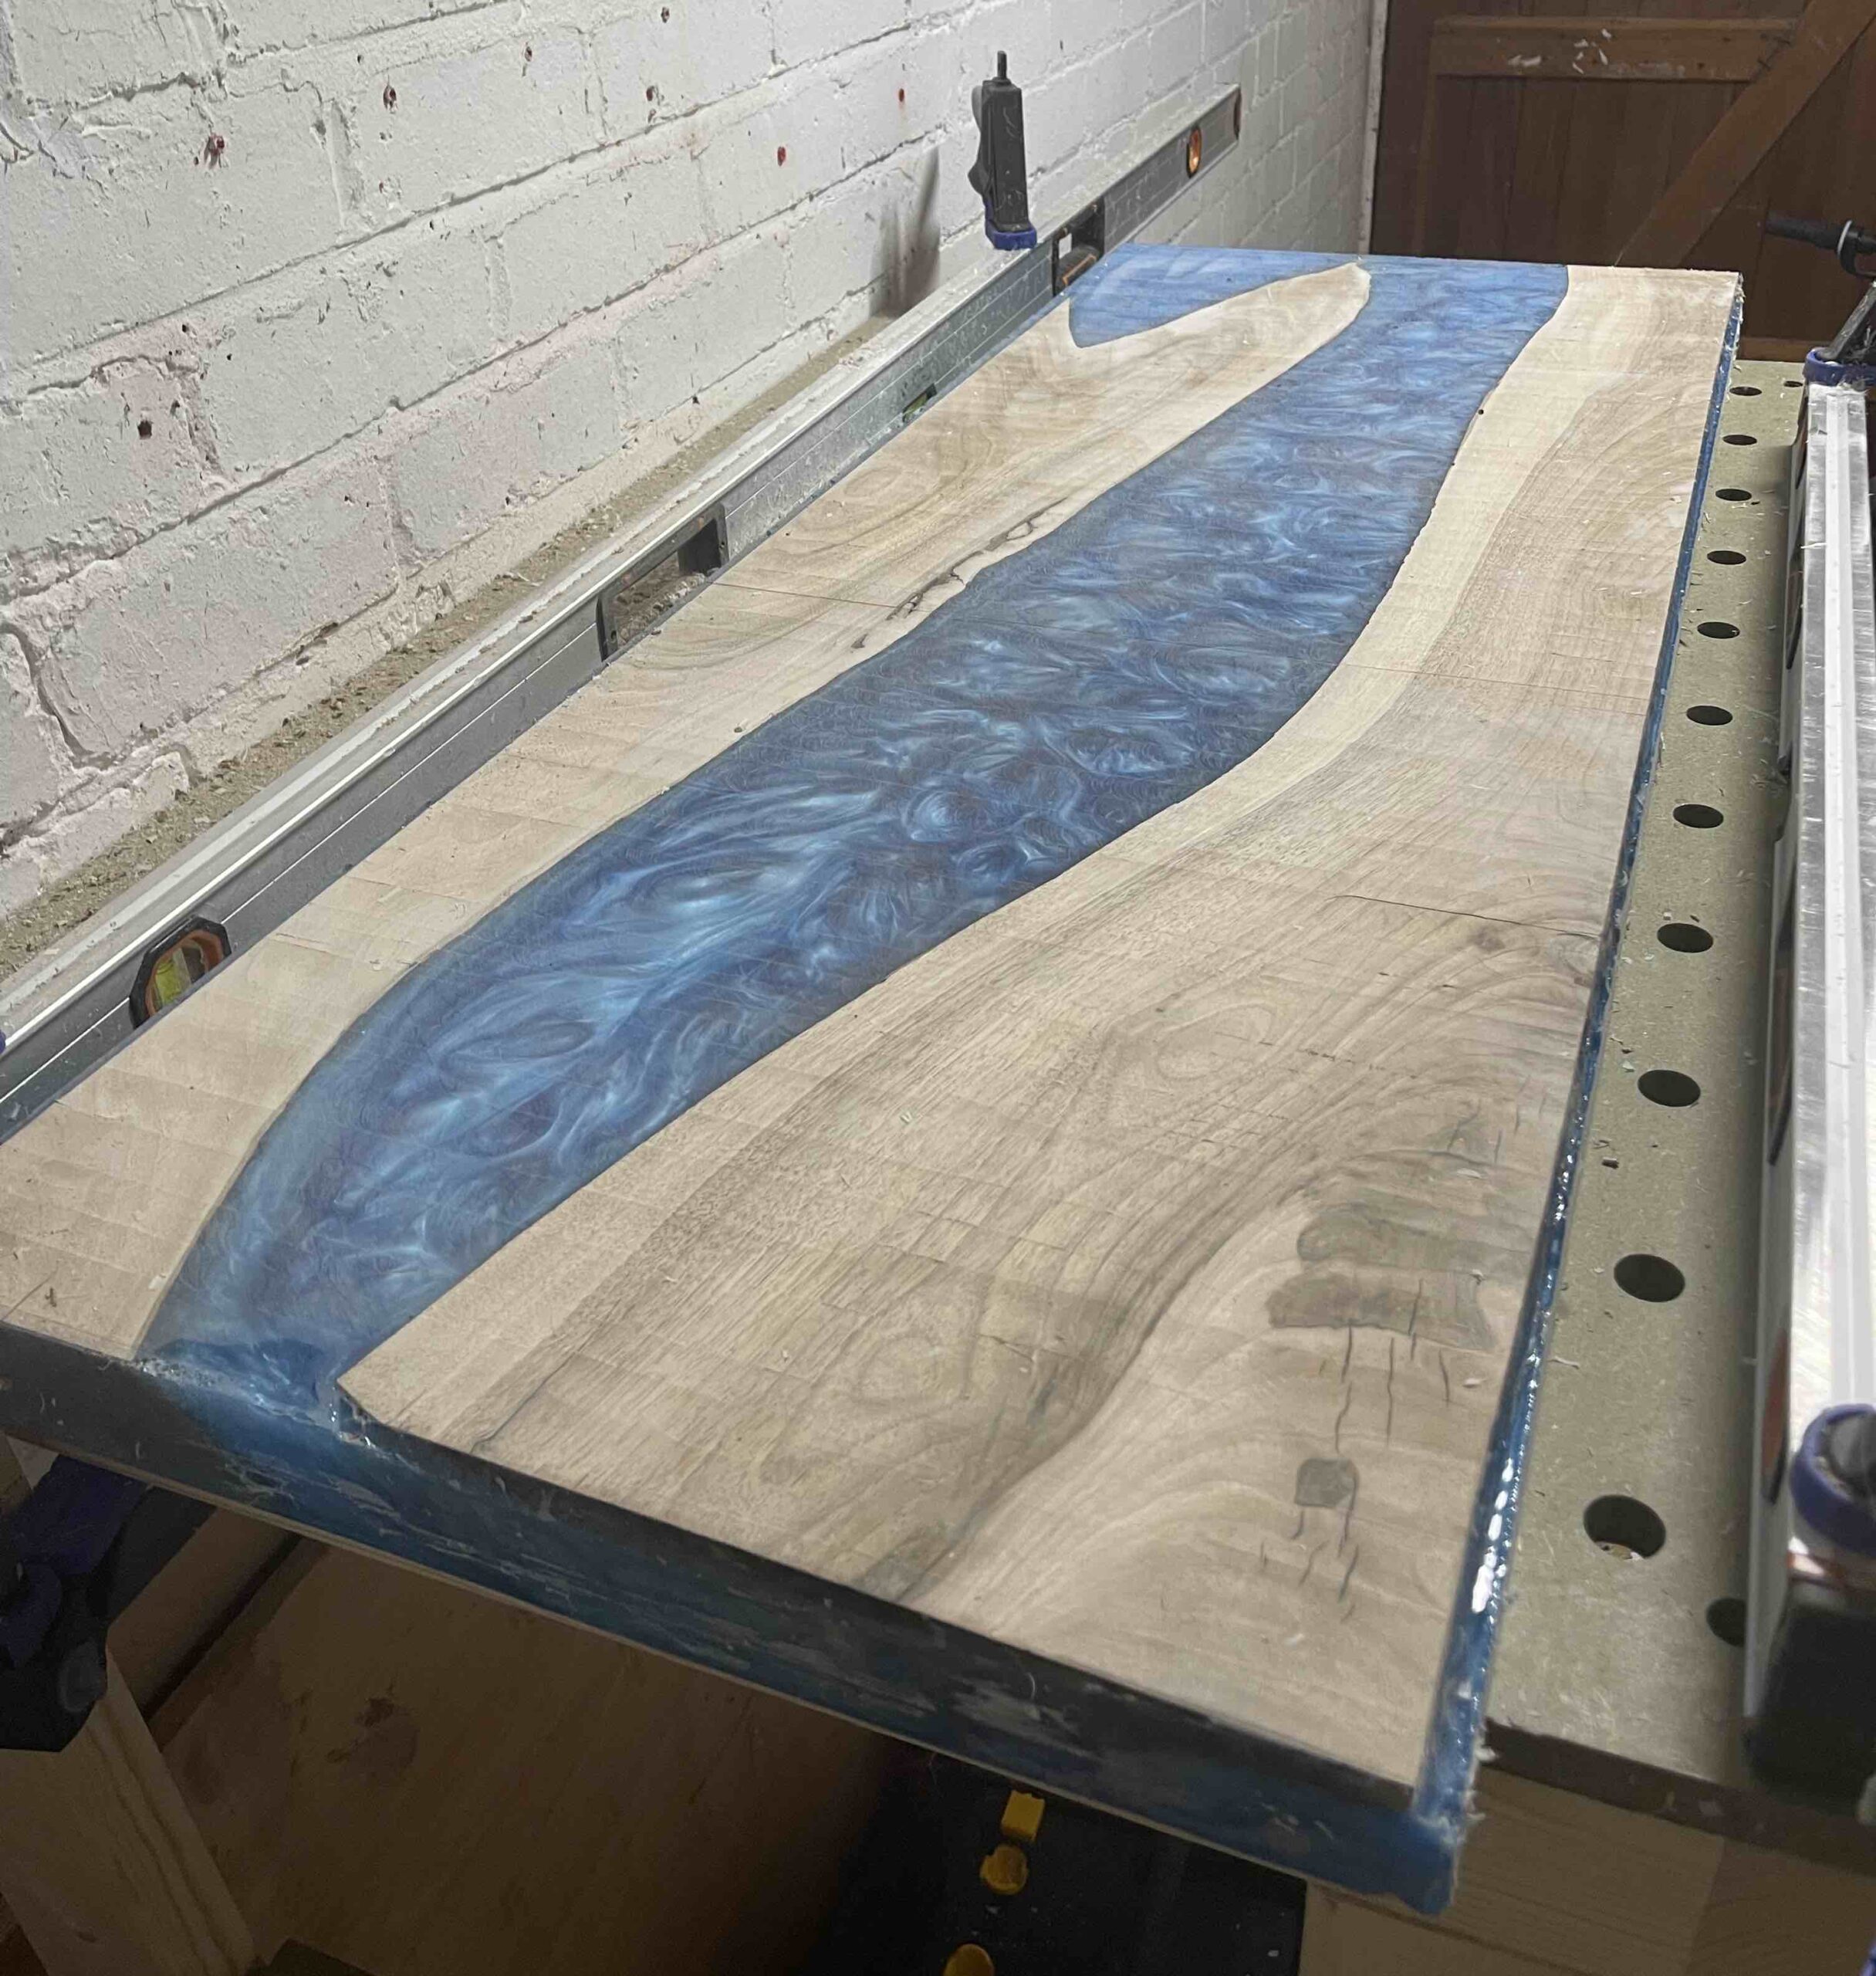
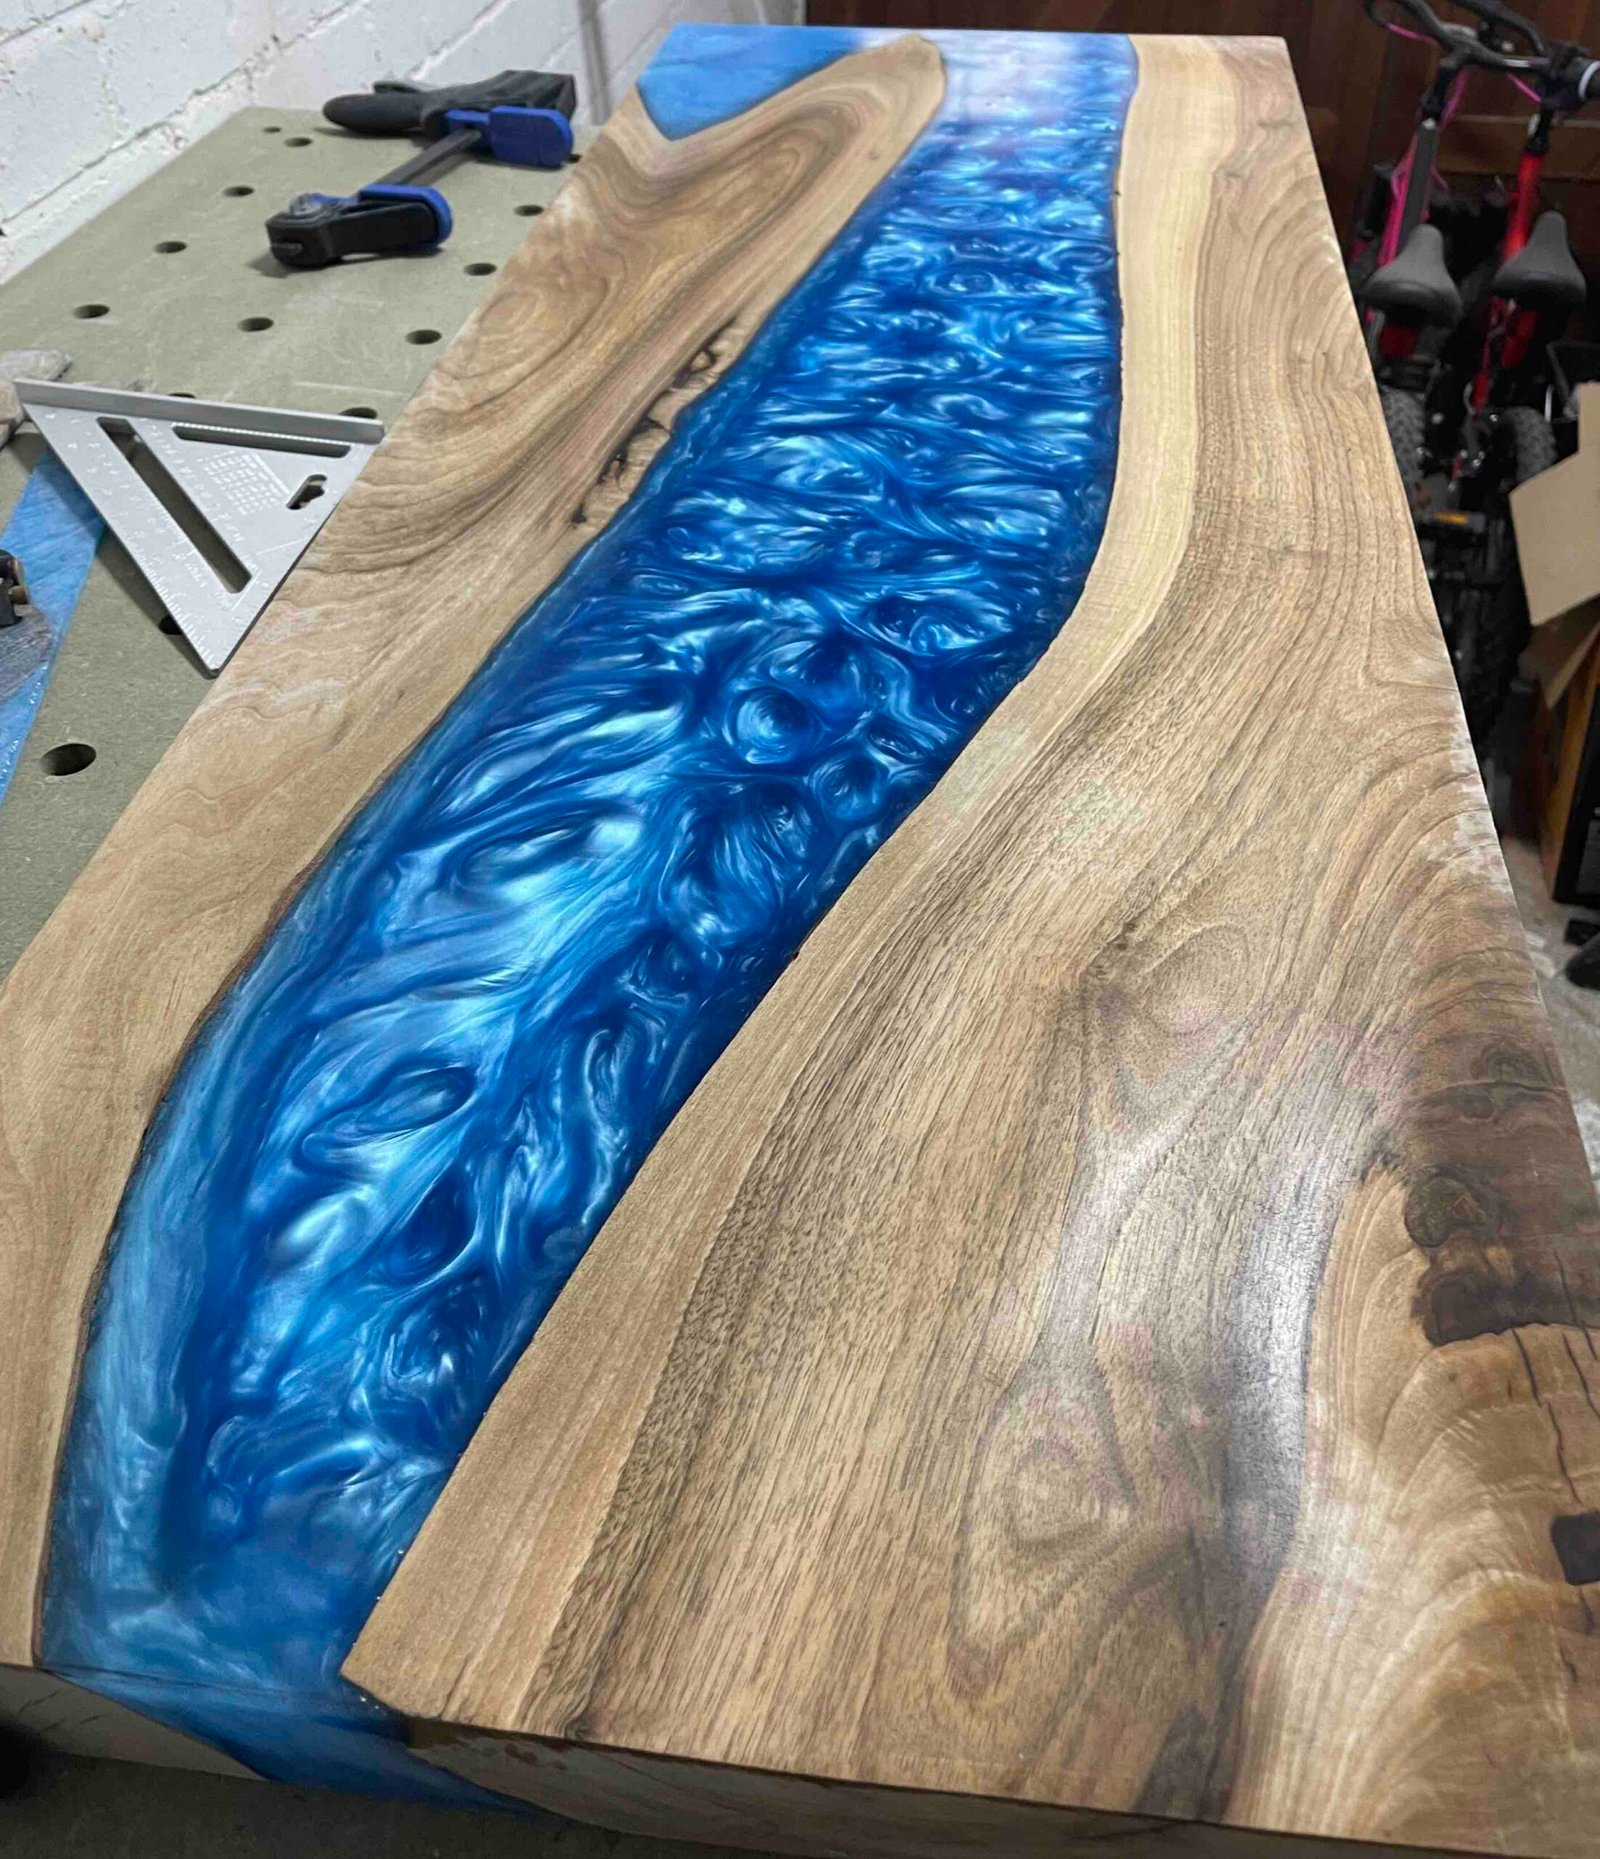
I spent a bit of time deliberating on how to cut it because the shape was a bit weird. In the end I planned to just cut it through the middle. Expecting this to give me the most flexibility. I was determined to use the whole lot!

And how it turned out didn’t look to bad. The circular saw did struggle a bit and the awkward shape meant that my circular saw track was perched more precariously. This mean that I had a false start with the cut however, the cut edge will be on the outside so can be sanded down/freshened up so I wasn’t too concerned.
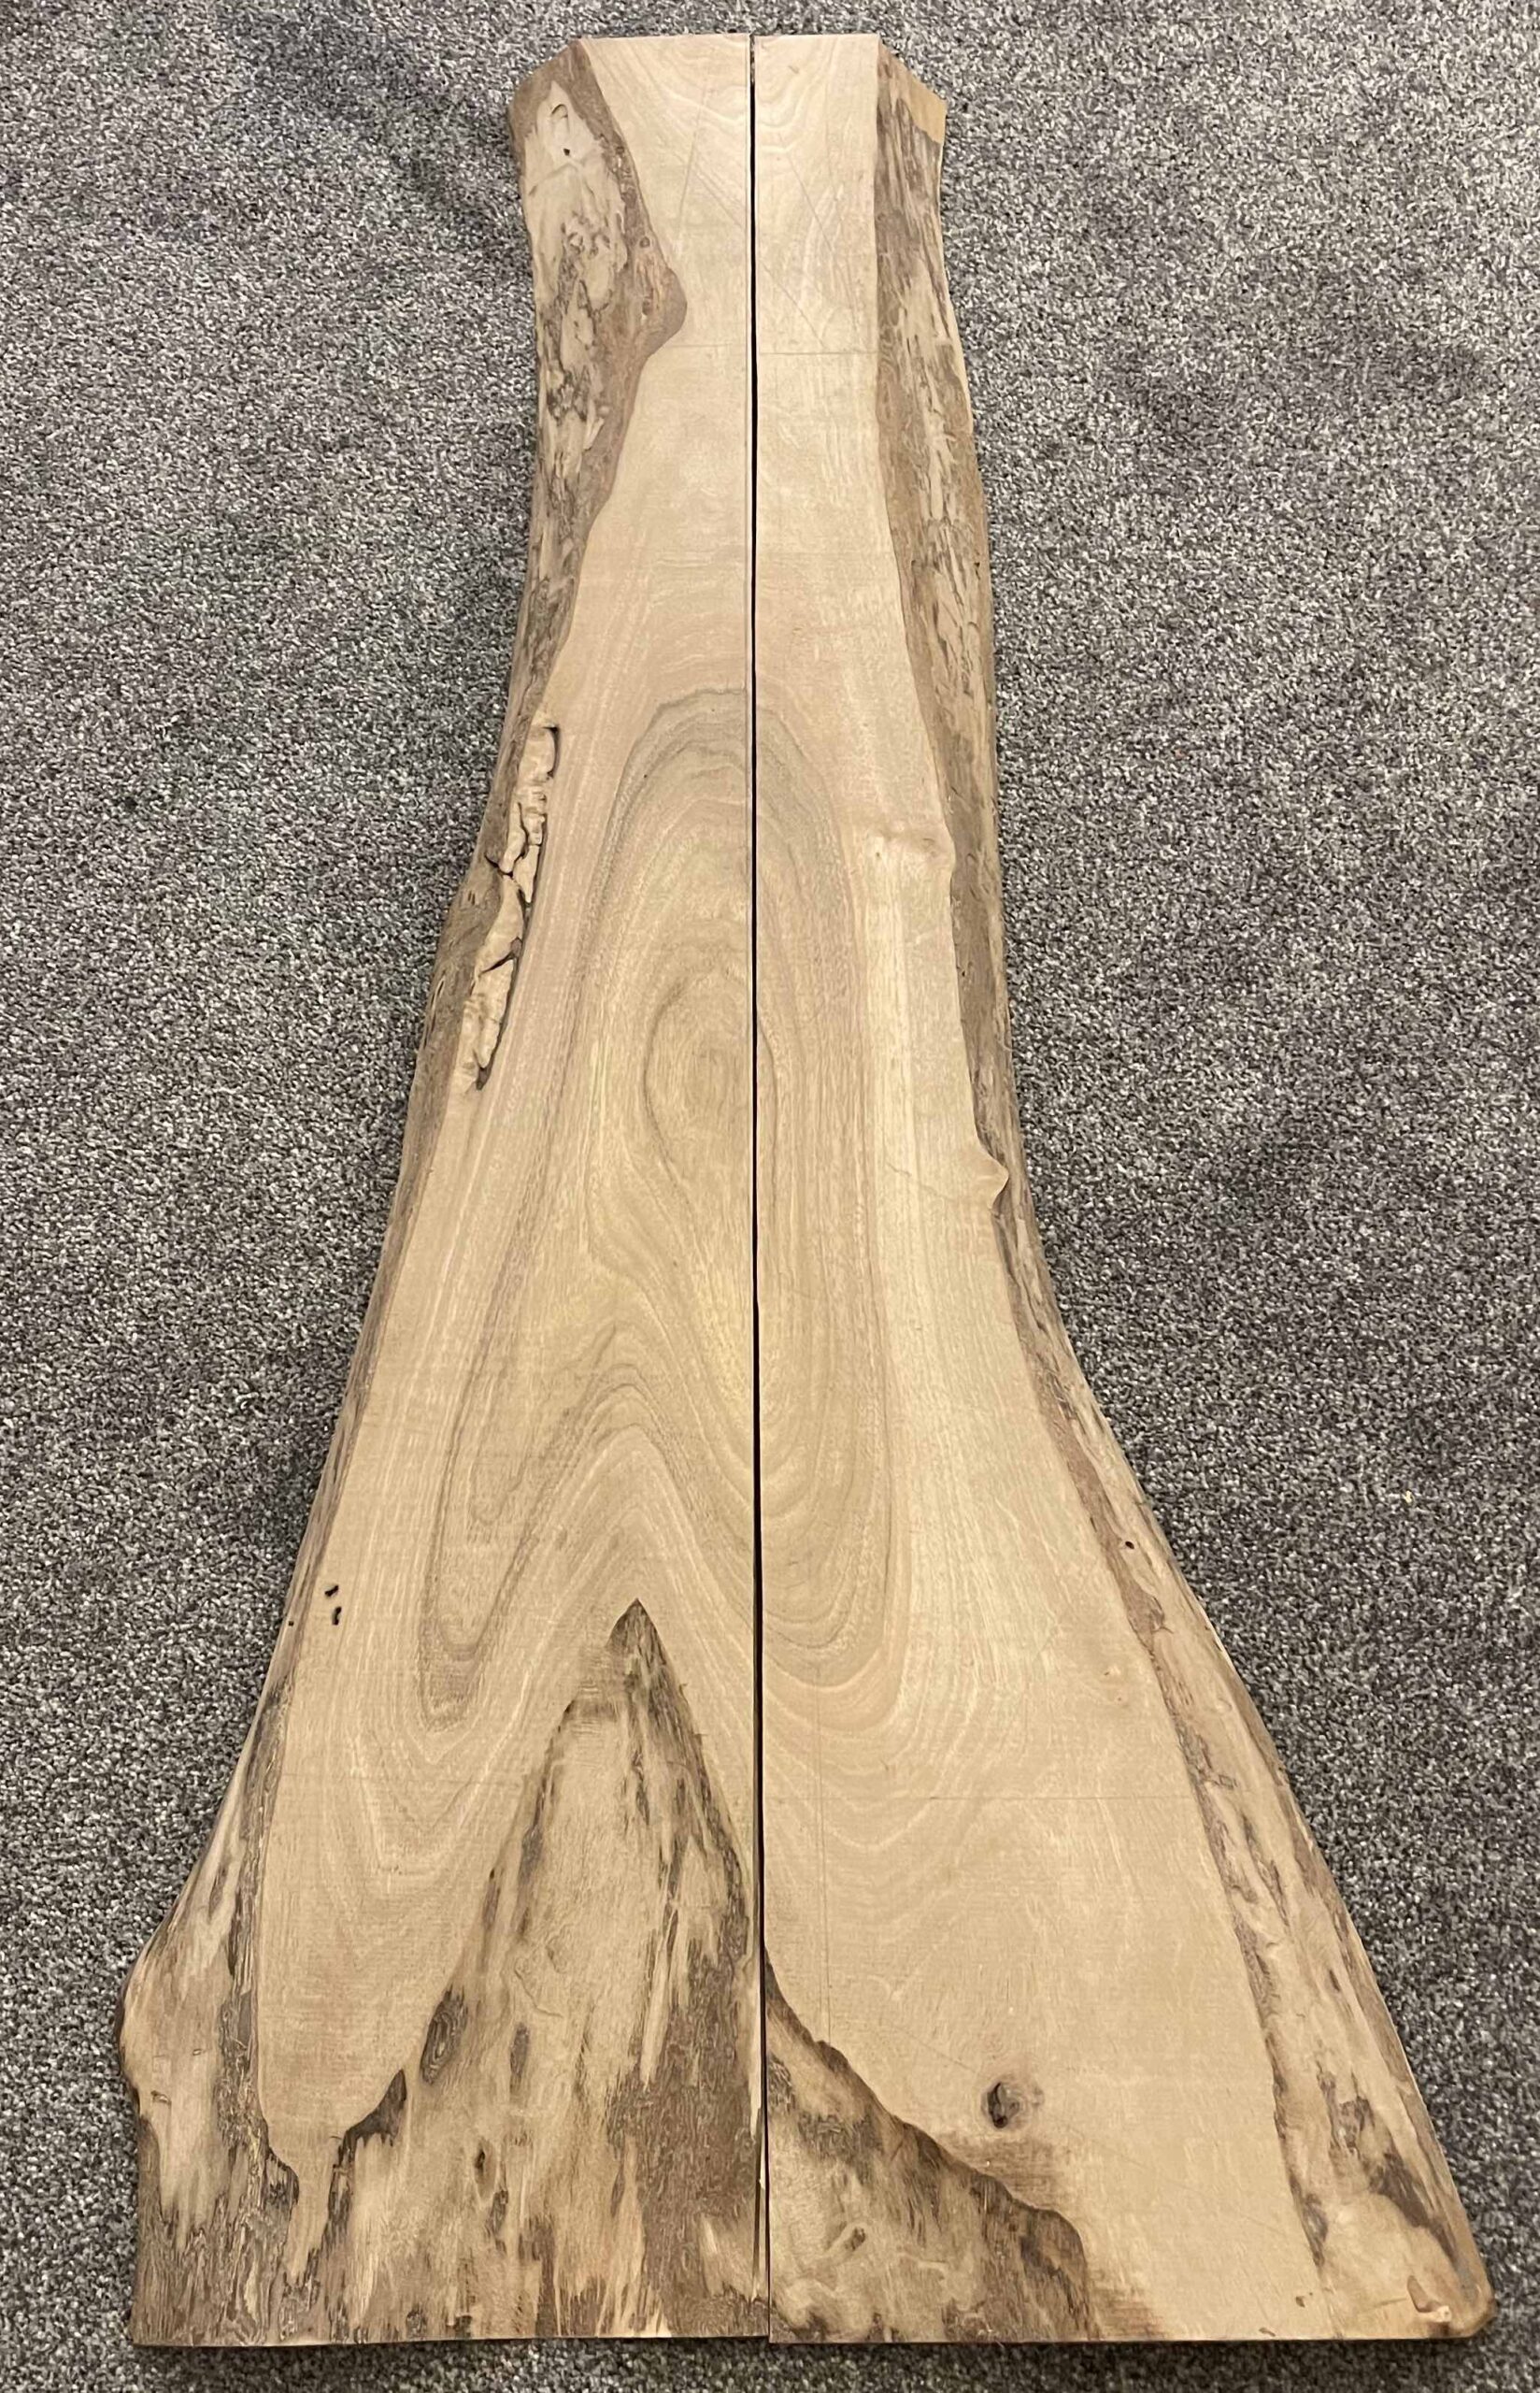
At this stage I needed to decide how I was going to orientate the two pieces to make the table and I turned to Twitter. I offered Option A and B and asked for feedback and tips.
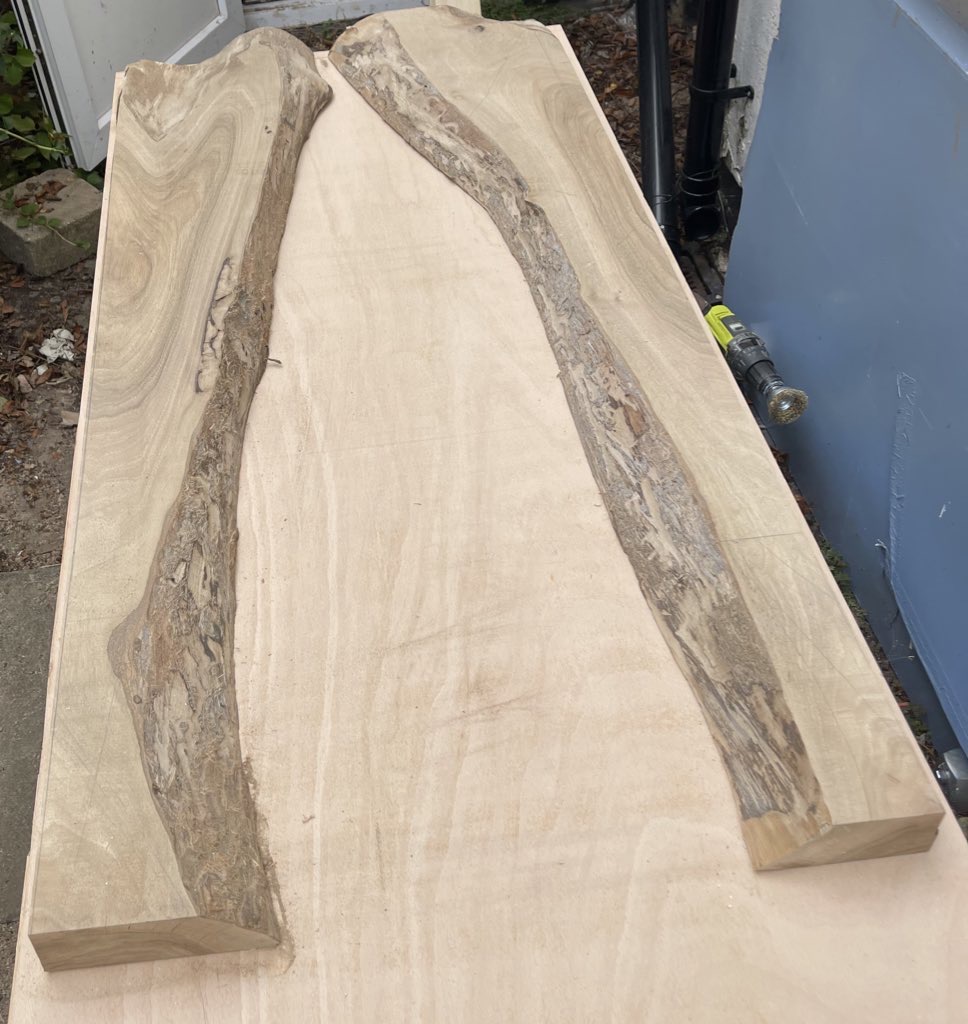
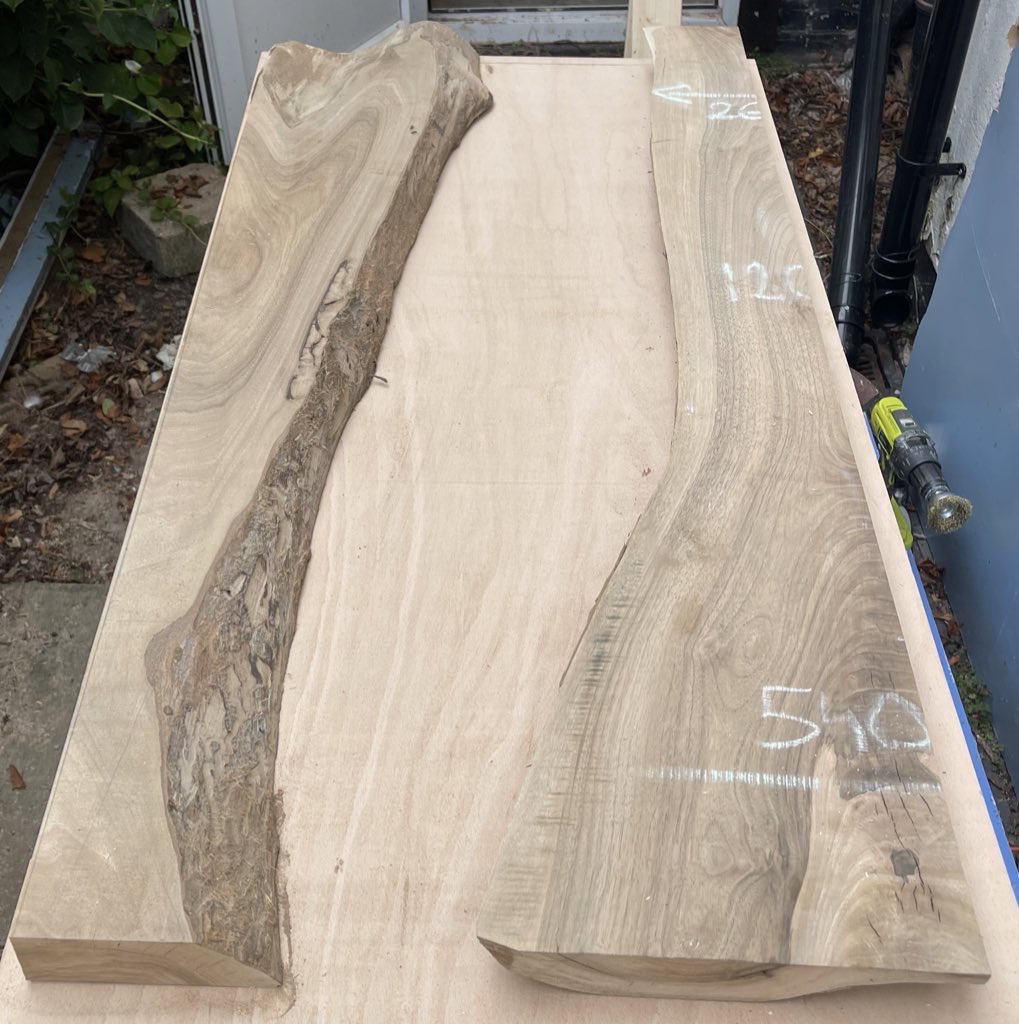
Option A would’ve used a lot of resin and would’ve been extremely heavy and this opinion seemed to have been shared by many on Twitter. Option B was narrower (by 150mm) and also had the advantage of the beautiful grains which when sanded and oiled will hopefully really stand out.
Option B it is…
Step 3 – The Mold
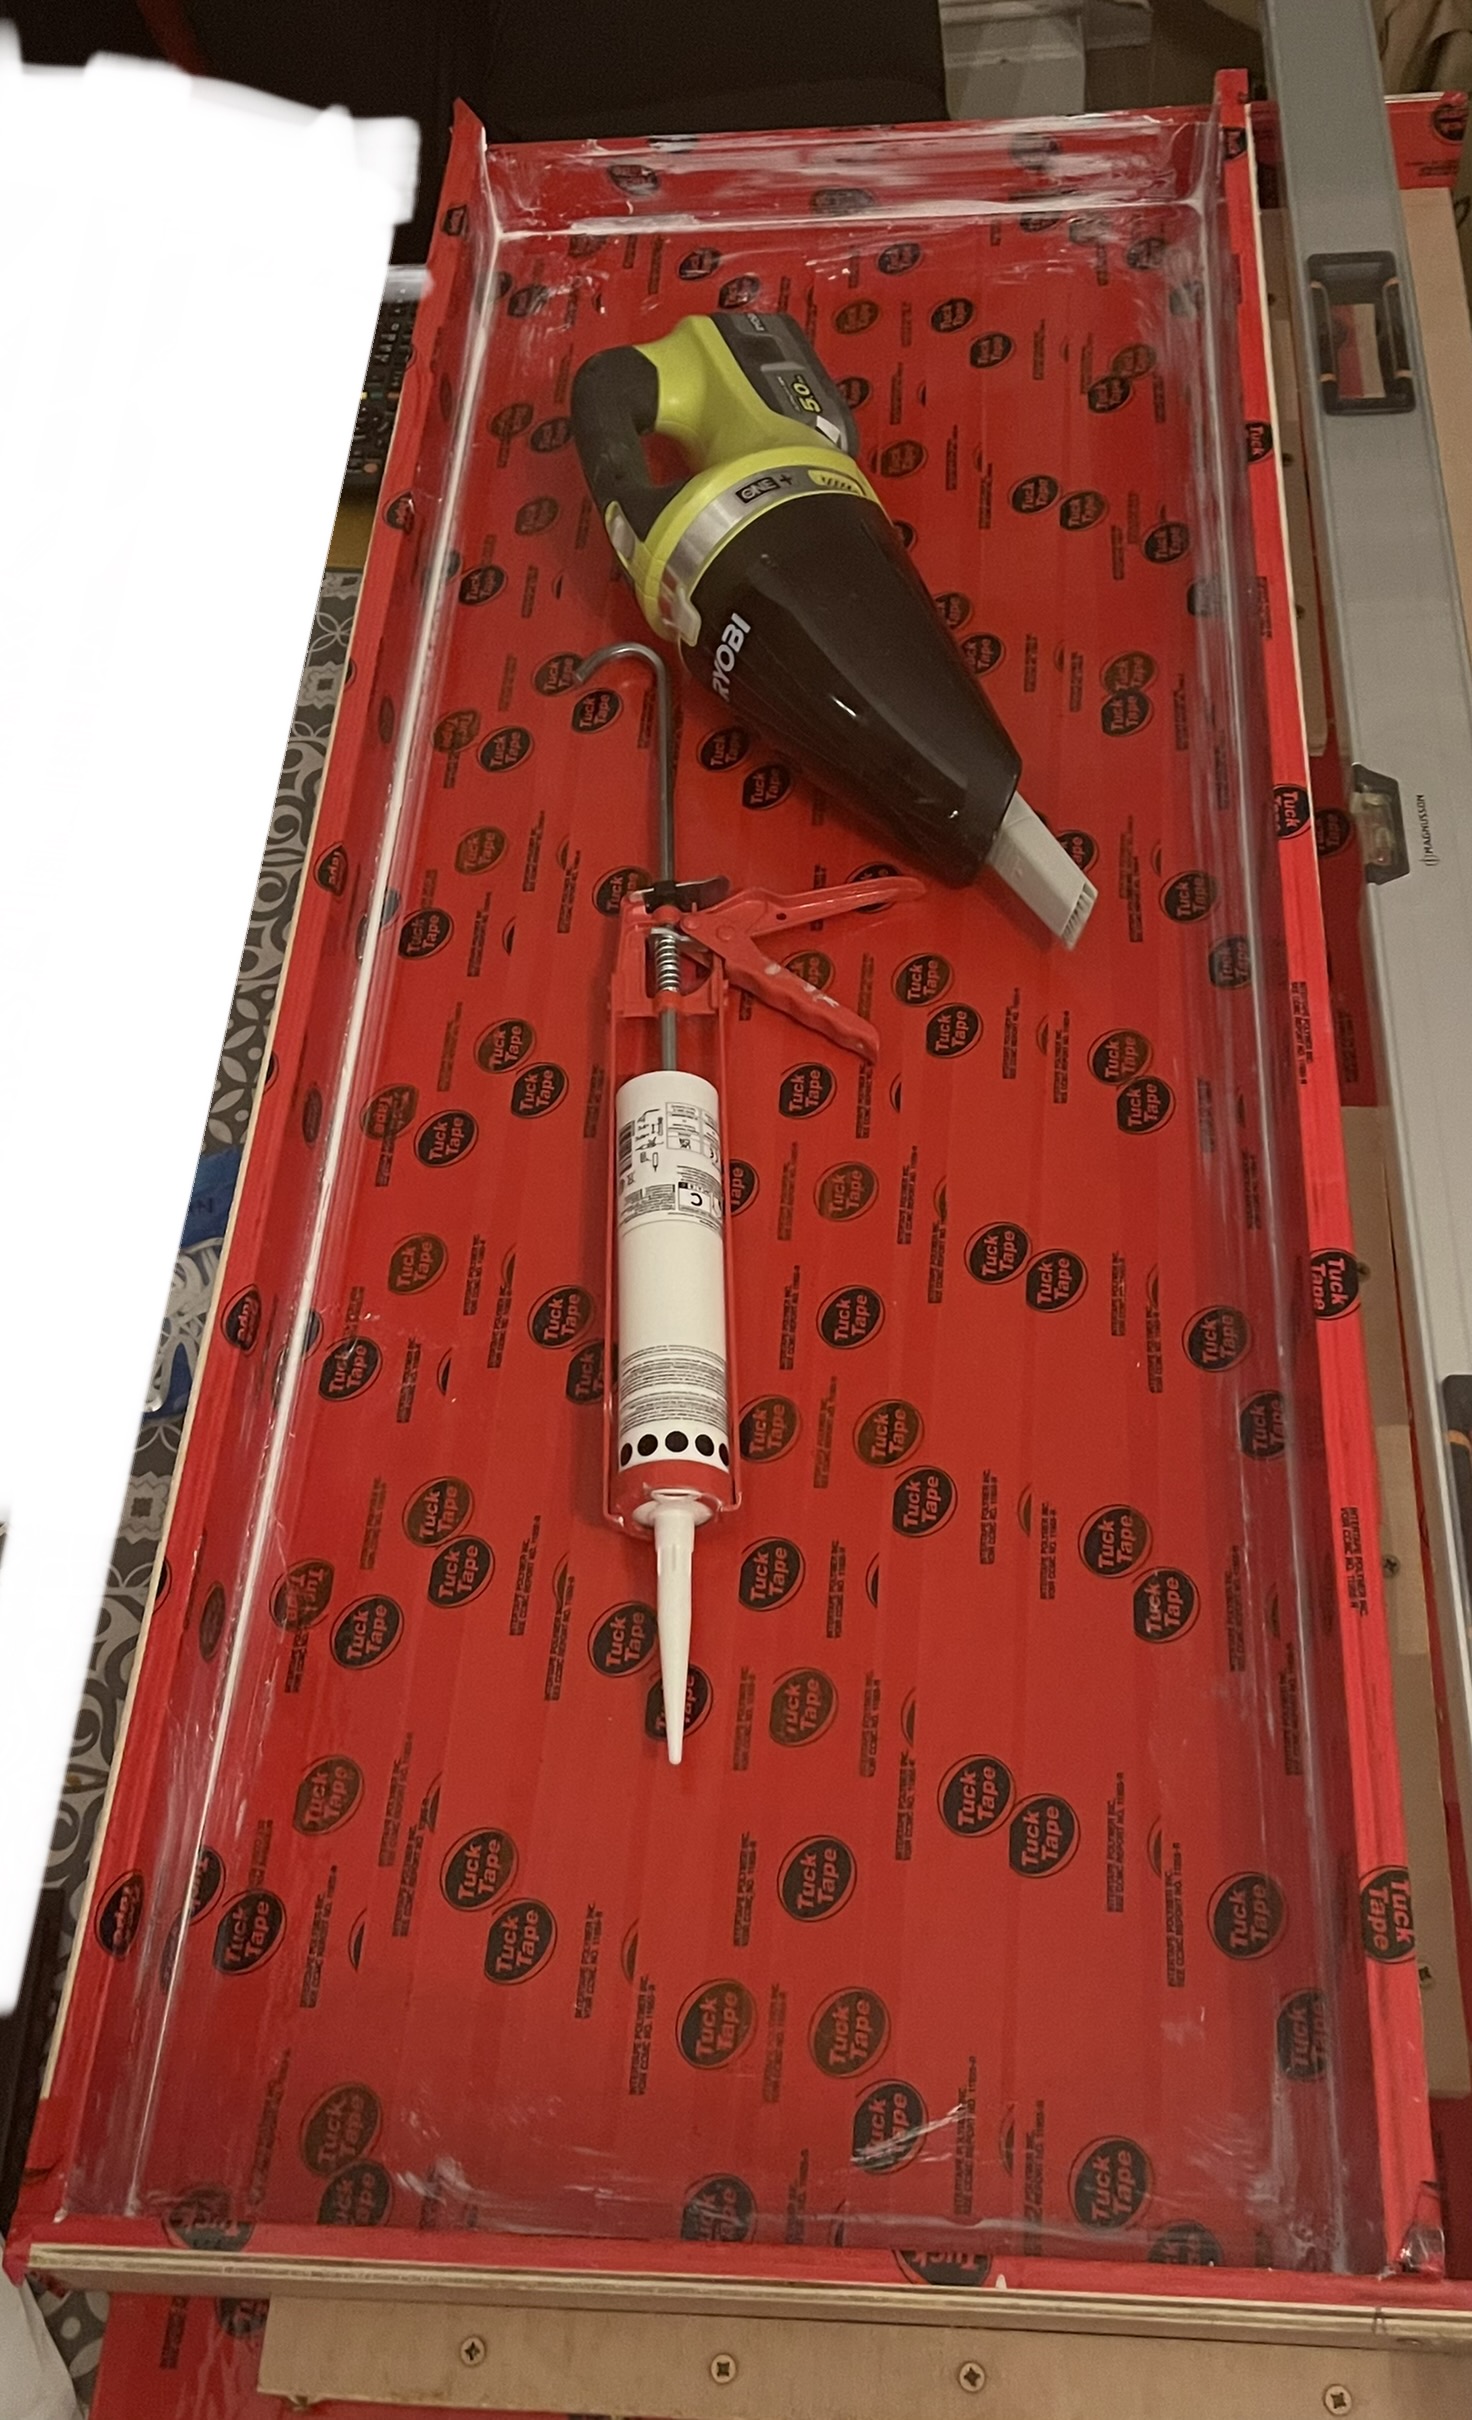
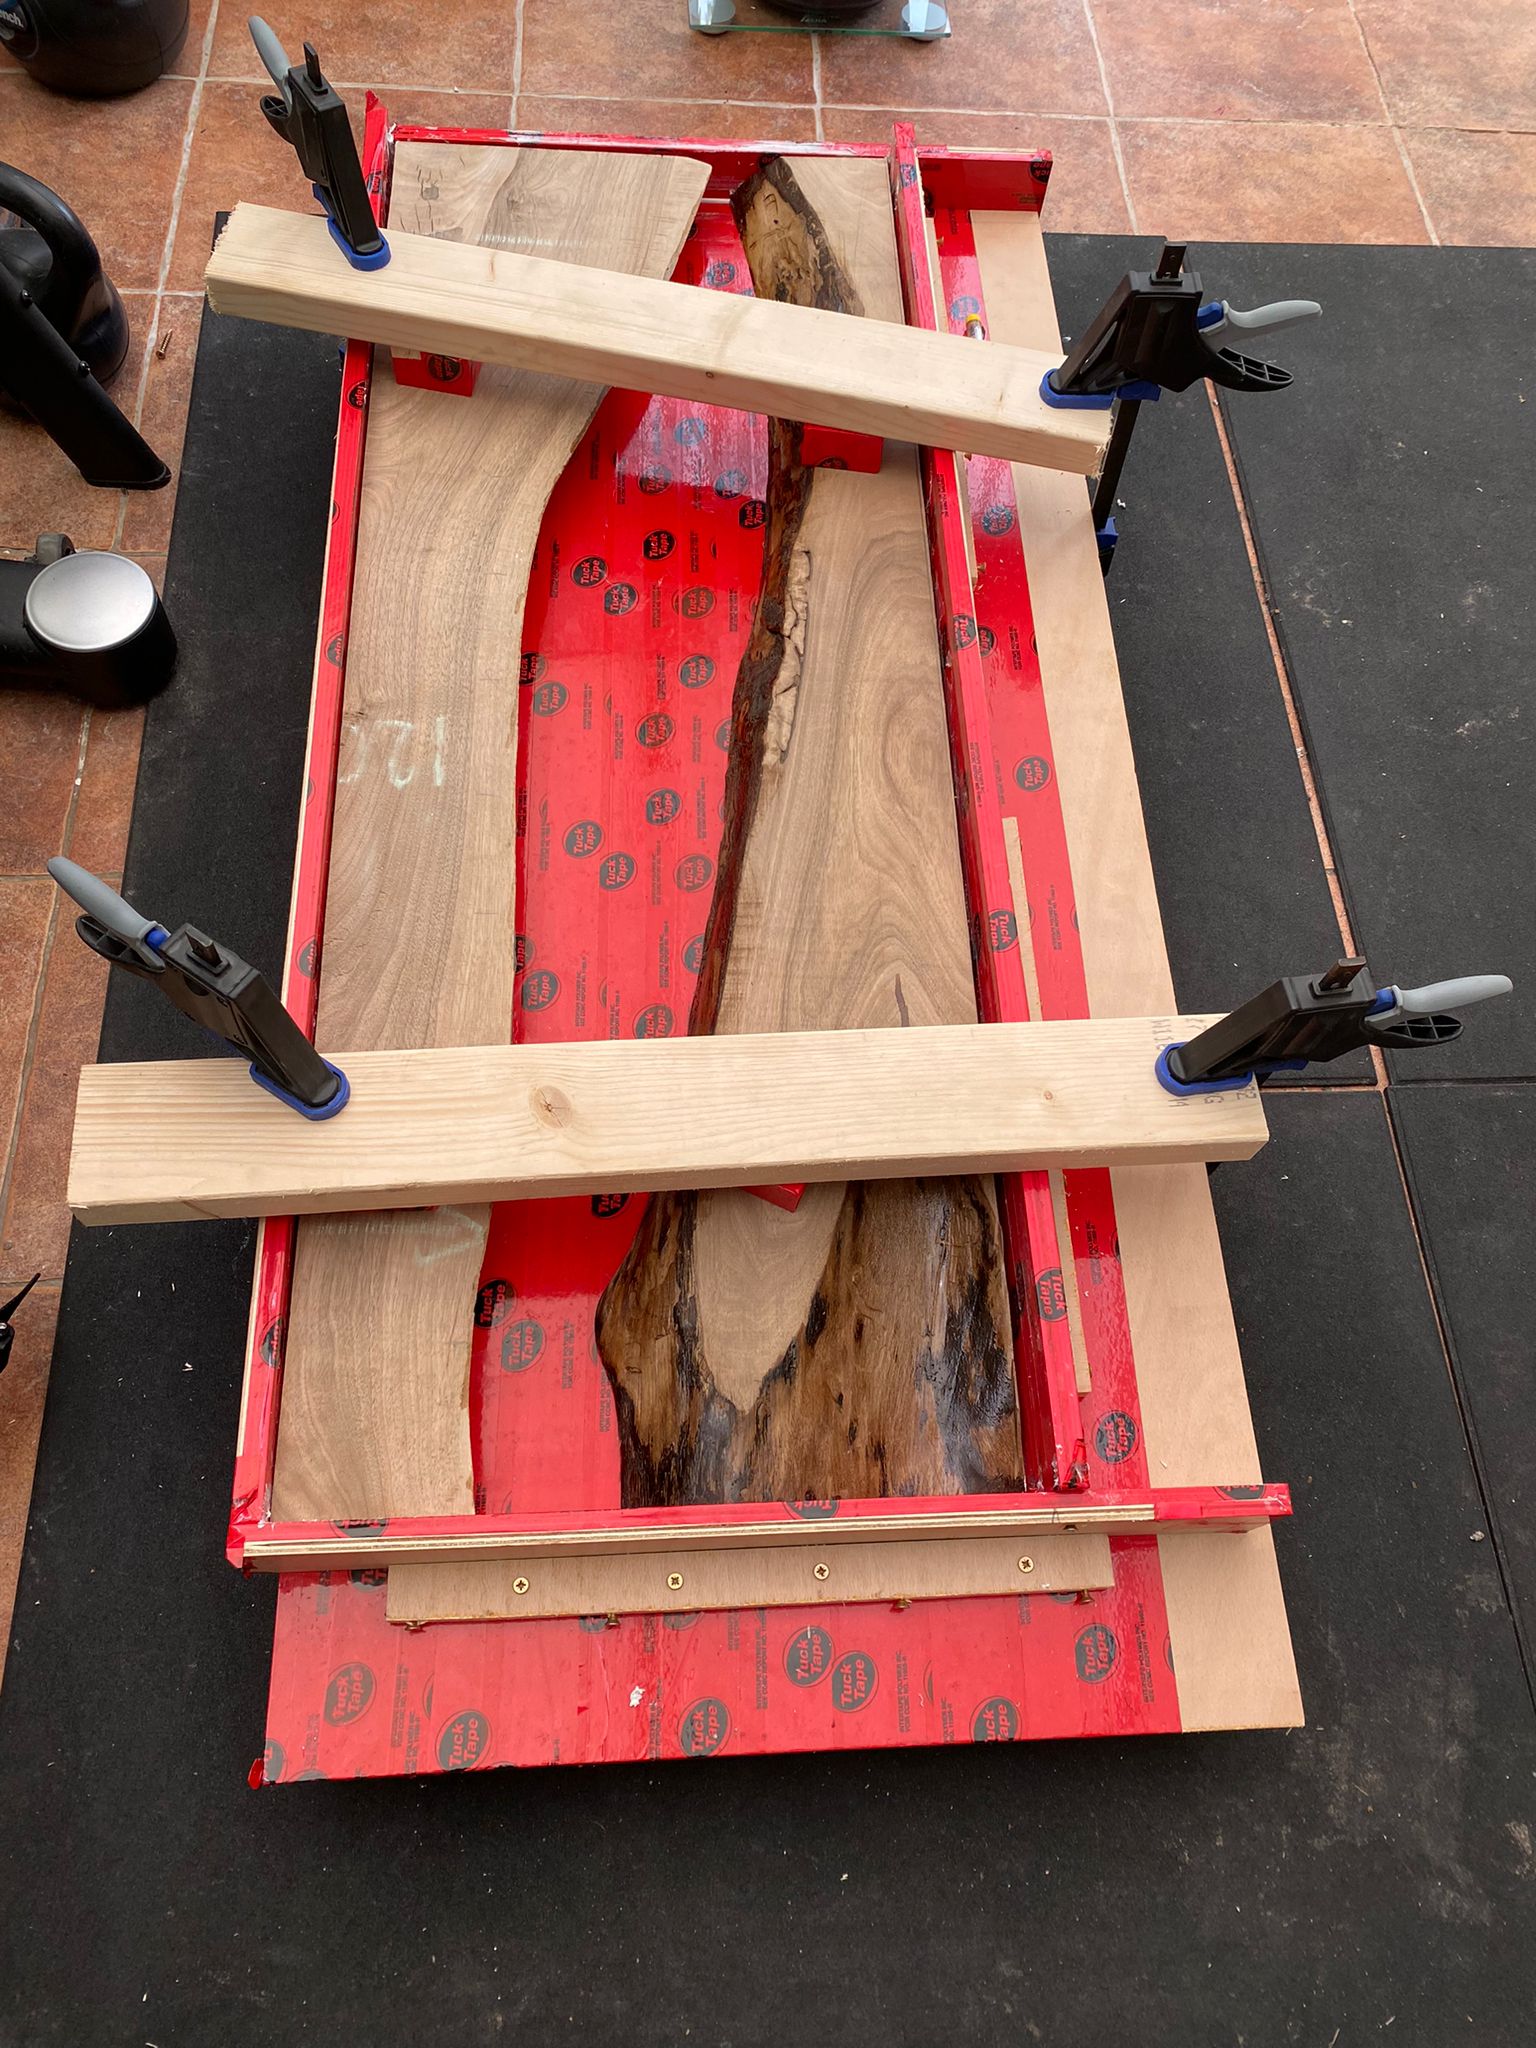
Now there are various ways to make the mold, but the easiest for me was to use 18mm thick plywood. I got a large sheet of it and cut the sides of the mold. Using plywood meant that I needed some sort of coating that would stop the epoxy from sticking to it and the best thing I could see on all the tutorials was Tuck Tape. I covered the side parts first and I used a filling knife to get the tape down flat with no ridges.
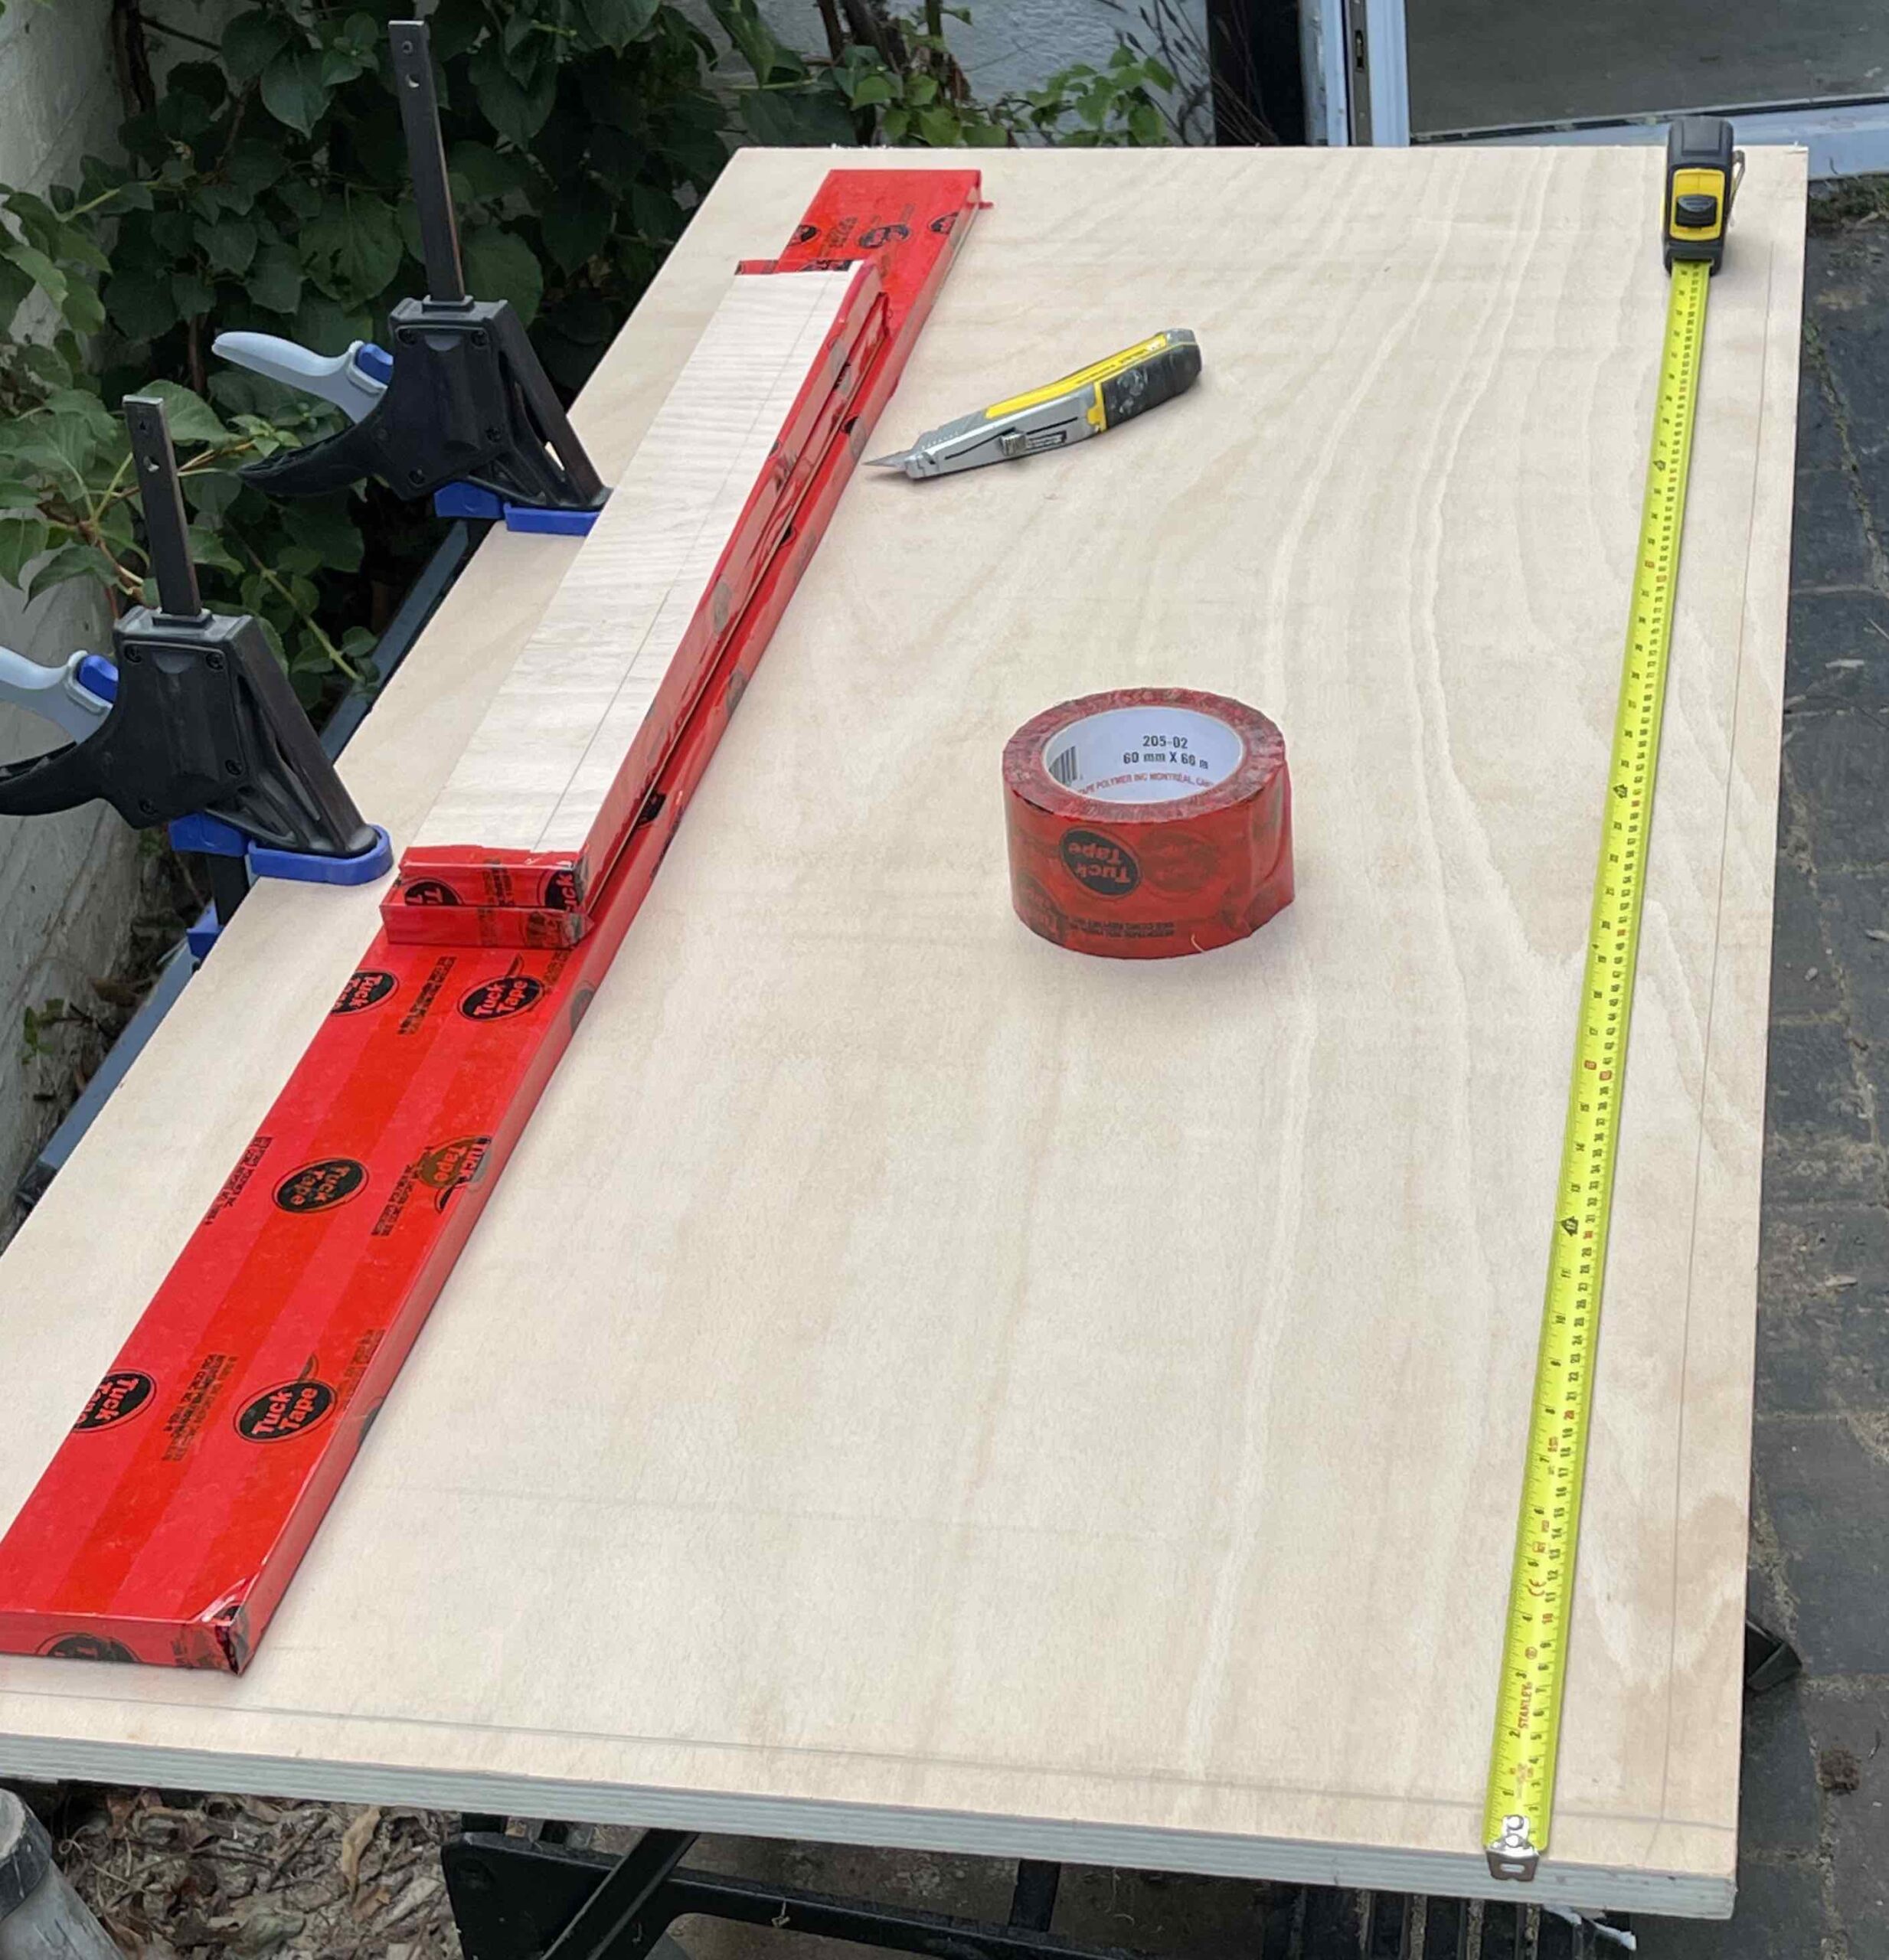
So having taped up the main mould base I then mounted one long and one short side making sure they were square. I drilled pilot holes along the edge of the side pieces, put it up against the main base and secured the first screw with short 5mm screw. I lined up the remaining pilot holes put some more pilot holes into the main base and secured them. At this stage I checked that those two sides were square before putting a screw to hold the two side pieces together.
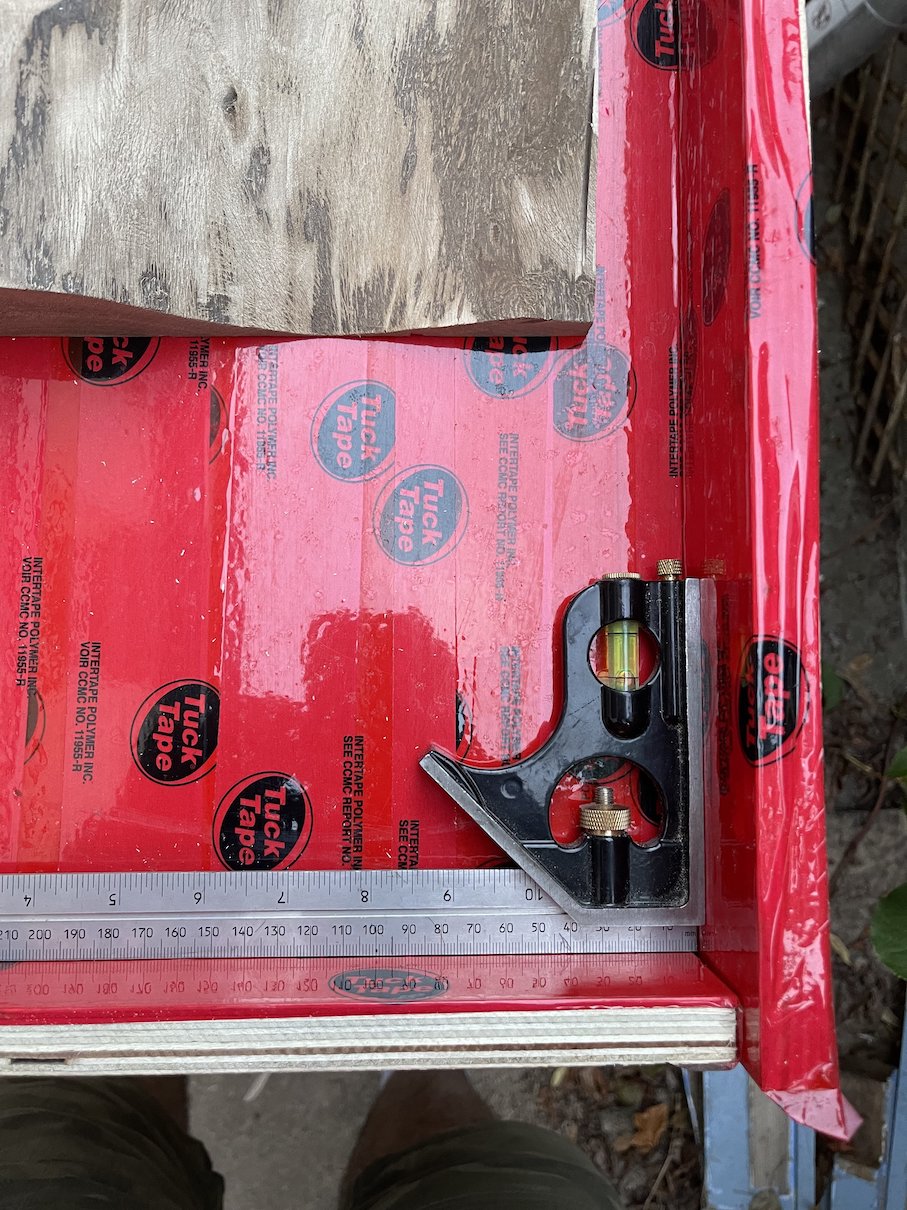
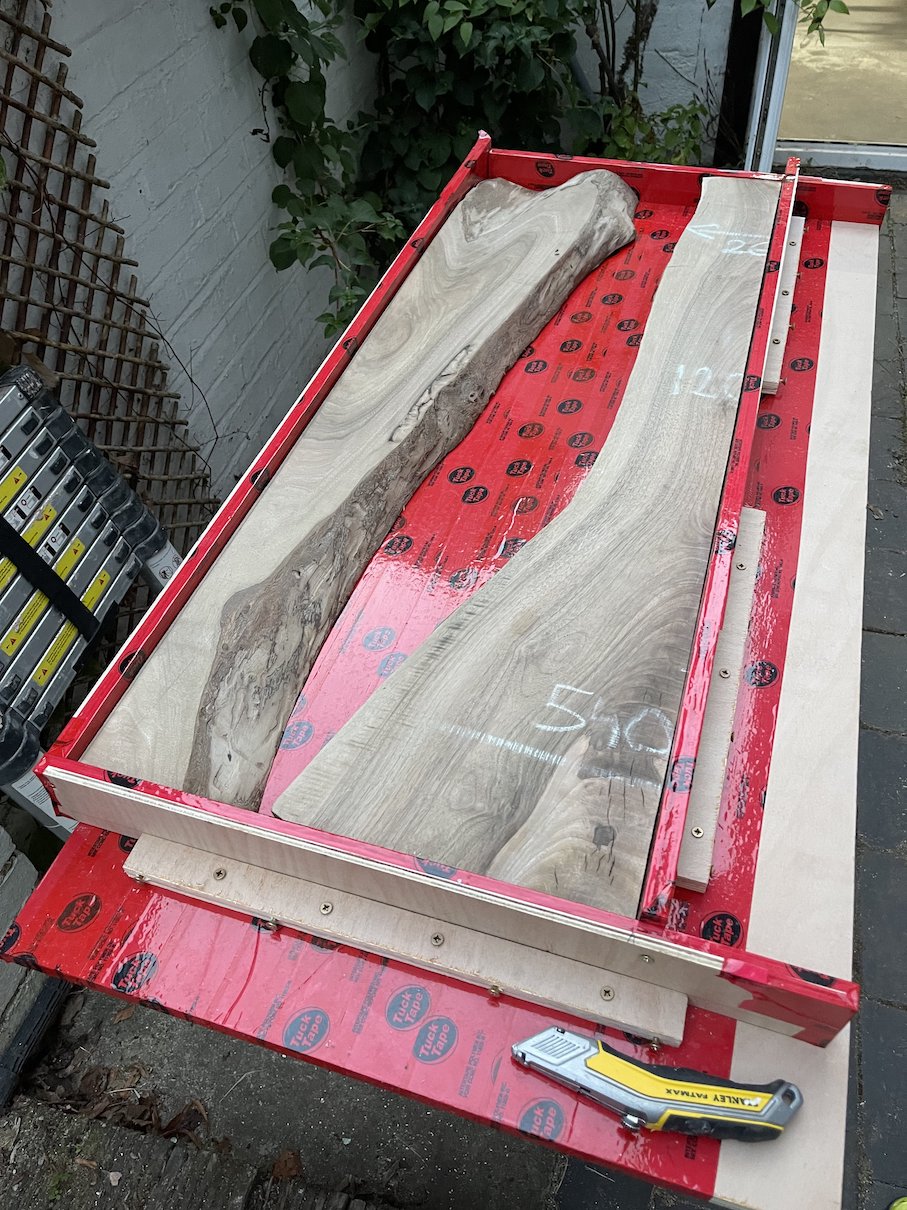
I then put the slabs in place before putting the 3rd side on, once again checking it was square.
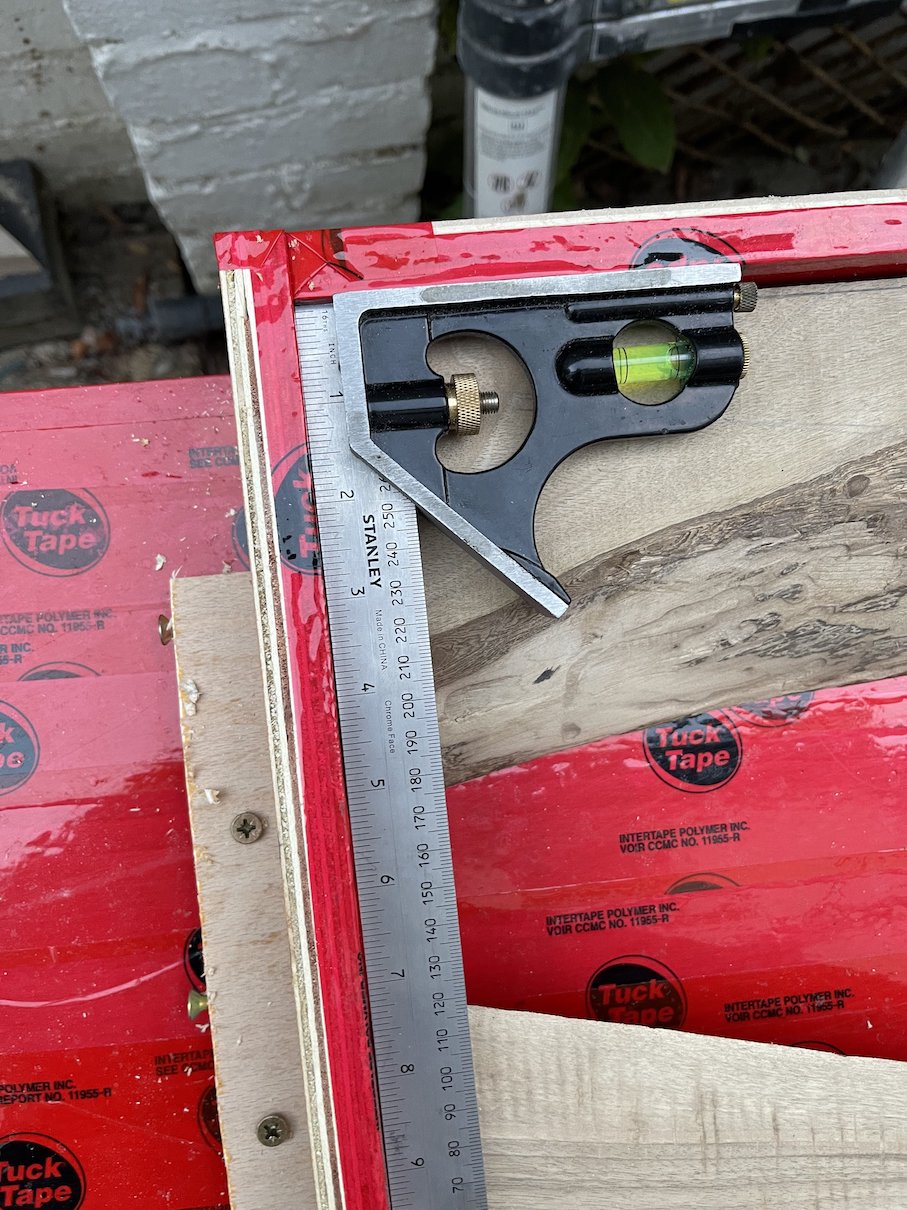
Now the 3rd and 4th side were no secured to the edge of the base but on the base itself. I attached a small bit of plywood to the side and then secured that to the base. I was thinking that if I wanted to do a bigger table in future then I can just remove the 3rd/4th side, tape the holes and reattach.
Once the mold was built I needed to seal the gaps which I did with some silicon sealant. I concluded that this is not a skill i’m good at yet and is why i’m not allowed to seal the bathroom by myself yet…..I’ve subsequently taking all the excess sealant off but I’ve read that its not a disaster because i’ll be sanding it all down anyway afterwards.
Step 4 – The Calculations
This was the most tedious bit where I realised how expensive resin can be and as such how important the calculations are! The irregularity of the river pattern means I had to get creative so I marked 100mm intervals along the length, the depth was set at 50mm and I measured the distance between wood at the ‘bottom of the river’ and at the ‘surface of the river’. It gave me a cross-sectional shape that was trapezoid in shape so I just took the bigger of two measurements.
Multiplying the Widths x 50mm(depth) x 100mm(length) gave me 12 volumes to add up plus the two irregular voids in the corner. The total was about 12L (with a bit extra). Now interesting for every litre of volume you need 1.16kg (roughly of epoxy). So initially I was delighted thinking that I only needed 12kg of the stuff but in fact I needed 13.92kg minimum……which meant I bought 15kg just to be safe!
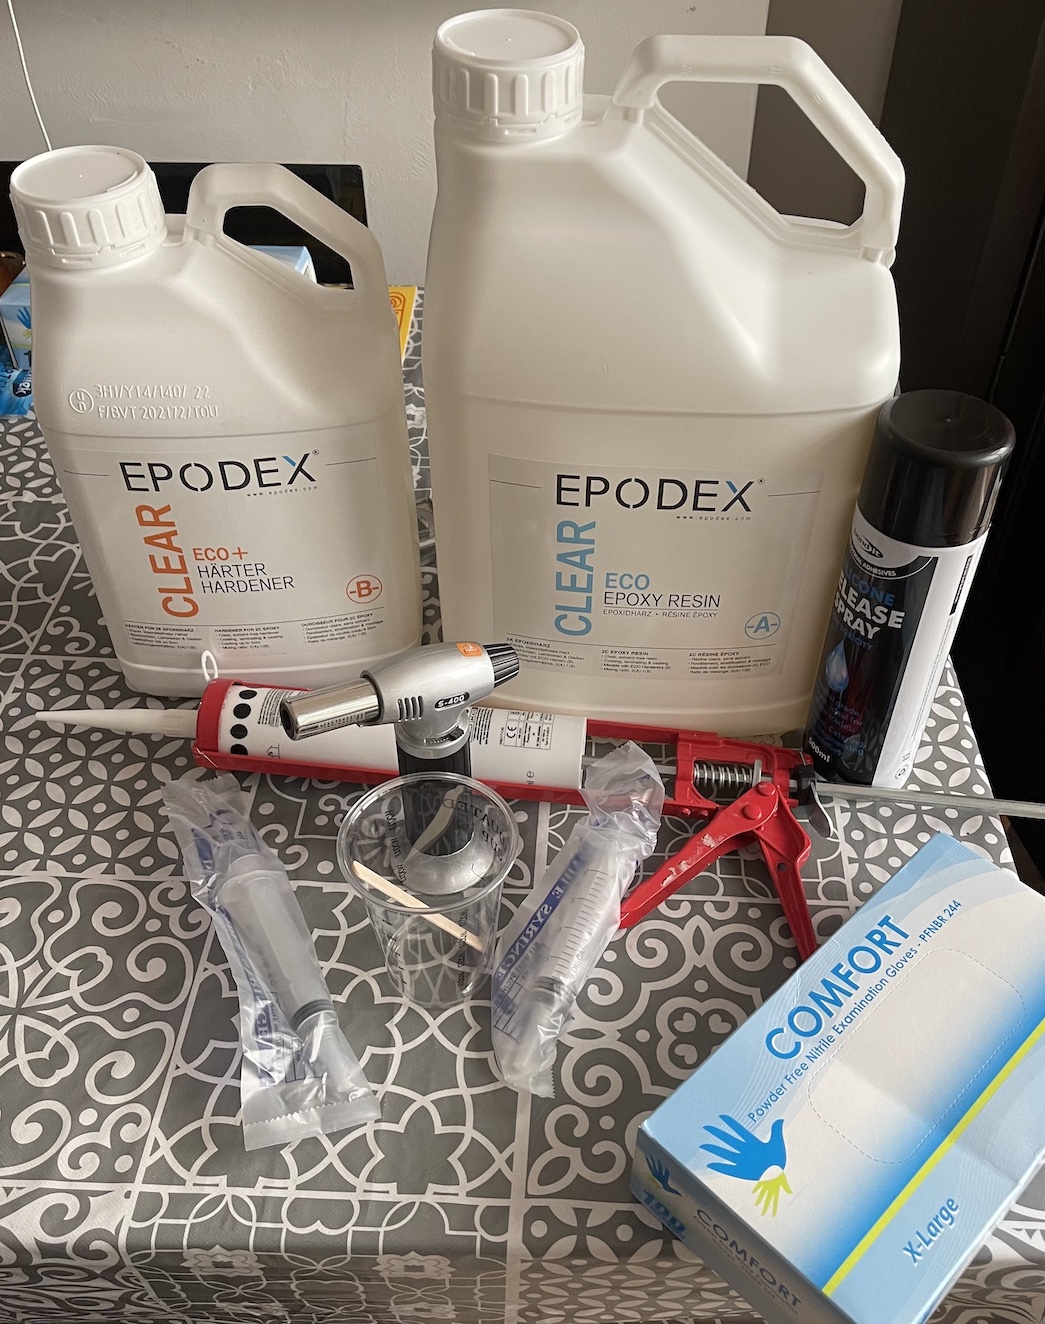
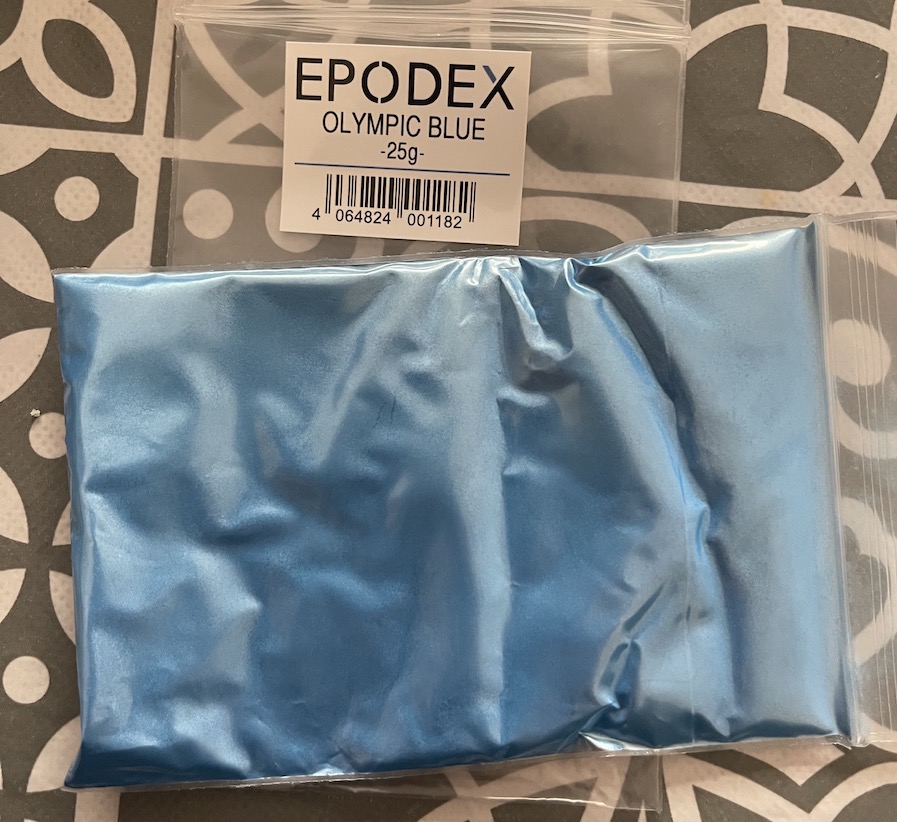
I purchased the Epoxy from EpoDex with the Olympic Blue Dye Powder.
Step 5 – Preparing for the Pour
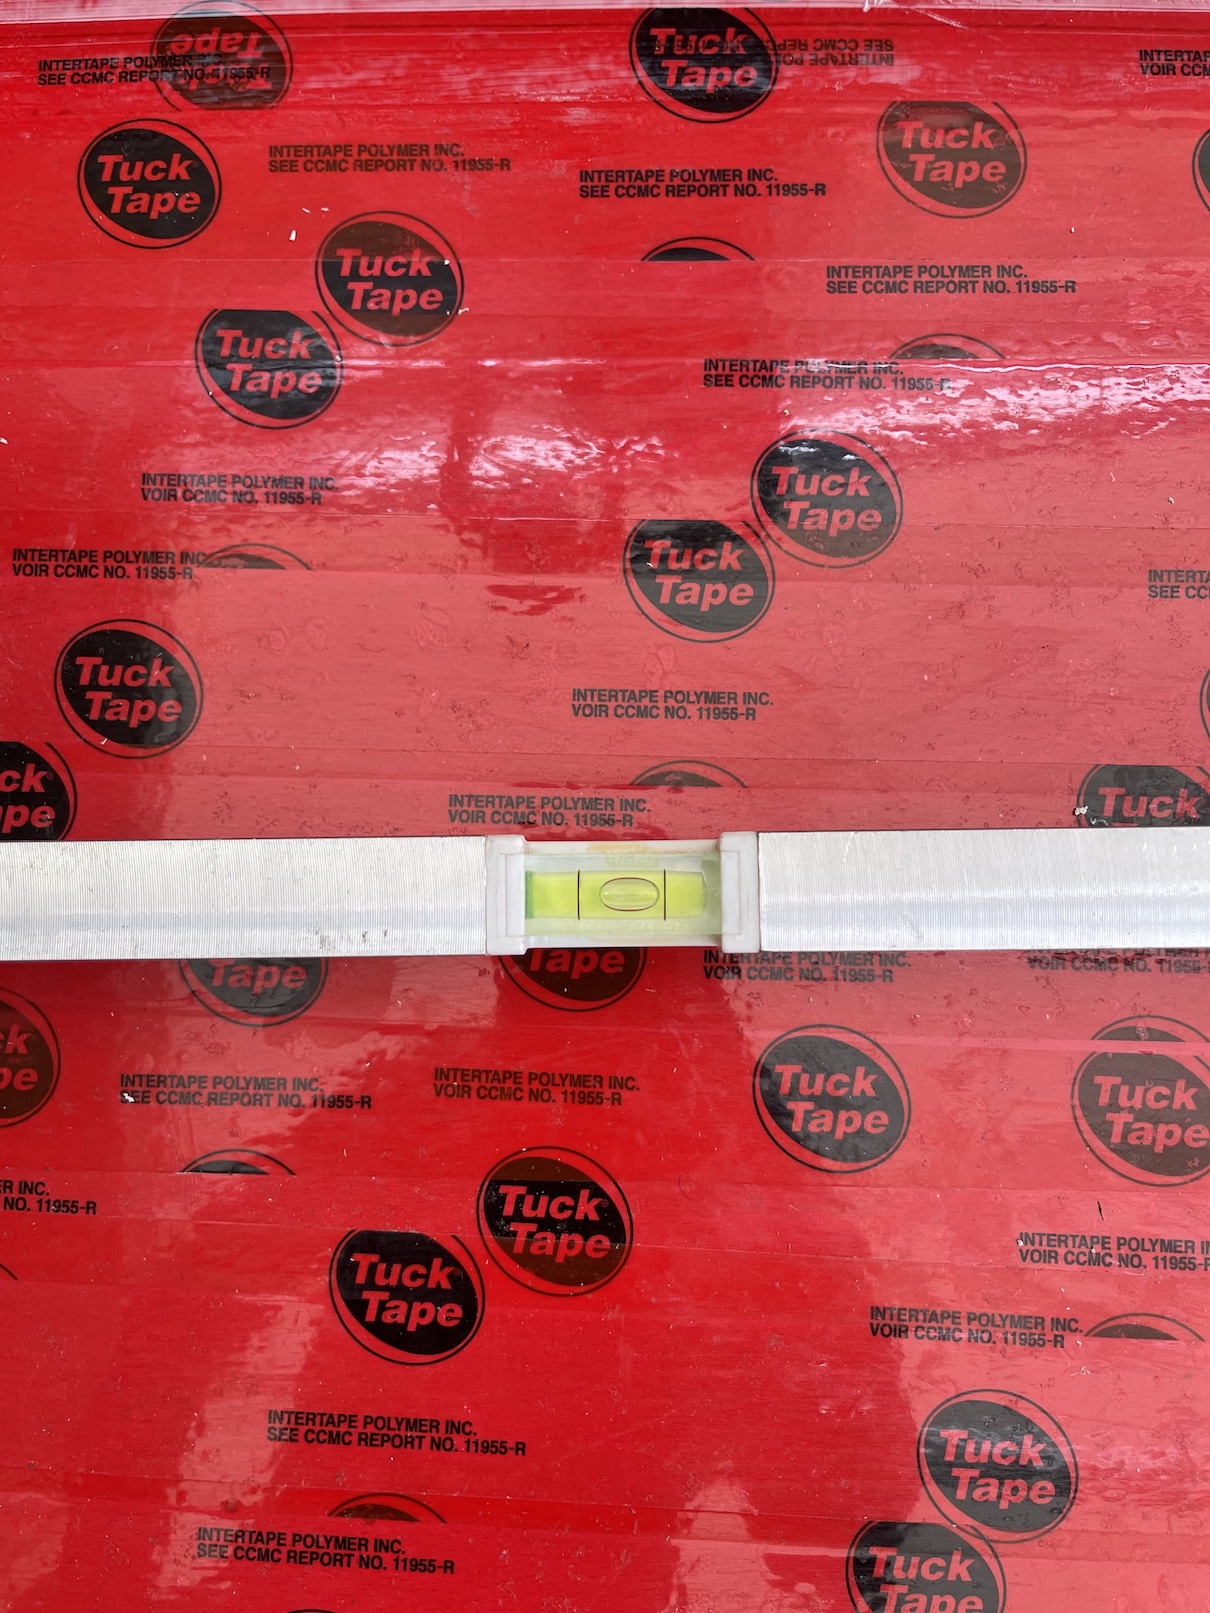
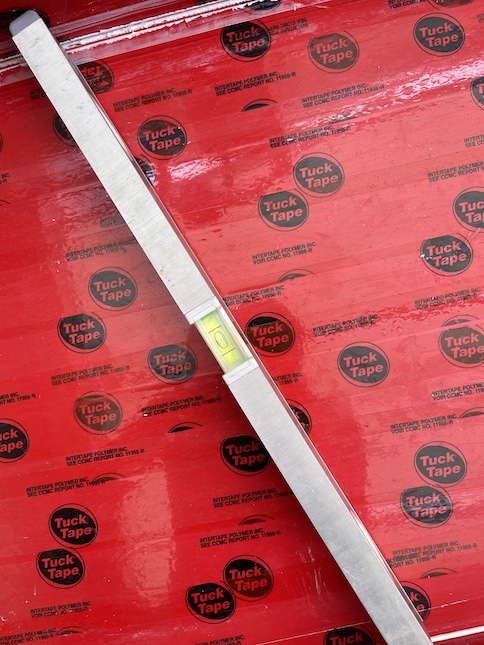
To get ready for the pour I set up the mold on 2x4s on the floor and checked it was level. I set it up in the house but in a back room with good ventilation.
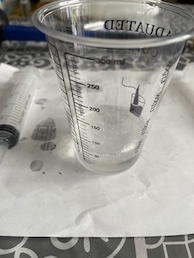
I mixed up a small quantity of the resin to prime the edges of the wood where the resin needed to stick and to also fill up and porous areas. The Epodex was a mixture of 2:1 (Resin:Hardener) by weight. This was a really important point to note that some resins have ratios by volume and some by weight. I used the 20ml syringes to first take some resin into the cup and then determine the weight of the hardener.
The primed pieces of wood were then left to dry, and I made a final sweep of the mould before setting everything in ready for the pour. I cut some small blocks of 2×4 and covered them in TuckTape before clamped them down to ensure that the wood was firmly snug into the mold. At the top left of the mold there is a small gap but this leads to a small void in the wood that was originally part of the small void in the bottom right. I want the resin to leak into it easily.
Step 6 – The Actual Pour
This was a family effort, doors open and the wife had the camera! I weighed out the main river part first and mixed up 3kg Hardener with 6kg of Resin and mixed it up with the blue powder. The colour was amazing, but as with all mixing there were plenty of air bubbles.
Once mixed the pour began and there was a collective “ooh” from all of us. It looked awesome!
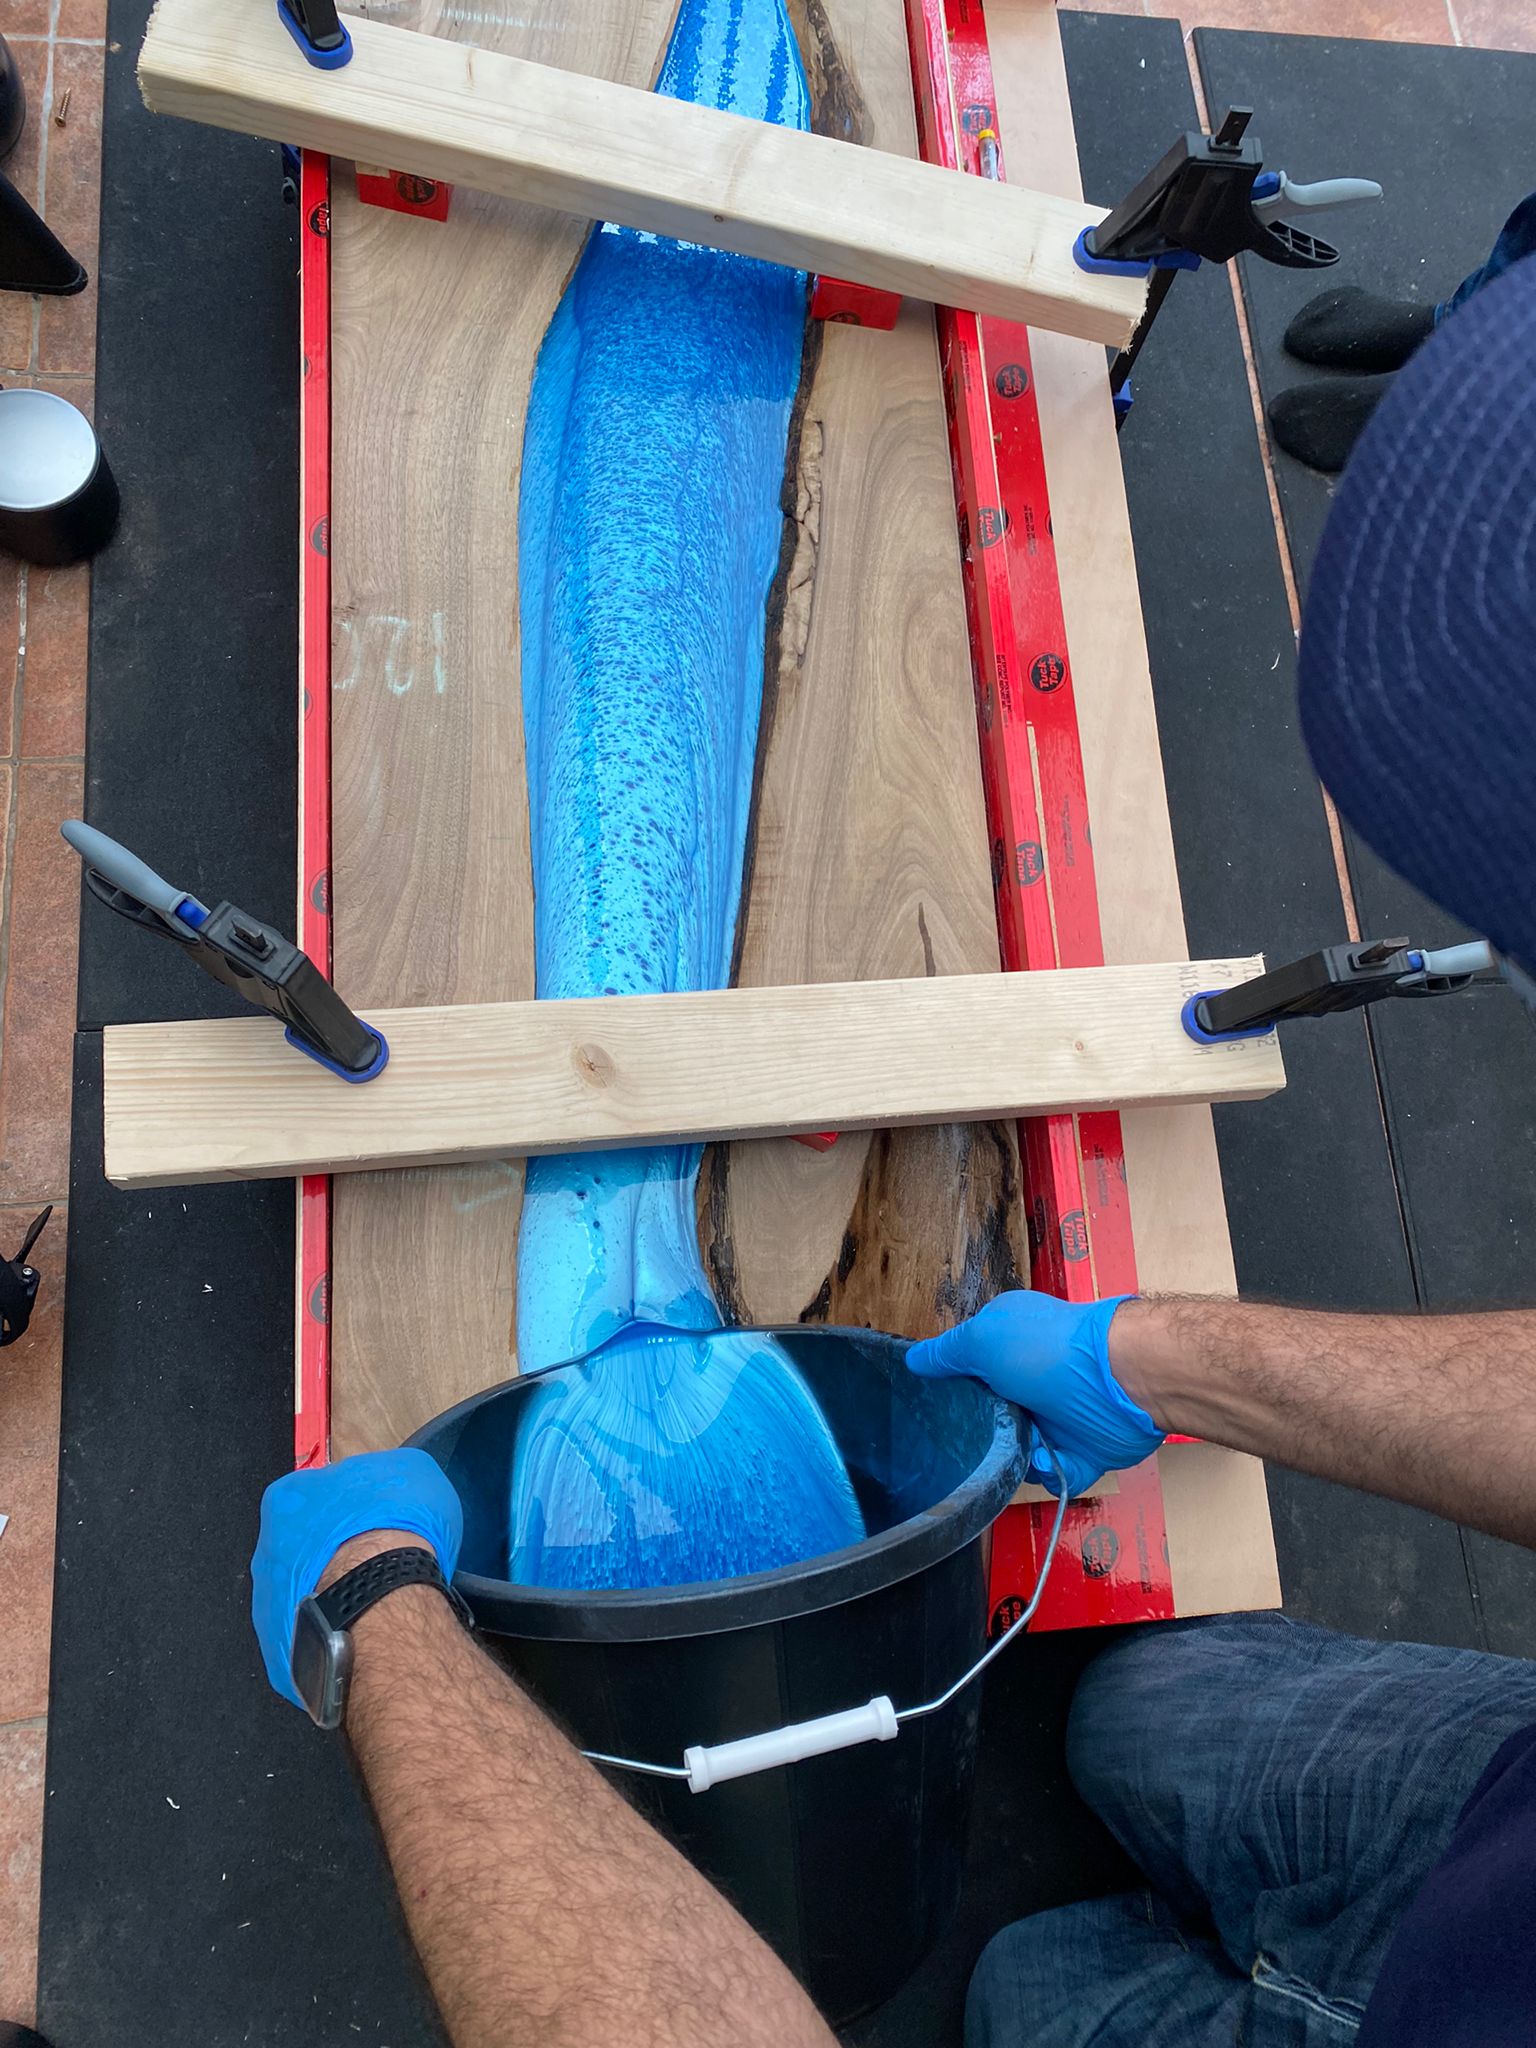
I then mixed up the rest of the resin to pour into the area at the bottom right of the screen and top up the main river area as it had gone down a bit with the top left filling up.
Now things got a bit awkward here because it seems the silicon sealant wasn’t doing its job and there were a few areas of slow leak which were dealt with a some supergrip adhesive on the outside of the mould and some clamps pulling the frame edges together from underneath.
Some solid reflections and learning for next time!
I spent a few hours sat watching the whole thing and buzzing the air bubbles with a small blow torch but overnight lots more bubbles appeared. Annoying but i’m going to be planing it all down anyway so not a complete disaster.
My daughter had the idea to make some swirls in the resin as it was setting. I was apprehensive but I trusted her judgement and let her crack on. The swirls look awesome!
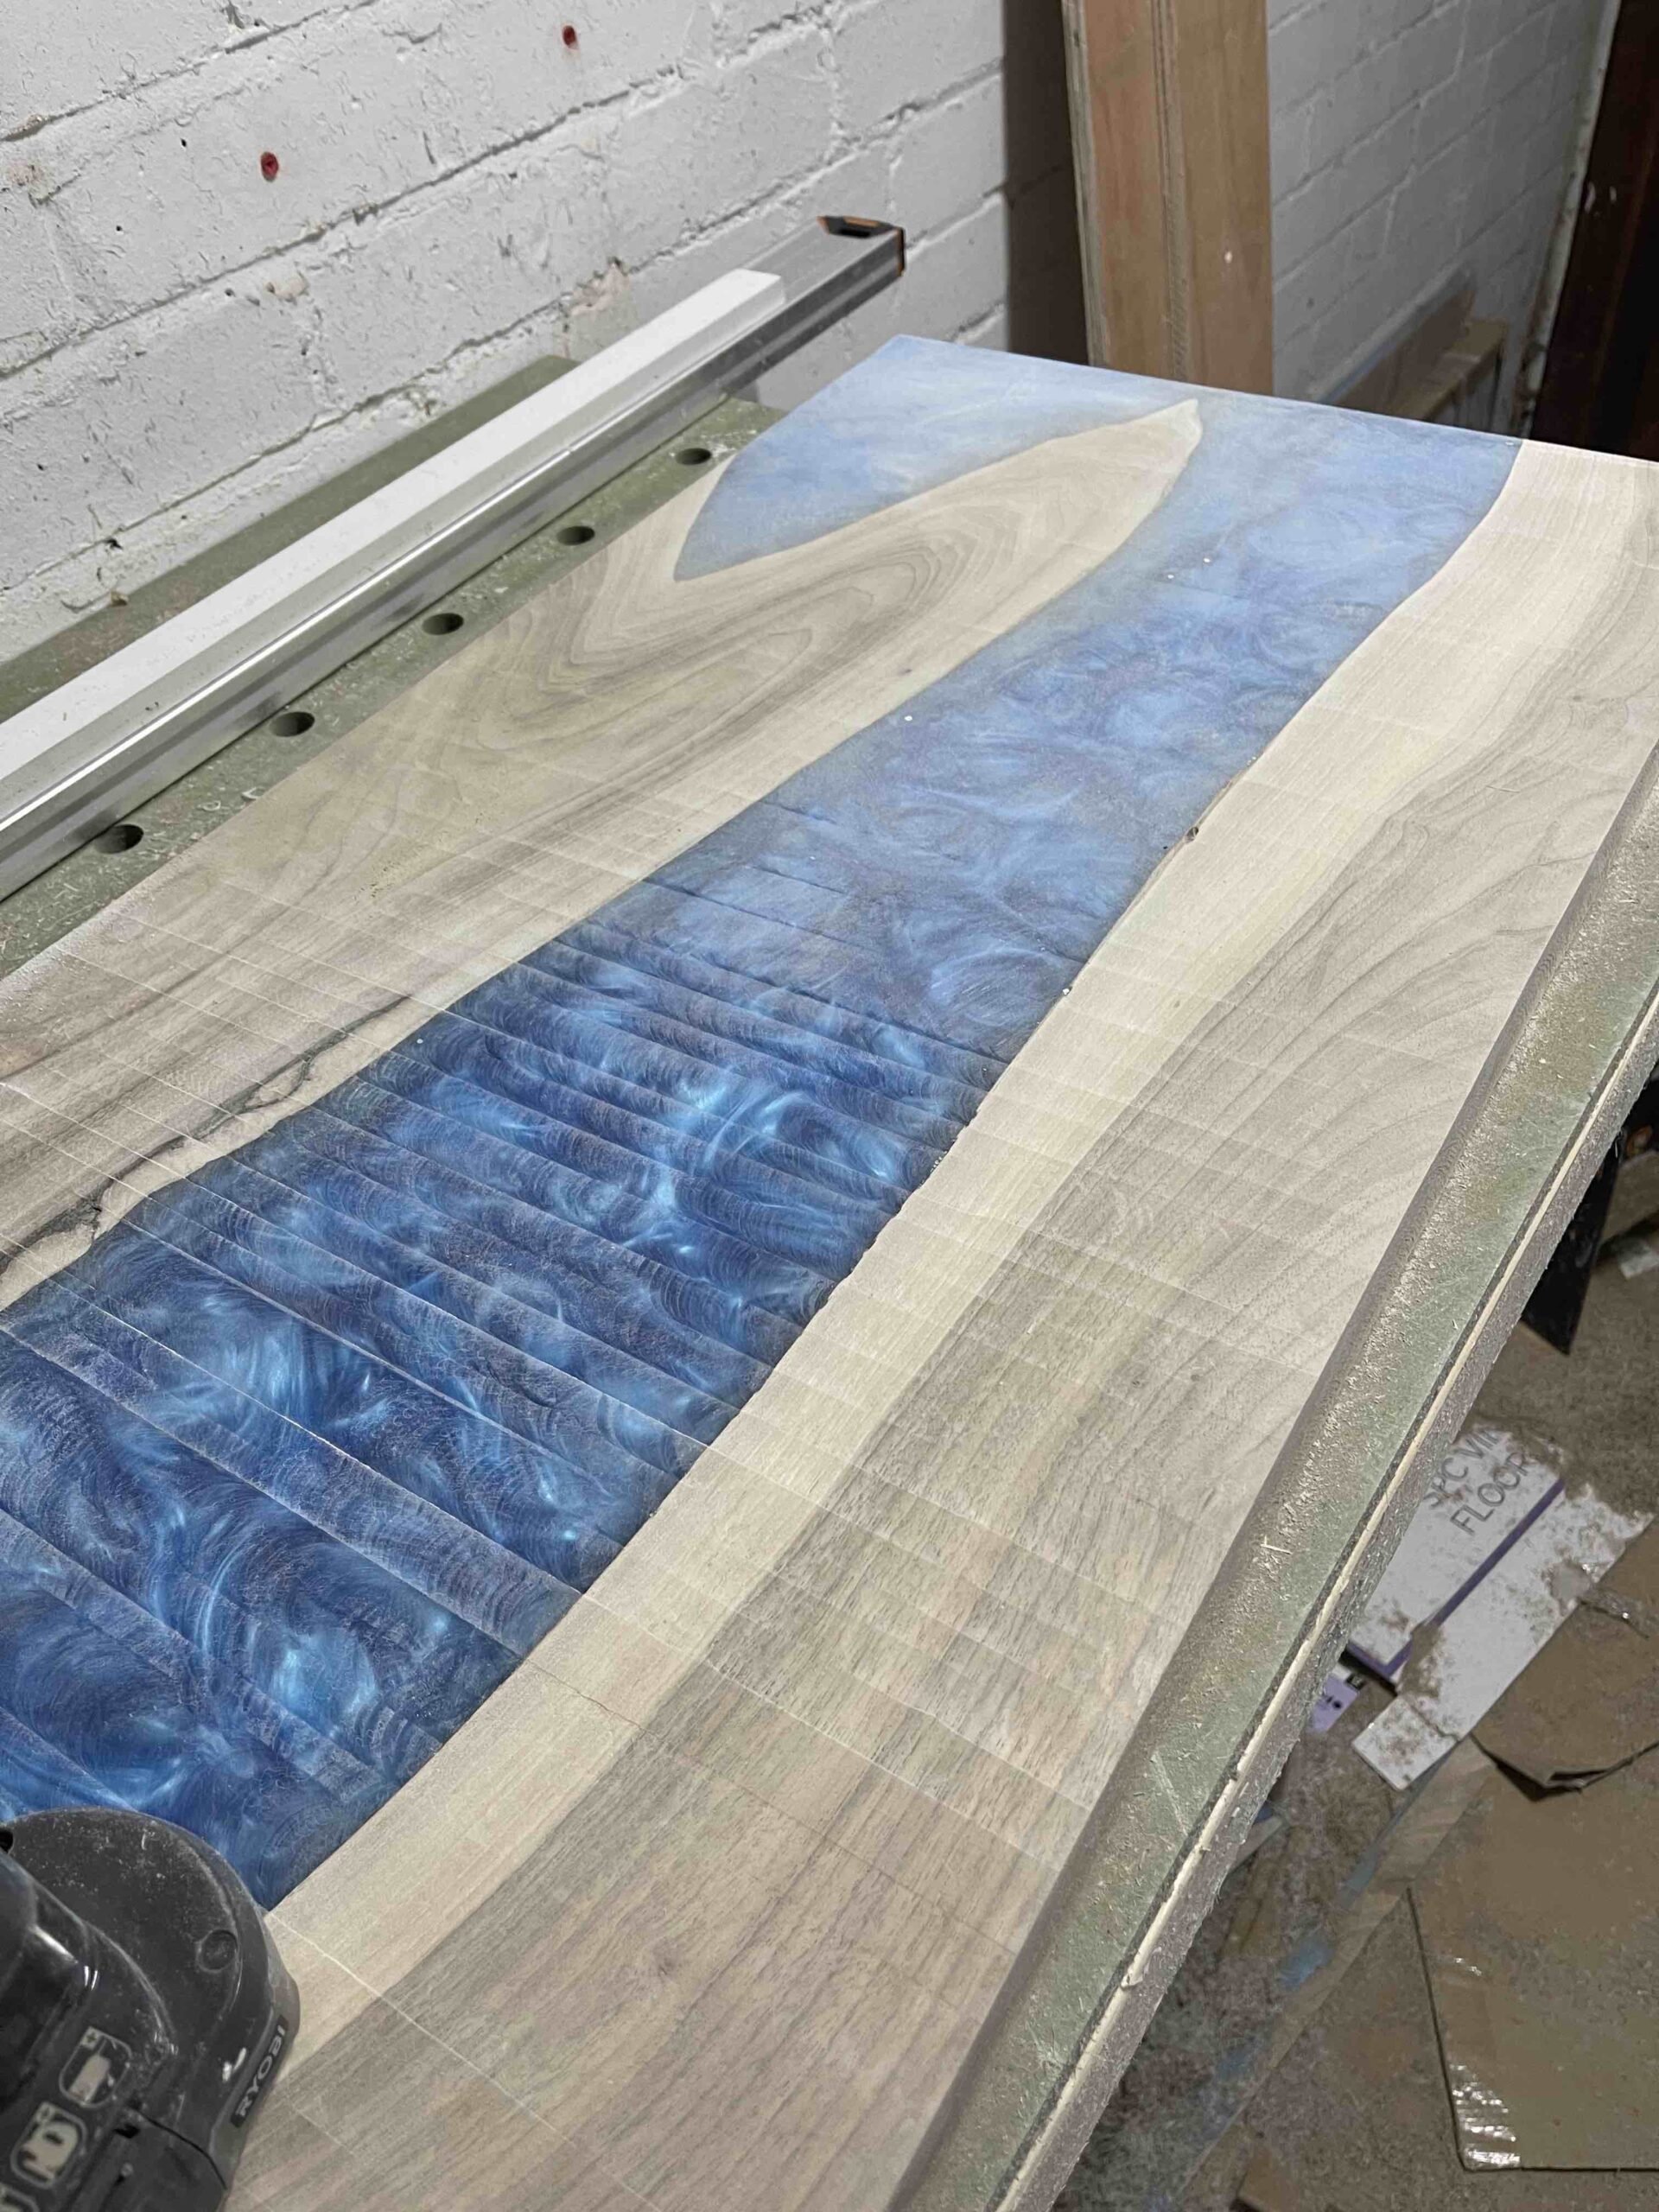
I waiting for 5 days, but most of it was solid within 2. There was leakage, but that mold release stuff was awesome so the slab came out nicely, but still plenty to do!

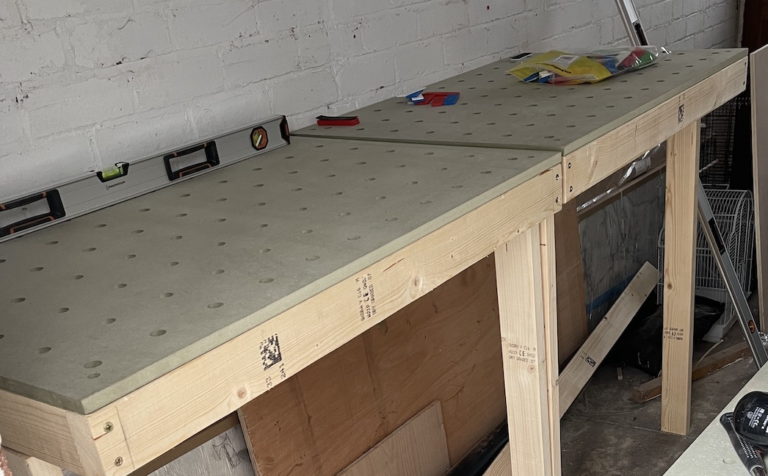
I had a choice to make here and I decided to get lazy and see if a local company could plane this done for me but it turns out I have to do it myself. Without a planer I had to go down the router with router sled path, but in order to get to that I needed a decent workspace which meant clearing out the garage and building a work bench (read here)
Step 6 – Finishing the tabletop
With the workbech done I then built the router sled (read here) and started flattening the table. The router sled worked really well but the videos weren’t joking about the mess. I had to stop and vacuum the dust and debris at least 5 times during the first run
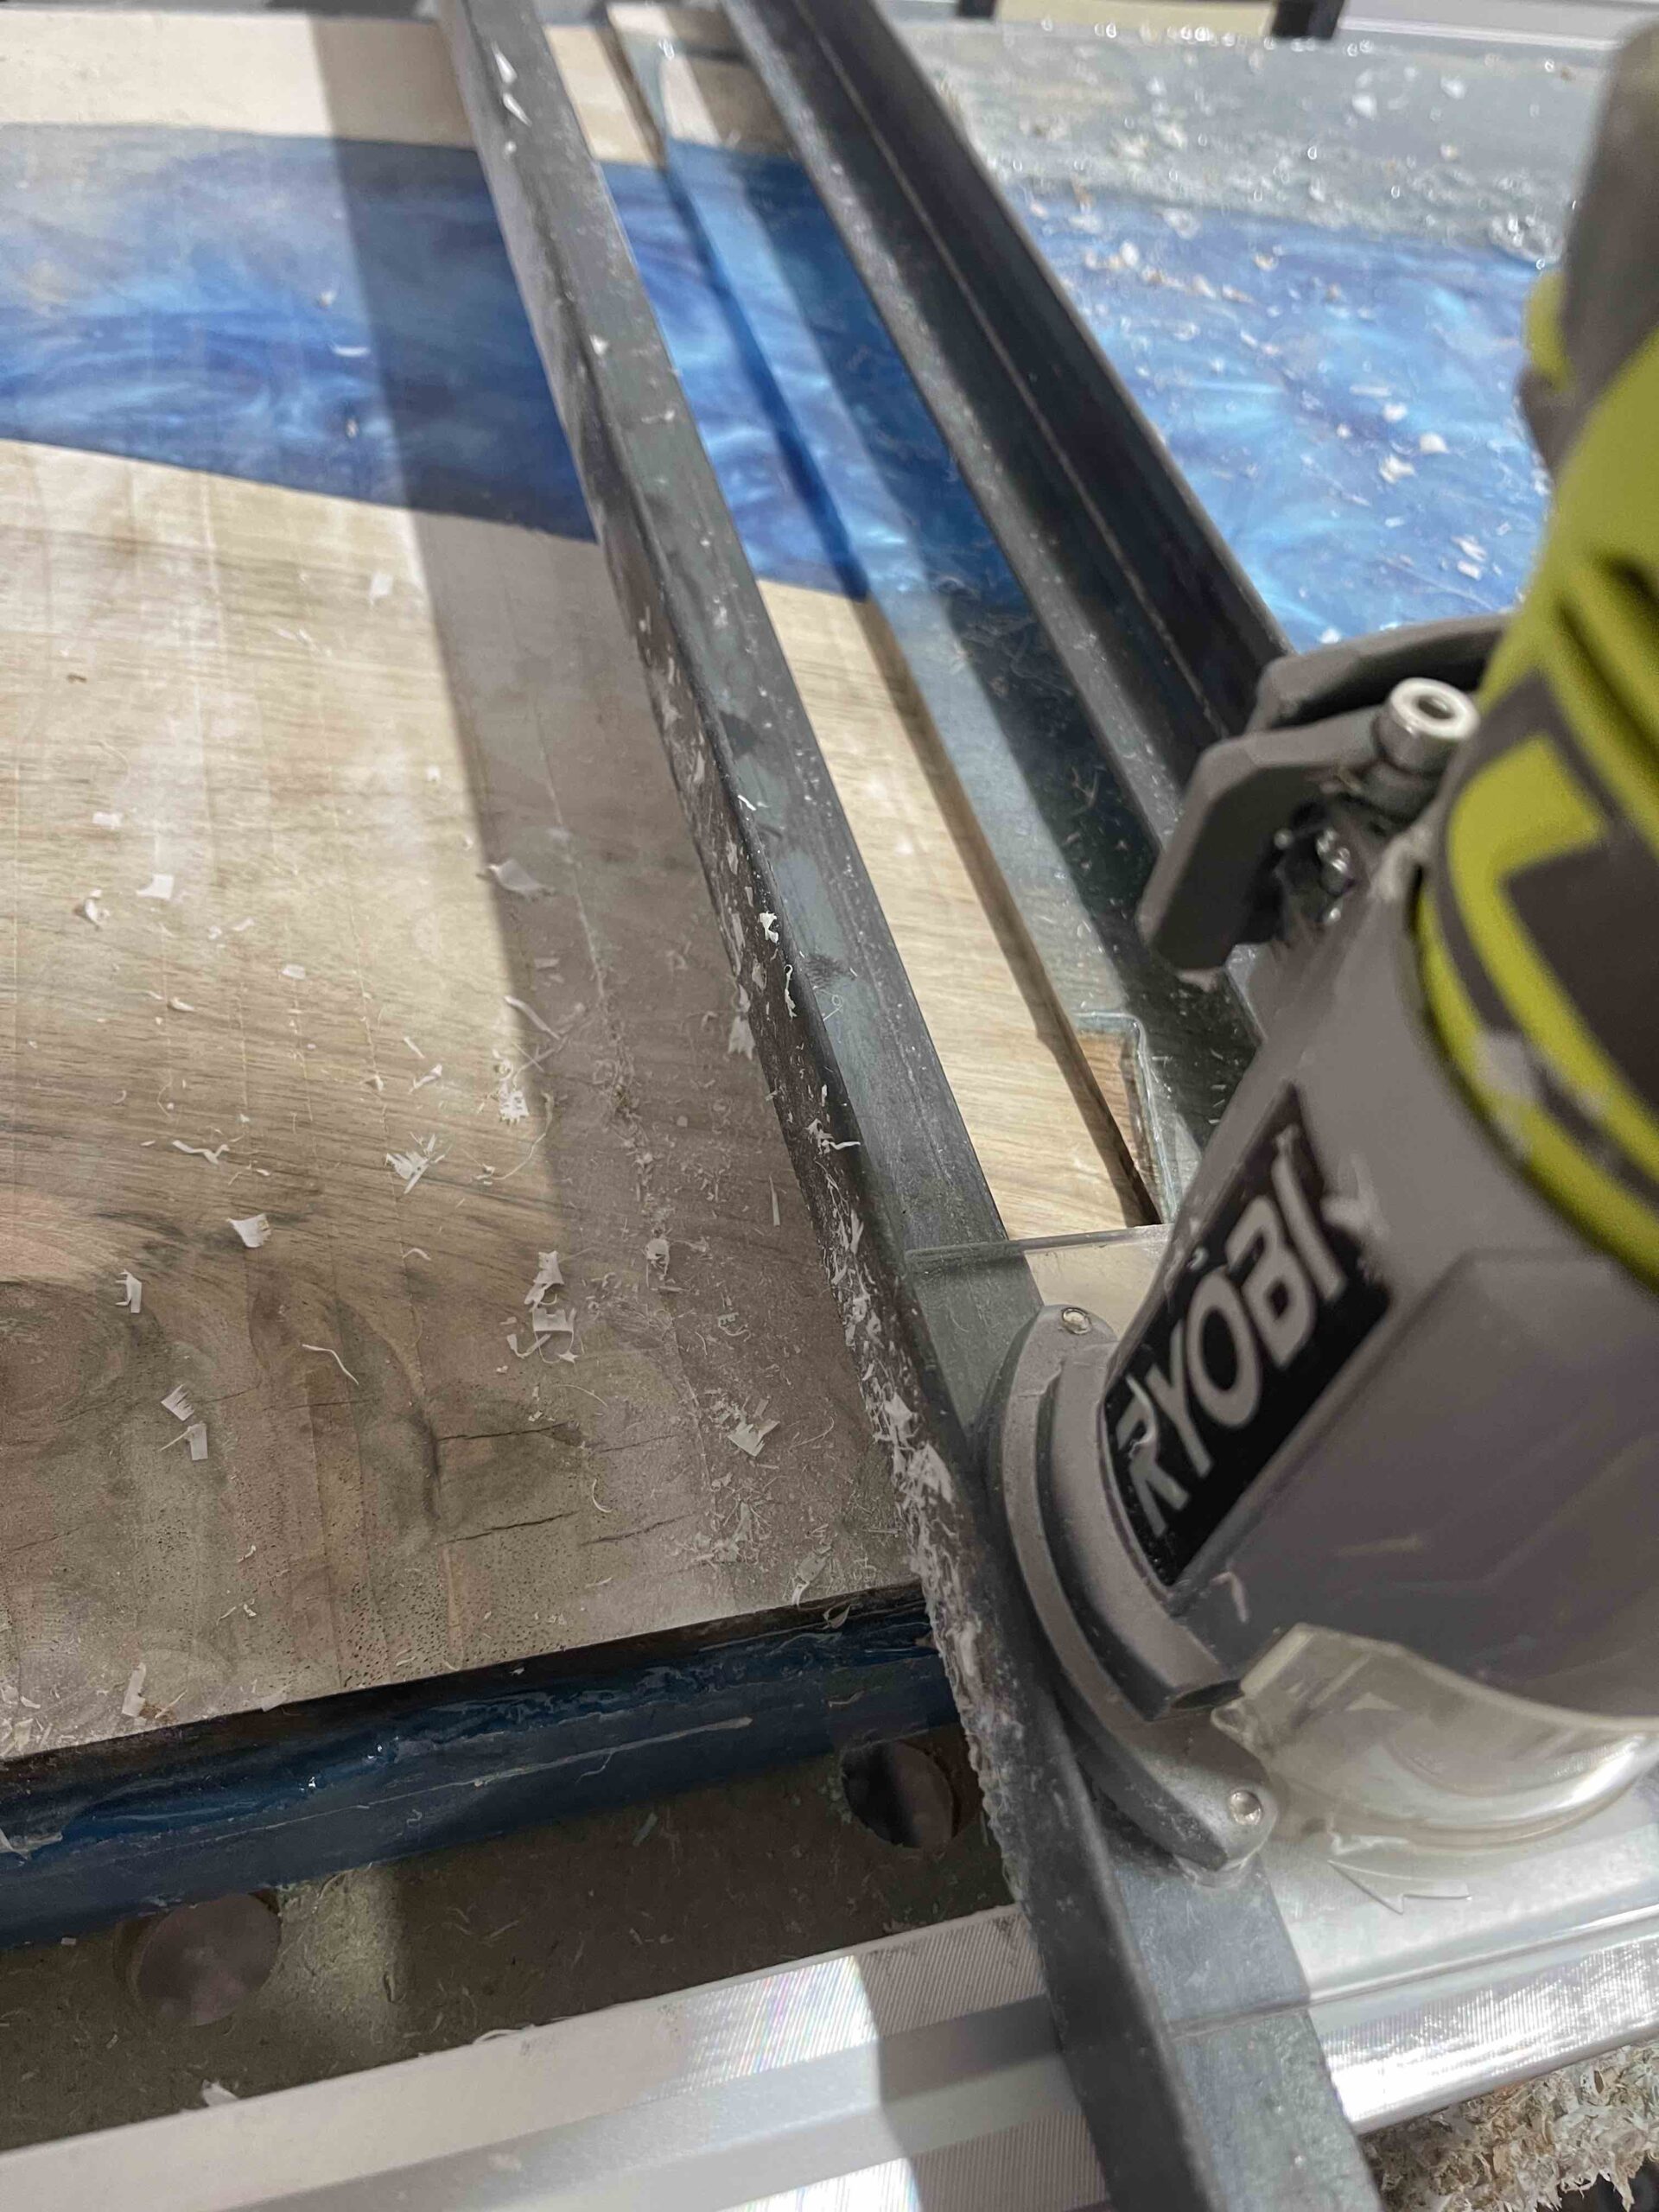

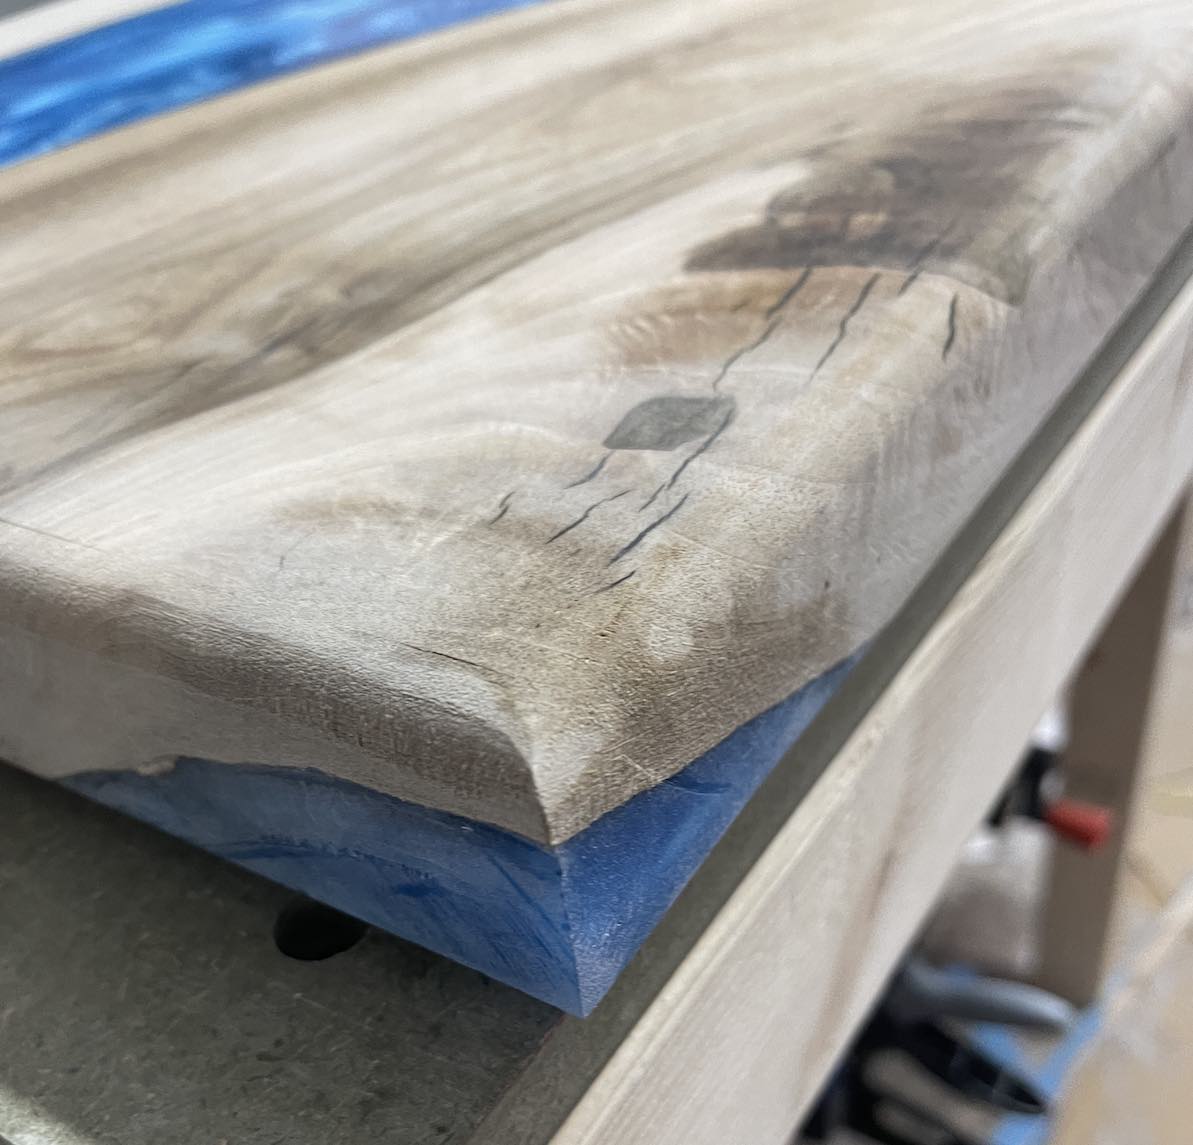
So a bit a disaster when the router bit got loose and gouged out a little bit of a groove on the underside of the table. Thankfully it wasn’t the side we were going to have on top but definitely going to make sure I check the tightness at each stop point!
Step 7 – Squaring Off
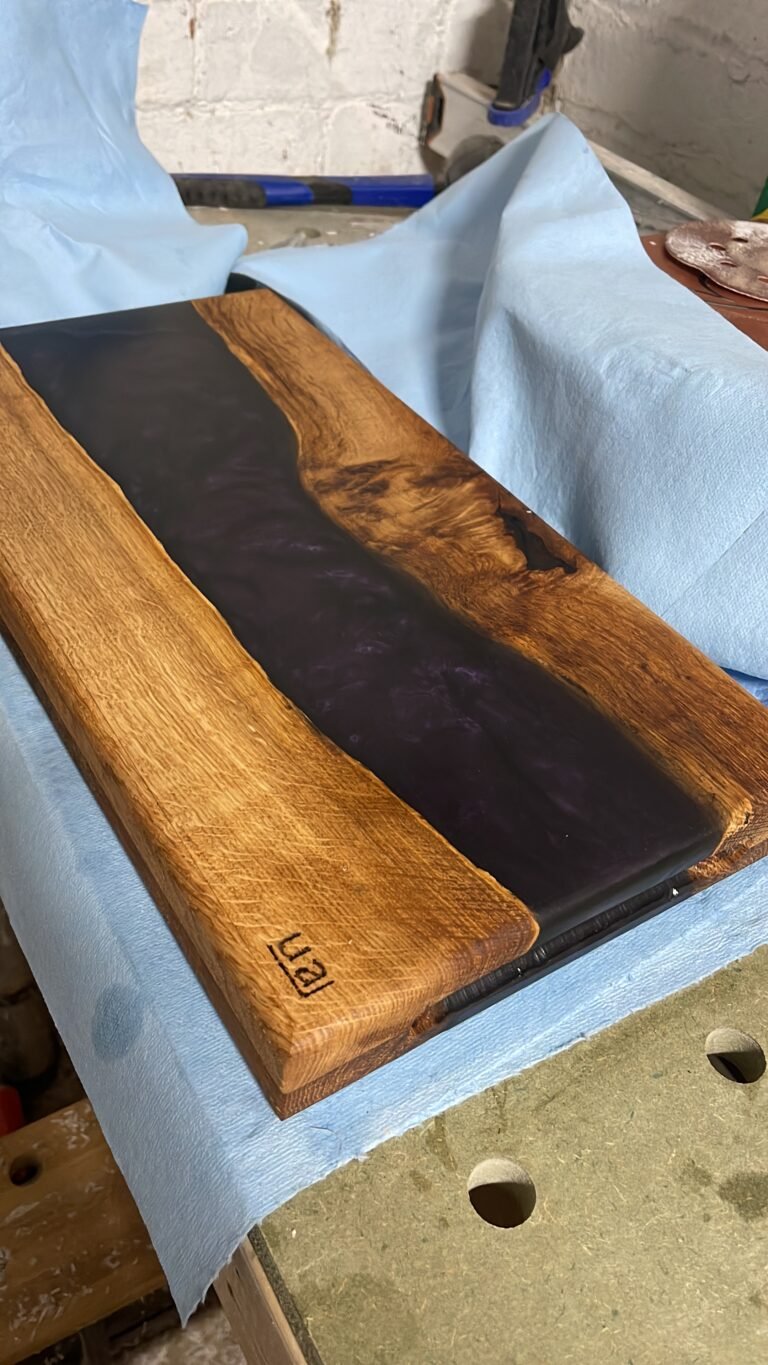
Although my mold was square the sides were not completely straight so I took the circular saw and tidied one side up and used that to reference the others. I’m 2mm but this is a unique hand crafted piece so I can live with it. The videos below just reveal the beautiful cross section of the ends!
Step 8 – Sanding
I started with a 40 grit disc to get the router lines out first

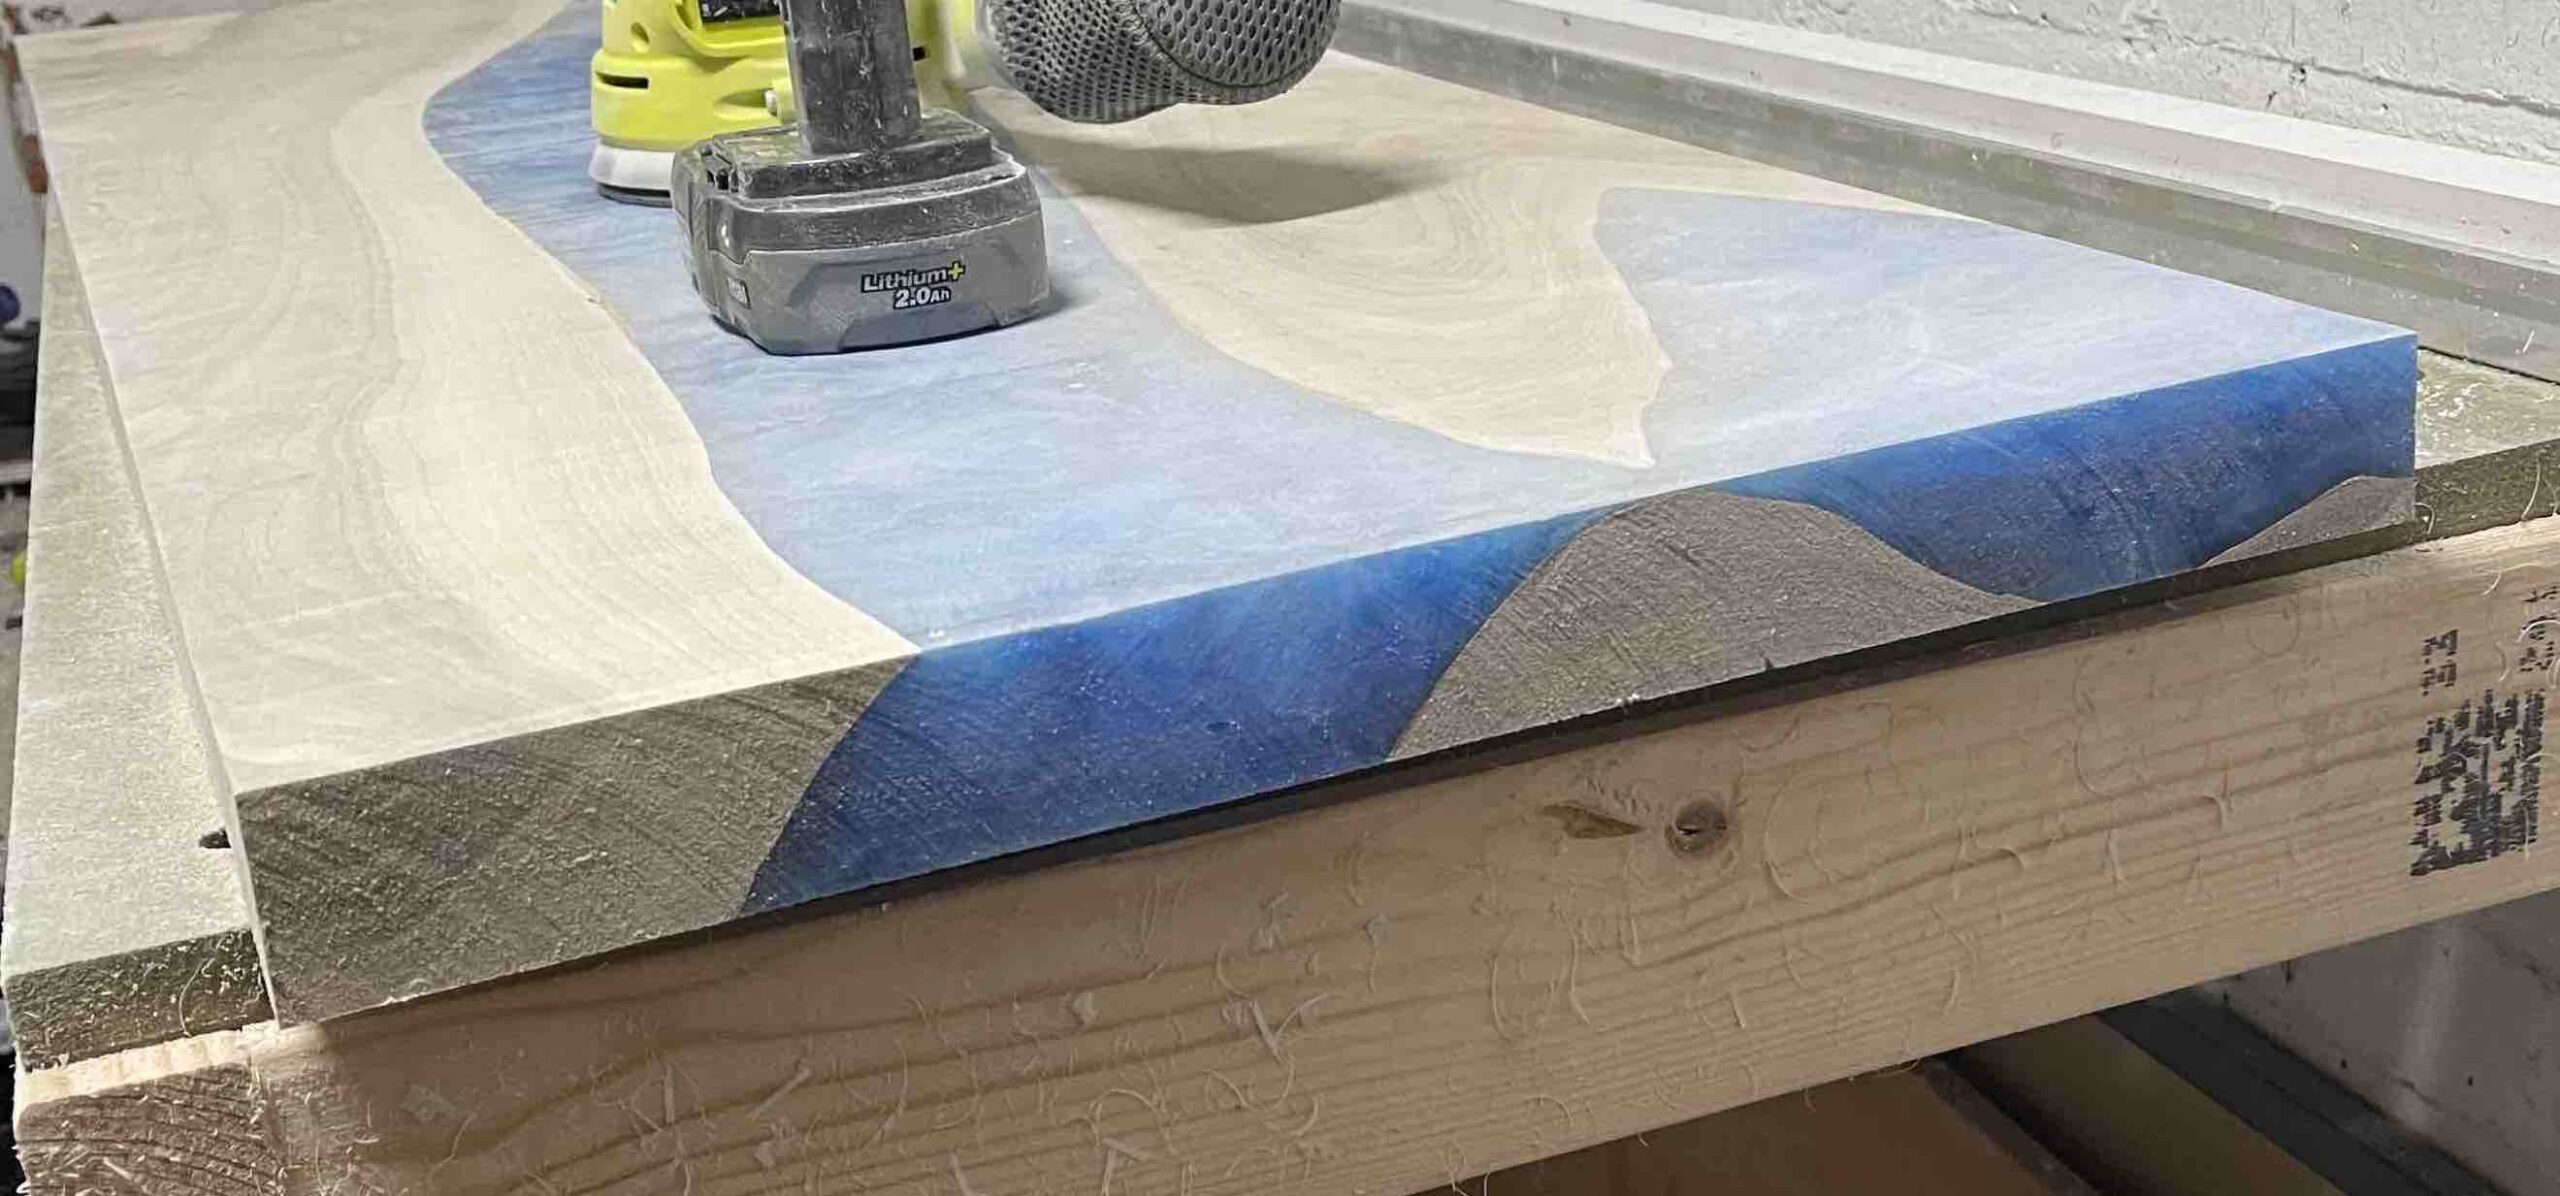
I got to 120 grit and noticed these little swirls that were not going. so I had to go back to 80 grit with suction and fresh pads to remove those. After redoing 120 grit I wiped/vacuumed all the dust and then blew out some of the uncovered bubbles on the surface. I misted it with water and then hit it with a 180 grit
I filled the small defects with clear super glue and let it dry before routing the edges with a curved router.
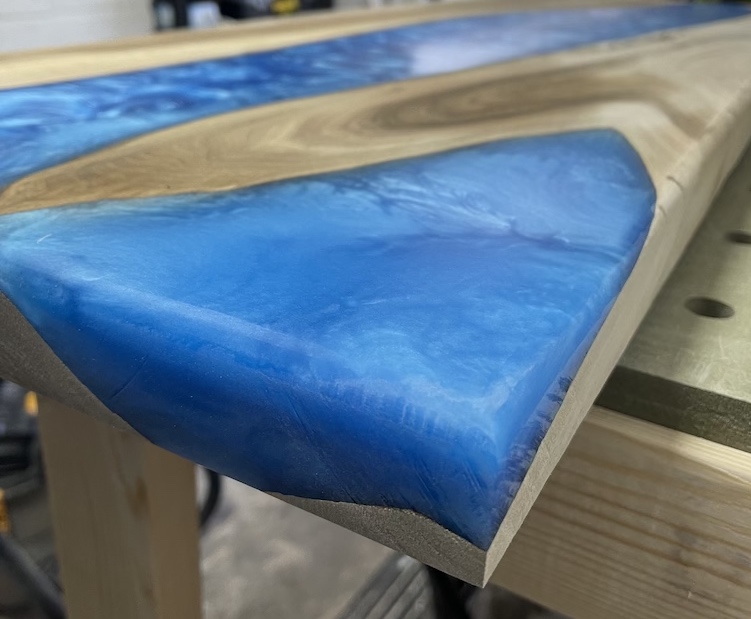
Clean & Polish
At this point I was getting close to the end for the table top. I gave it a final wipe down with mineral spirits and after letting it dry I applied Rubio Monocoat. Now I saw loads of videos on what to apply to protect the table top but only the Rubio Monocoat instructional videos were the most thorough. So I purchased a small amount but it is expensive.
Rubio Monocoat comes as an oil and an accelerator and needs to be mixed at a ratio of 3:1 (oil:accelerator). Without the accelerator the Rubio takes 3 weeks to fully cure but with the accelerator it should be set in 7 days.
The table area dimensions were 1.2m x 0.45m x 0.04m giving a surface area of just about 1.25m2 for which I found 30mls of oil and 10mls of accelerator was more than sufficient.
I drizzled it on and used a plastic spreader to distribute it all over the table and then buffed it.
The Legs
Initially I wondered whether or not to use walnut wood to make the legs but I wanted to go a little bit different with it. I really liked the metal legs but not having any desire to start messing around with angle grinders and the like I opted to get some 3/4″ pipe and fittings to make some legs. I found a nice seller on eBay (Art-Craft.Workshop) who shipped out a selection of iron pipe and fittings for me to be able to build two frames with 3 legs on each to attach to the table. Now this idea didn’t come without drama.
Initially I made a rectangular base frame using the pipe work but with the final pipe every time I tightened one side the other side got loose. So after having a play my lad and I figured that we could make two bases with three legs a piece.
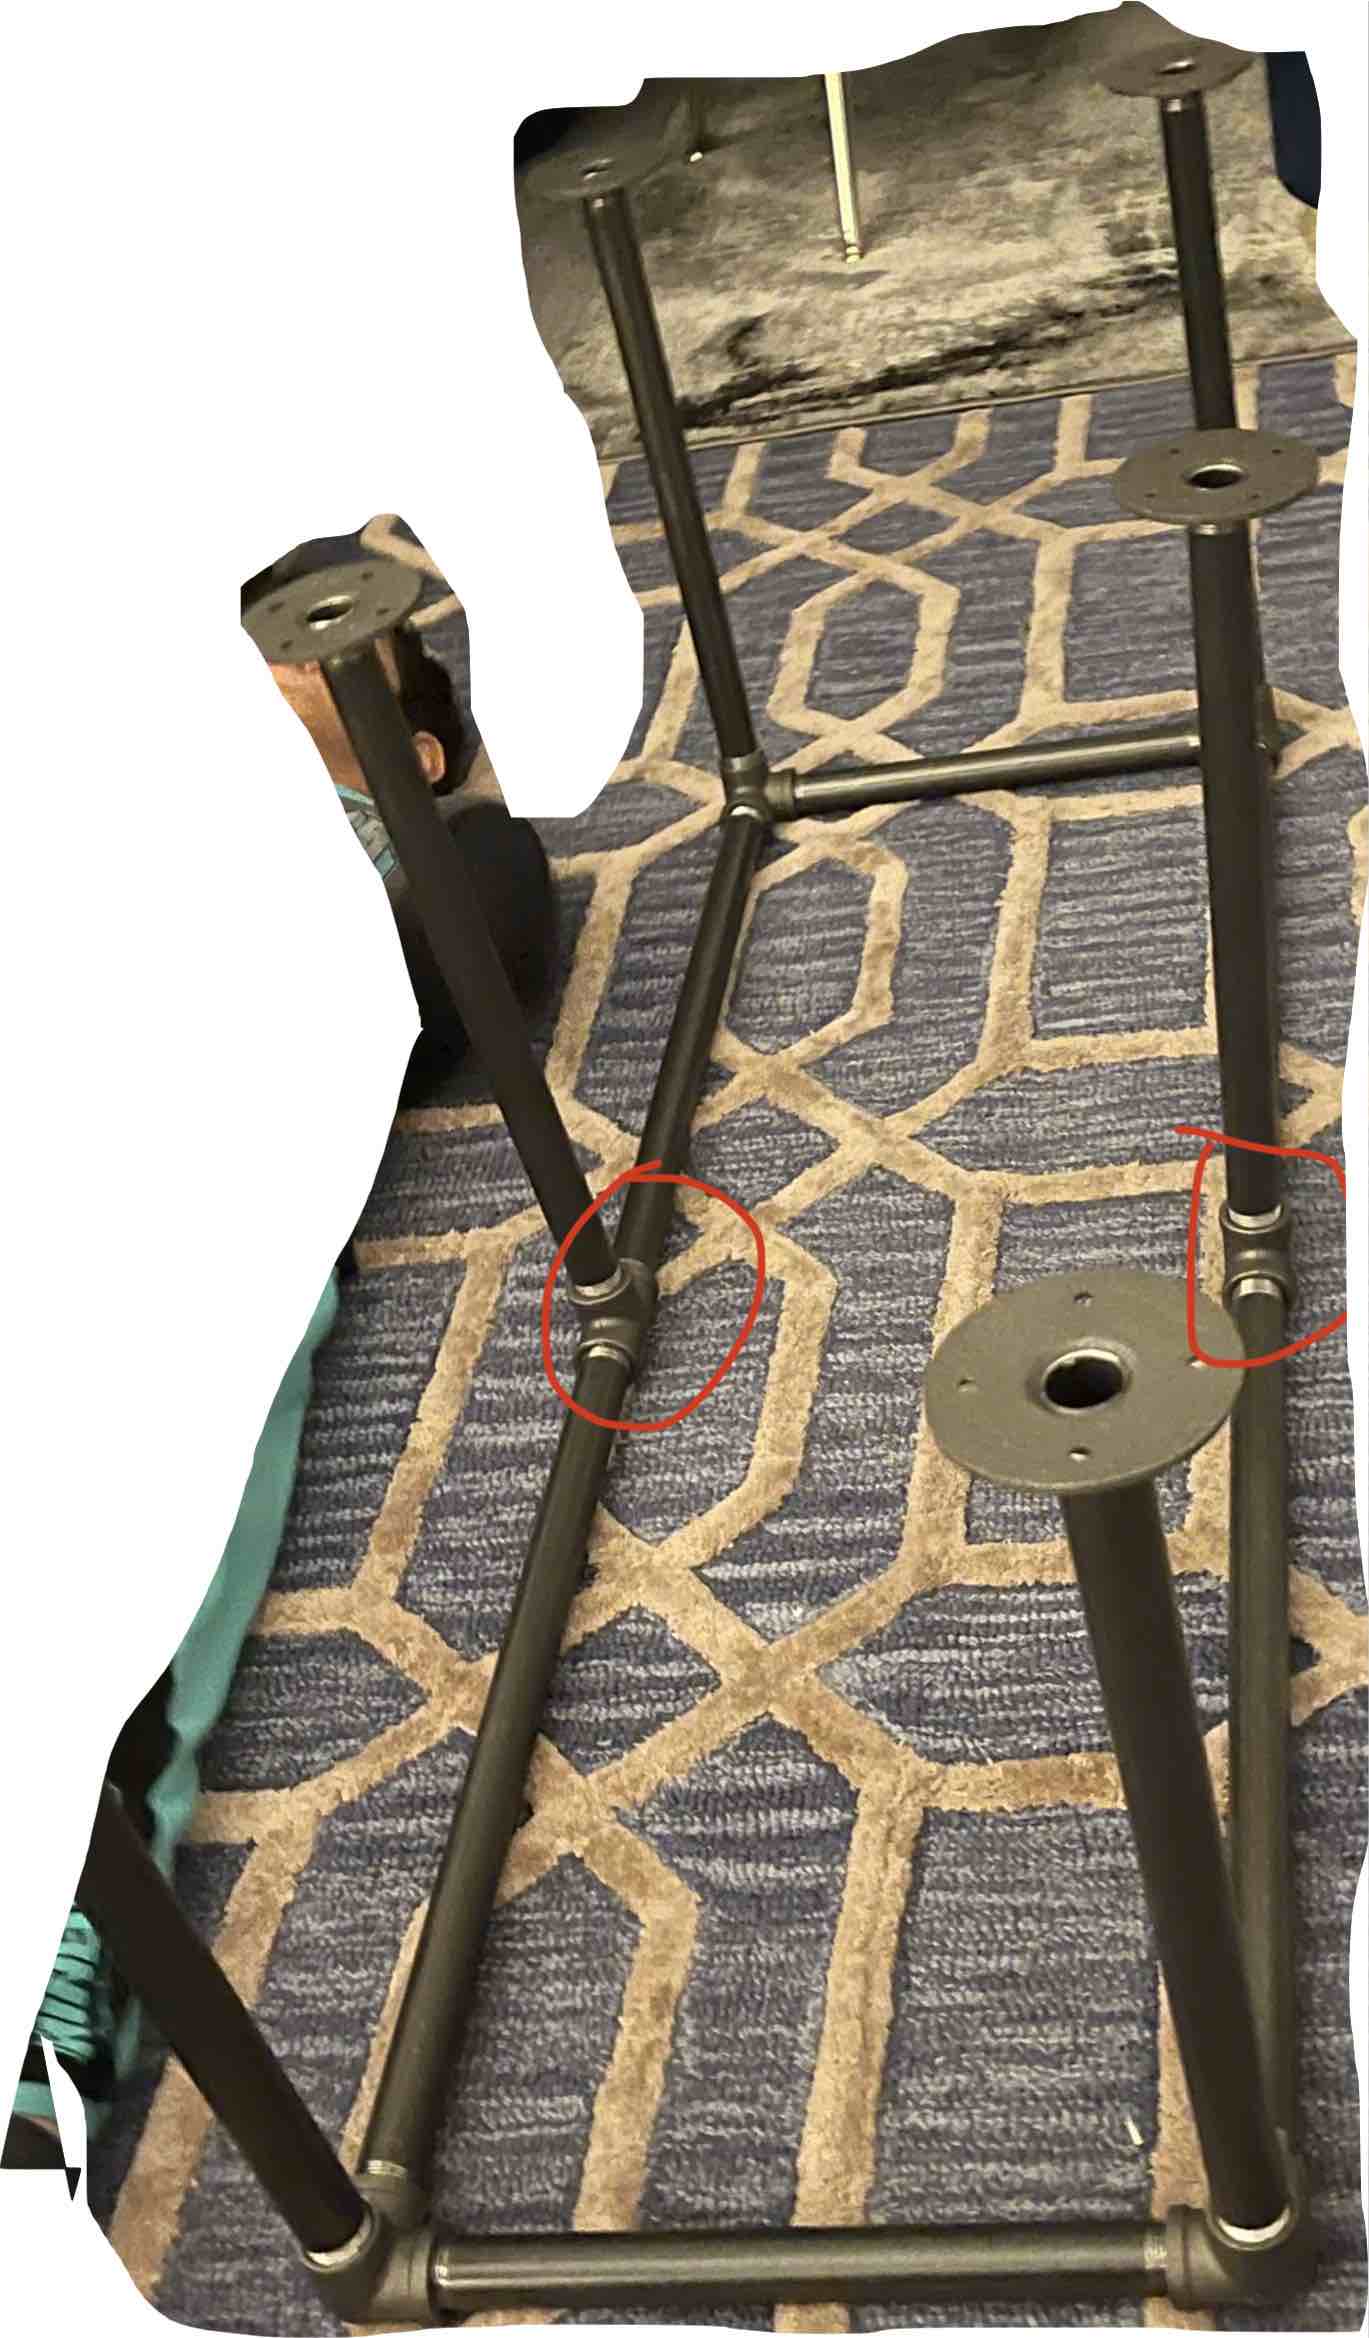
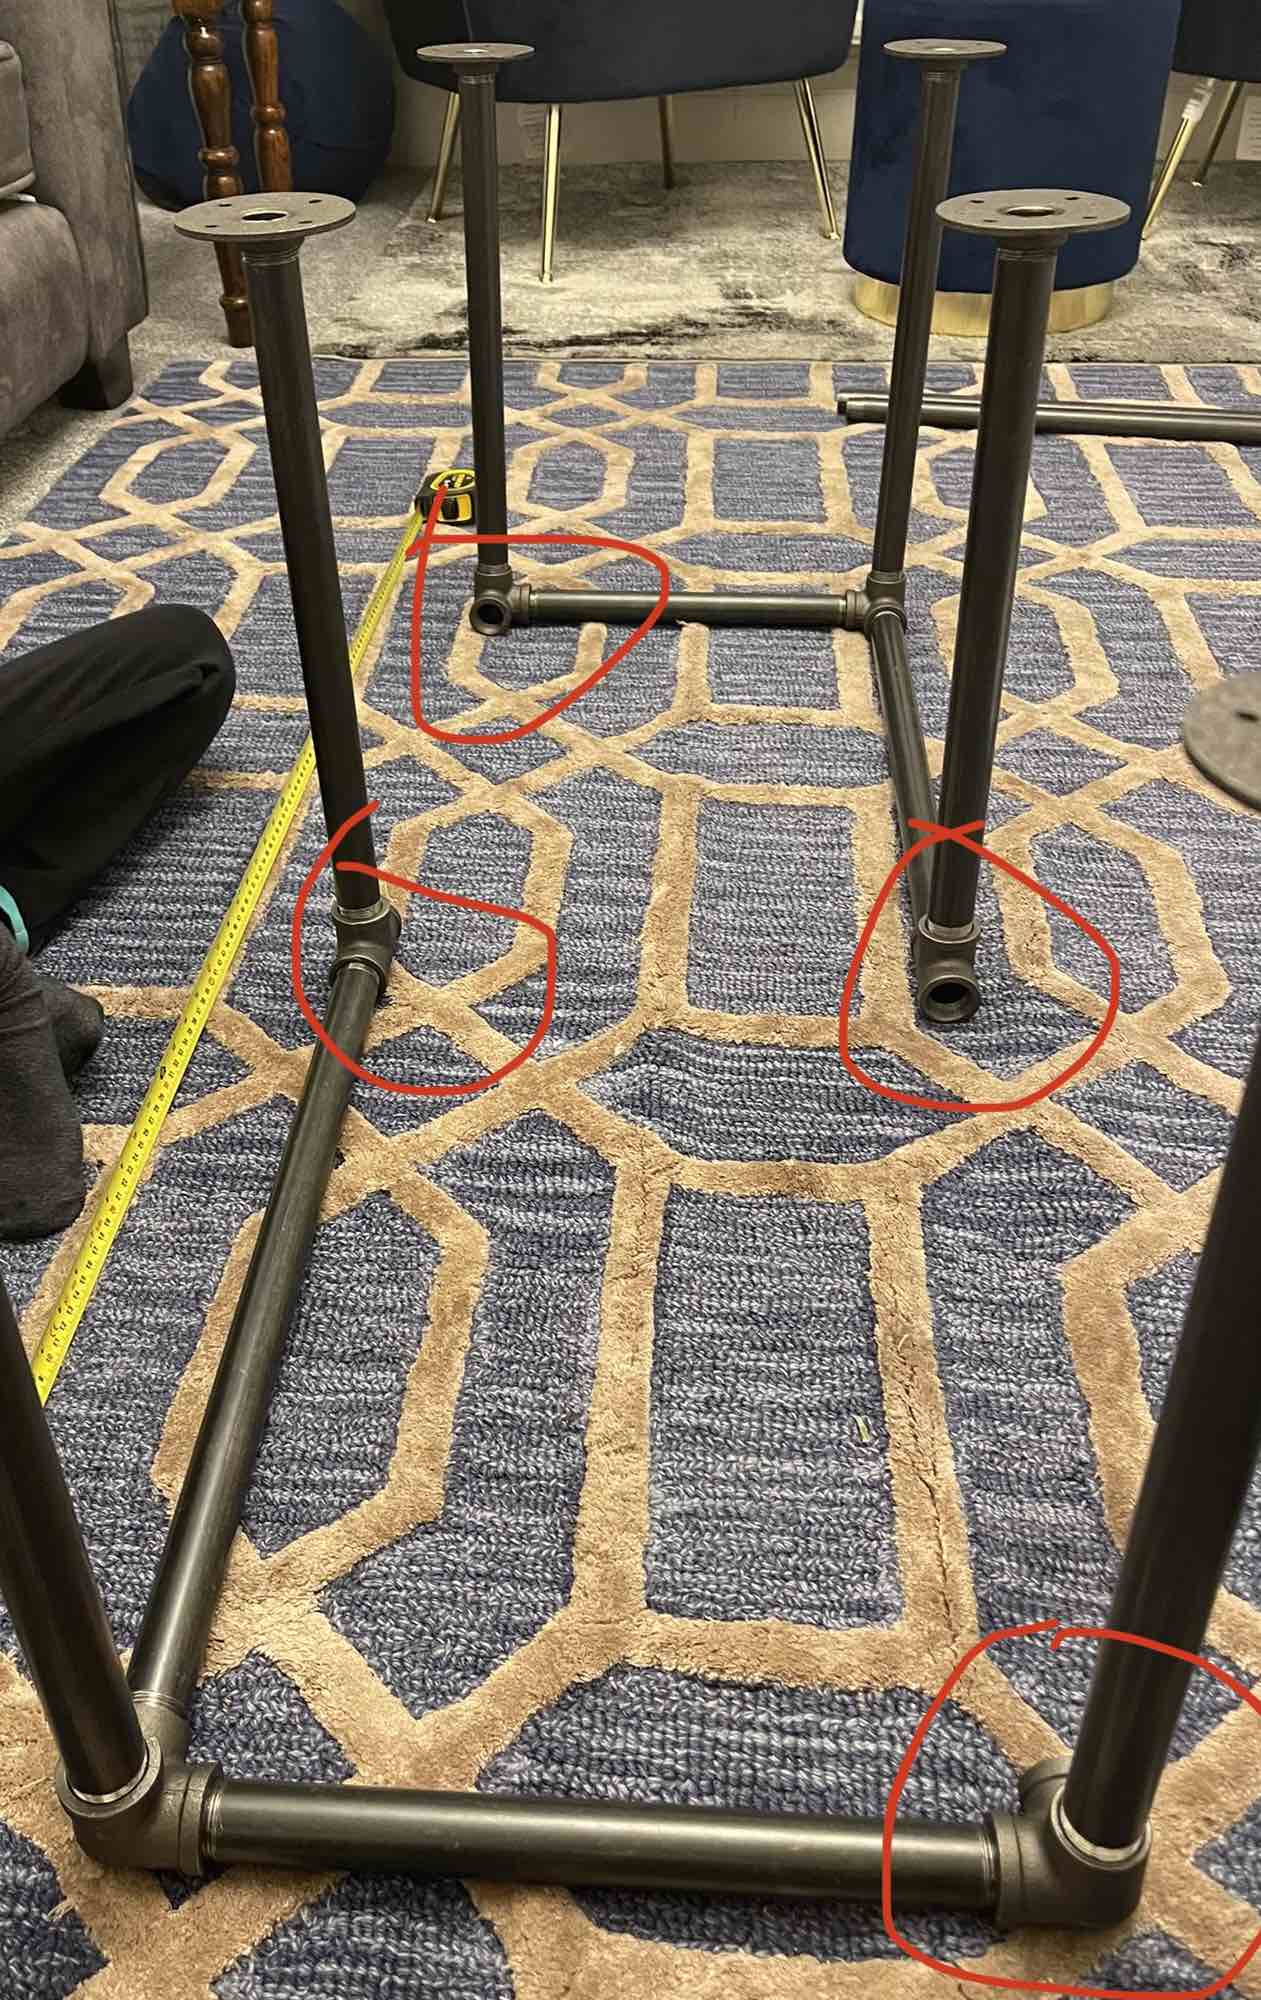
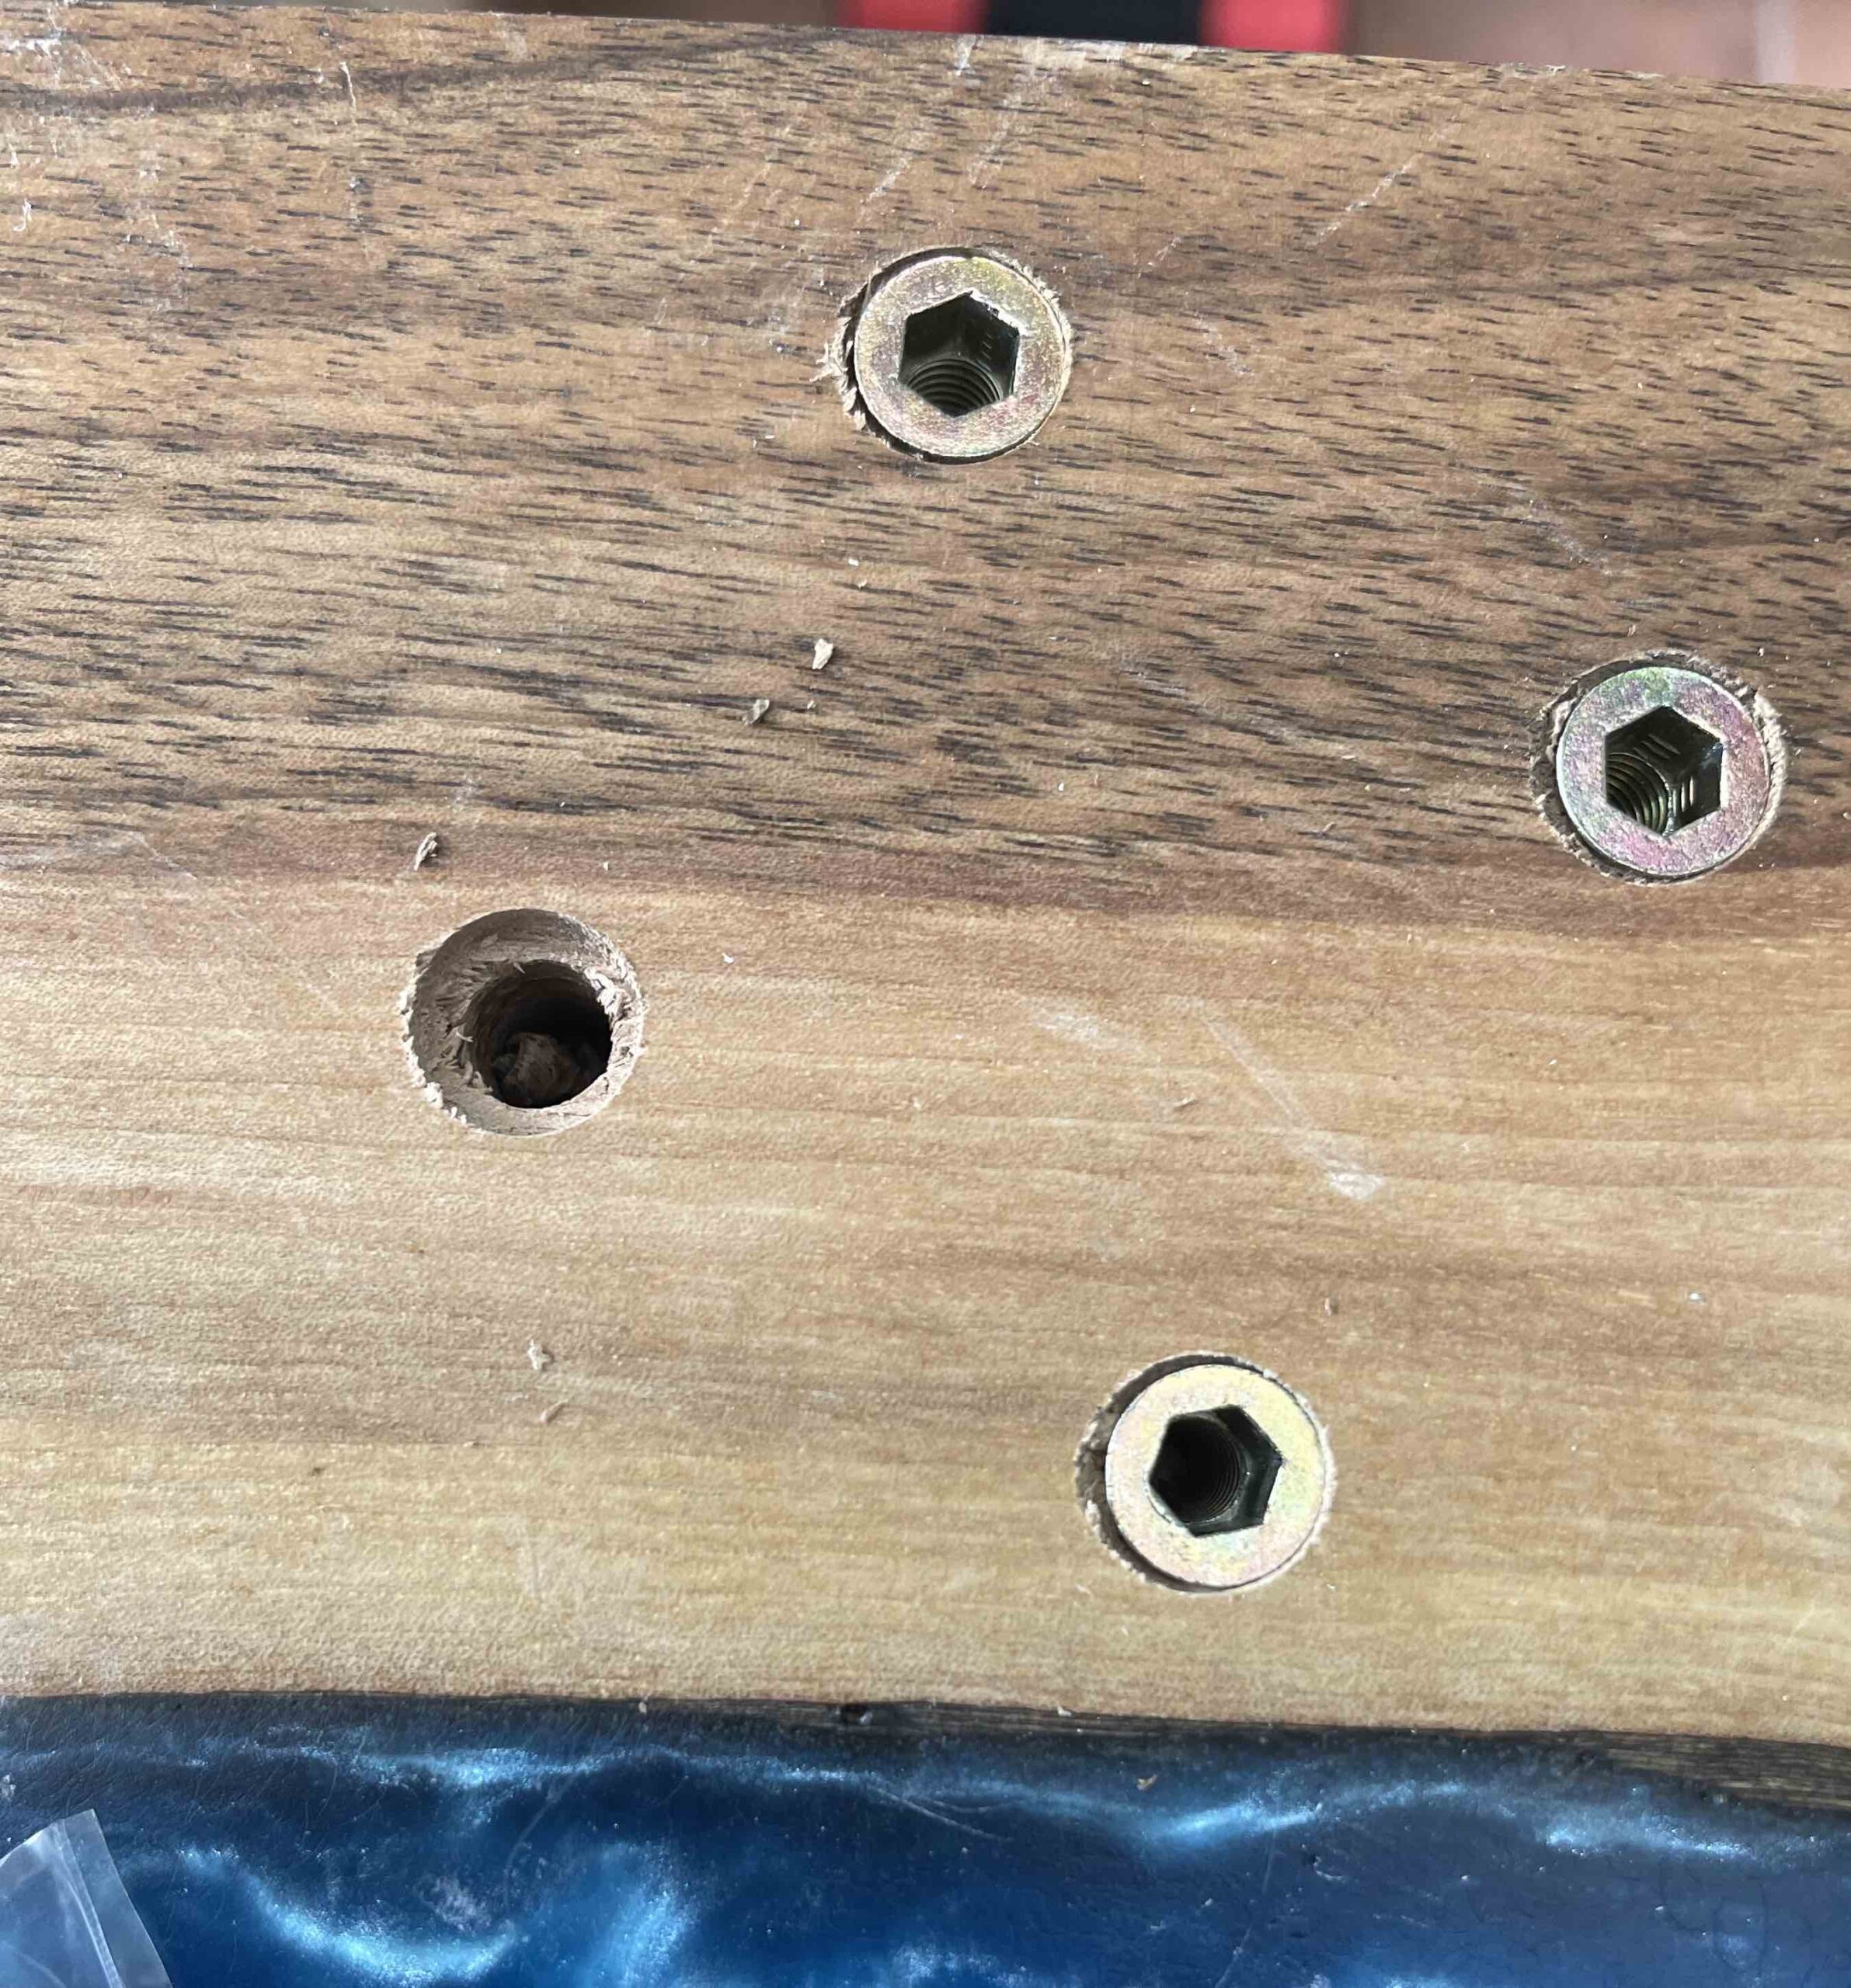
The elbow connectors fit quite nicely and after marking out the holes on masking tape I first drilled 8mm holes before using a 12mm drill to countersink.
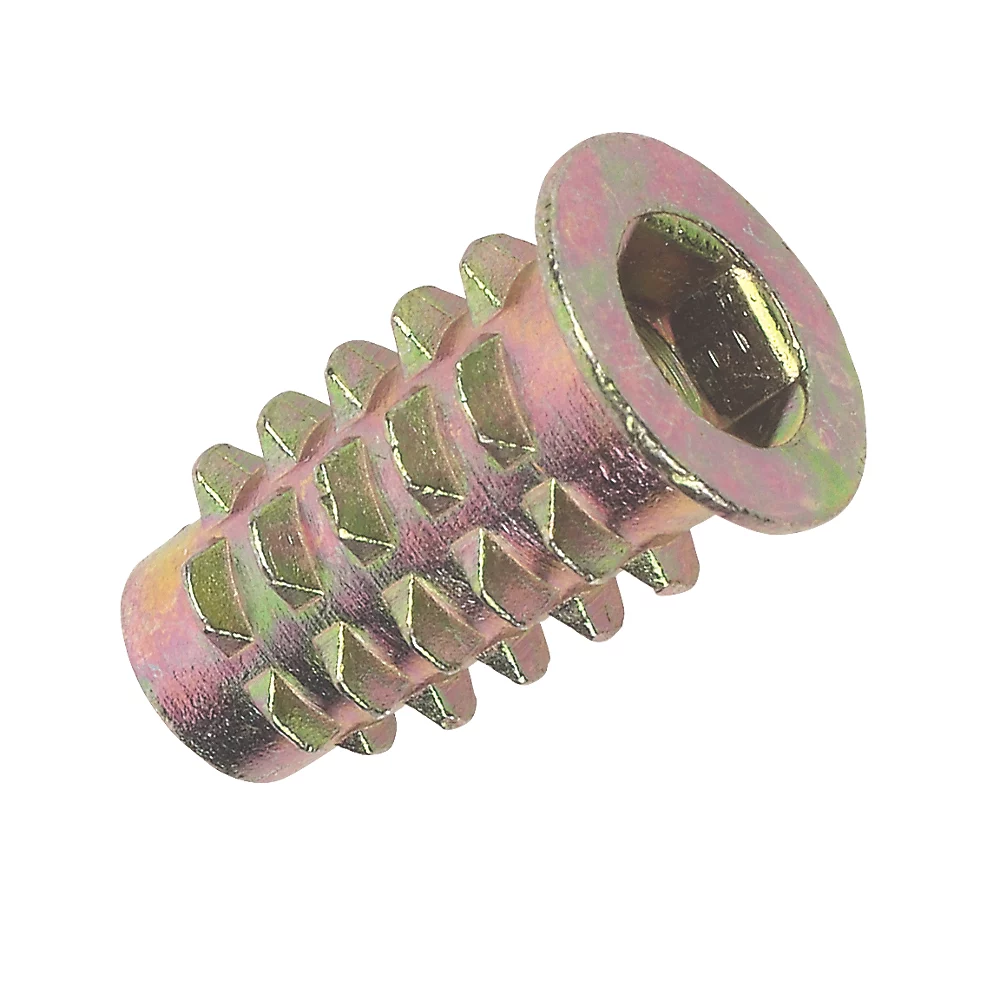
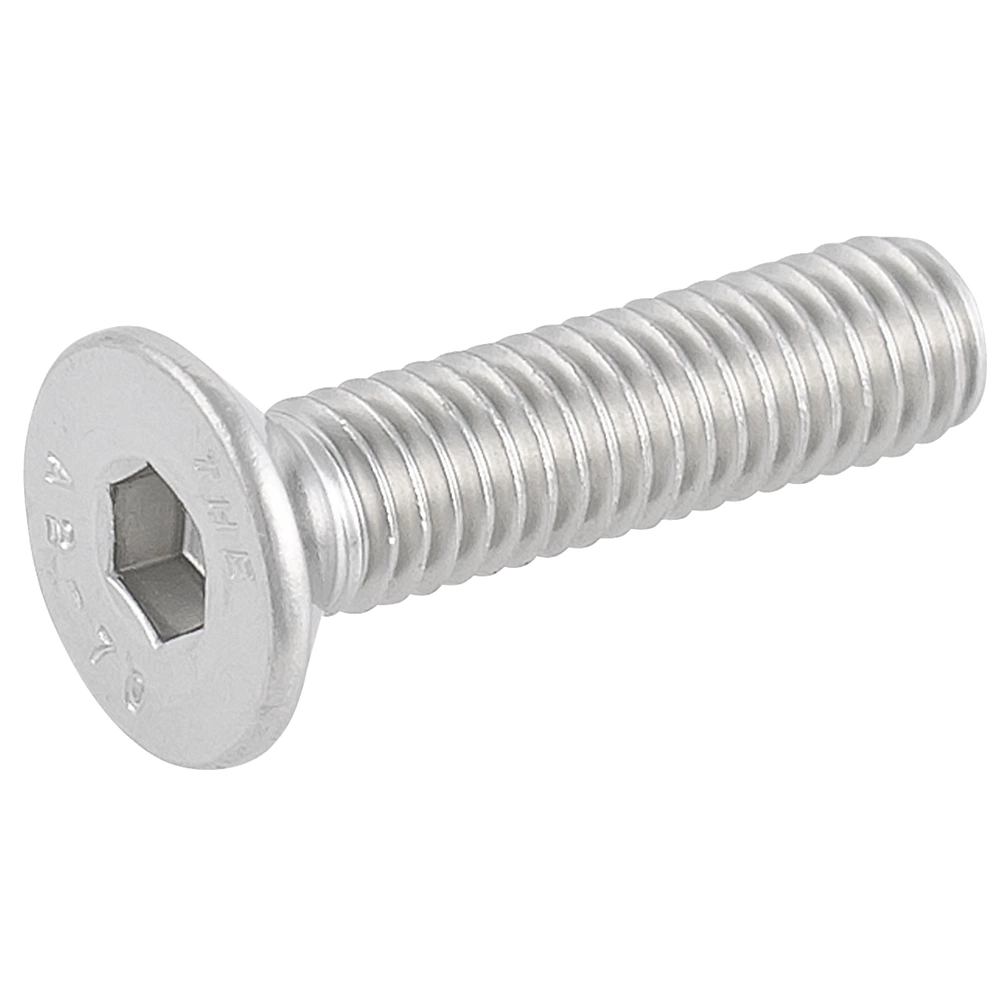
Insert nuts went in first. When I used the Allen key I actually cracked one so I drove them in on power and they all seated really well. I then put the legs over the top and secured them with the M6 bolts which have countersunk heads and fit very nicely into the flanges
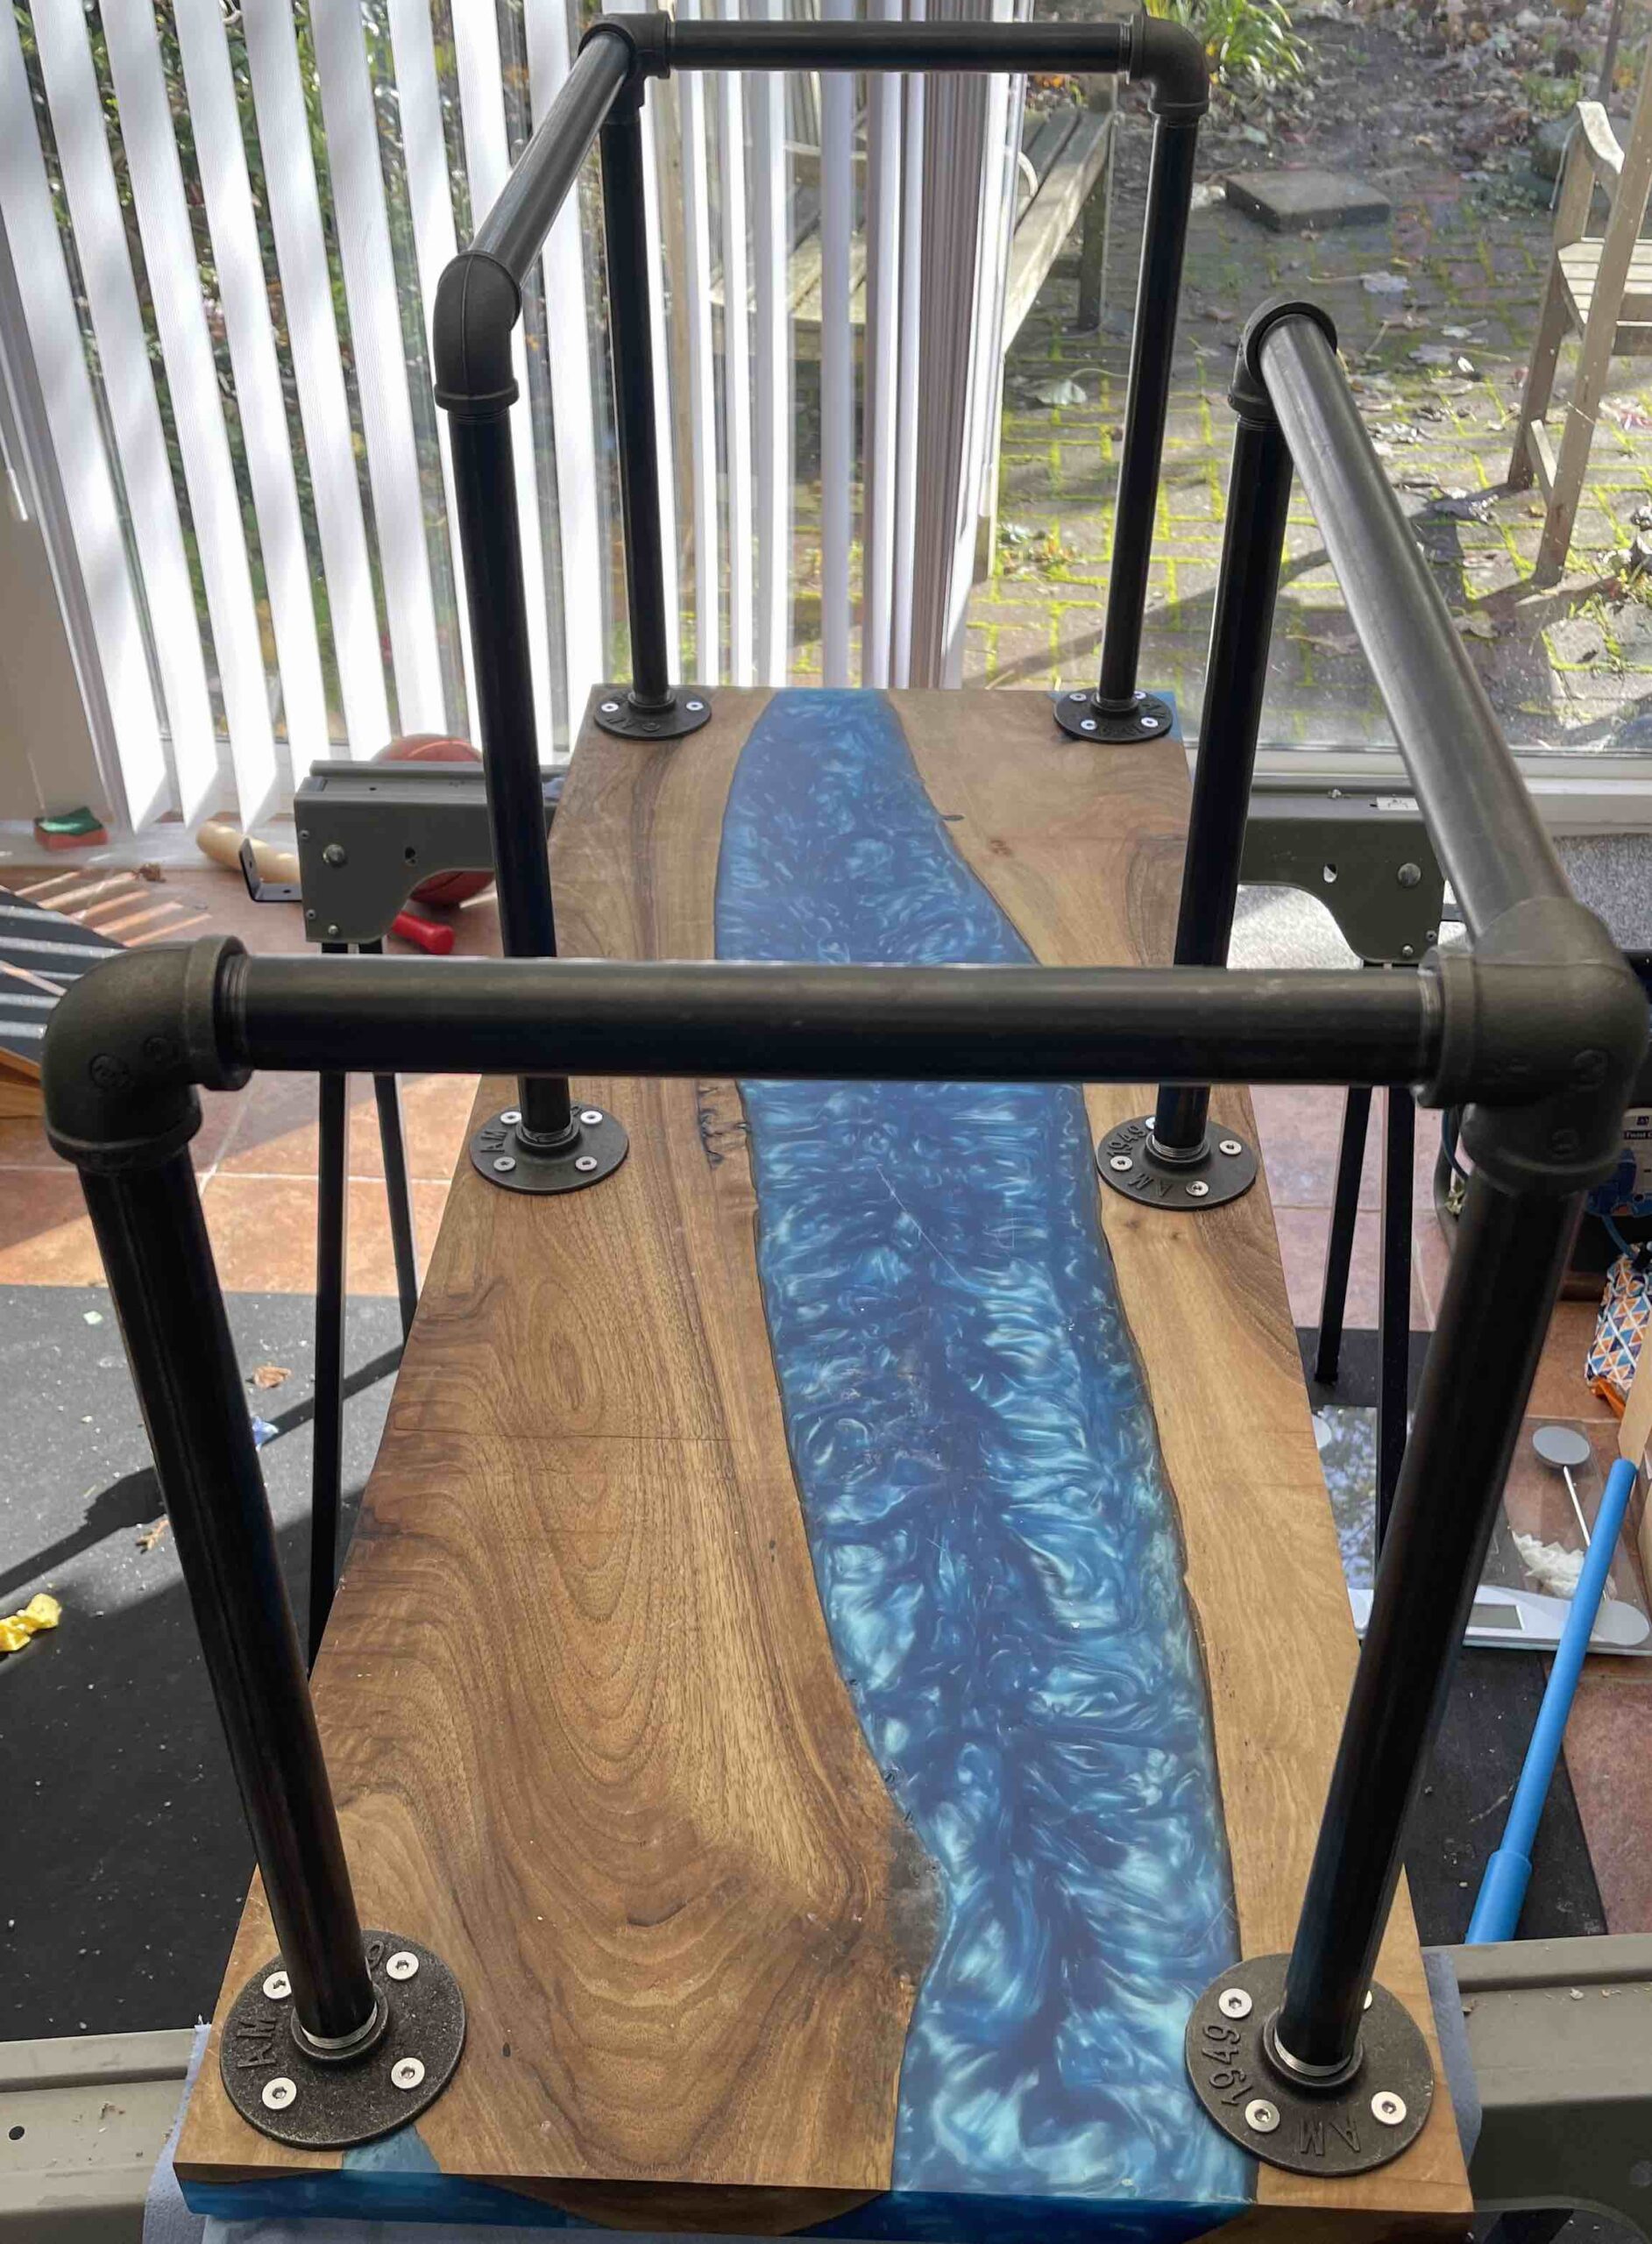
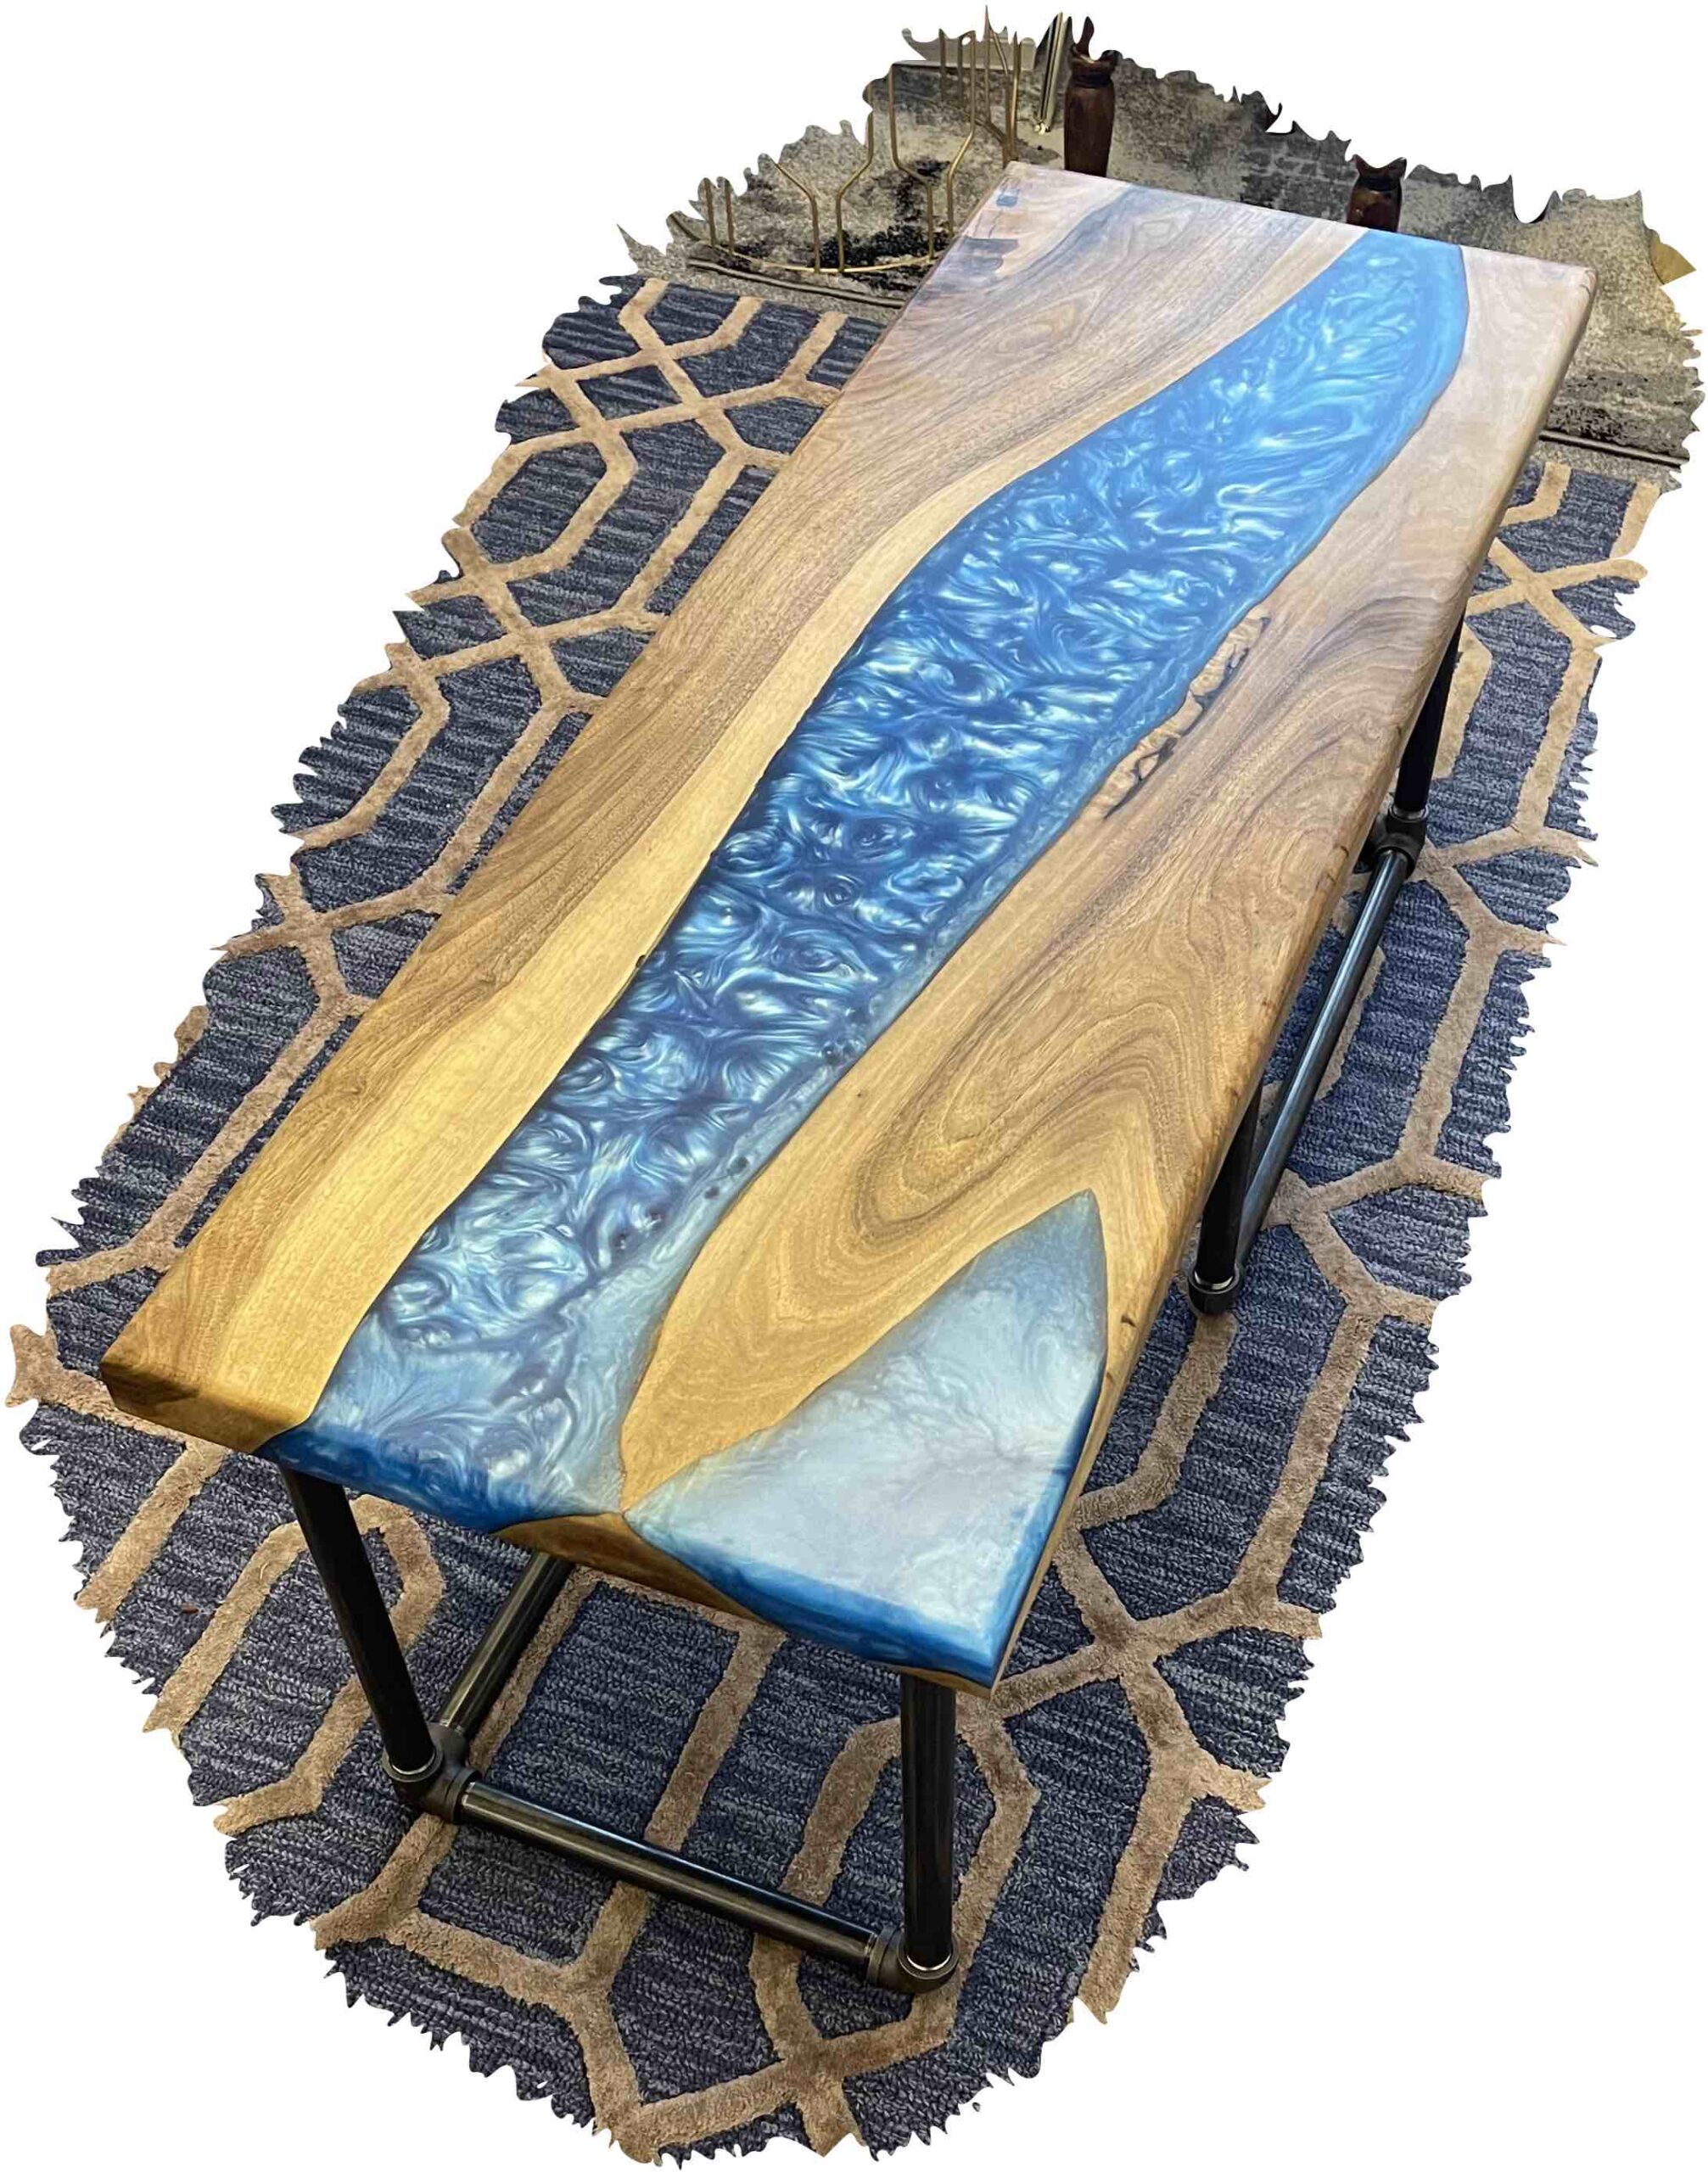
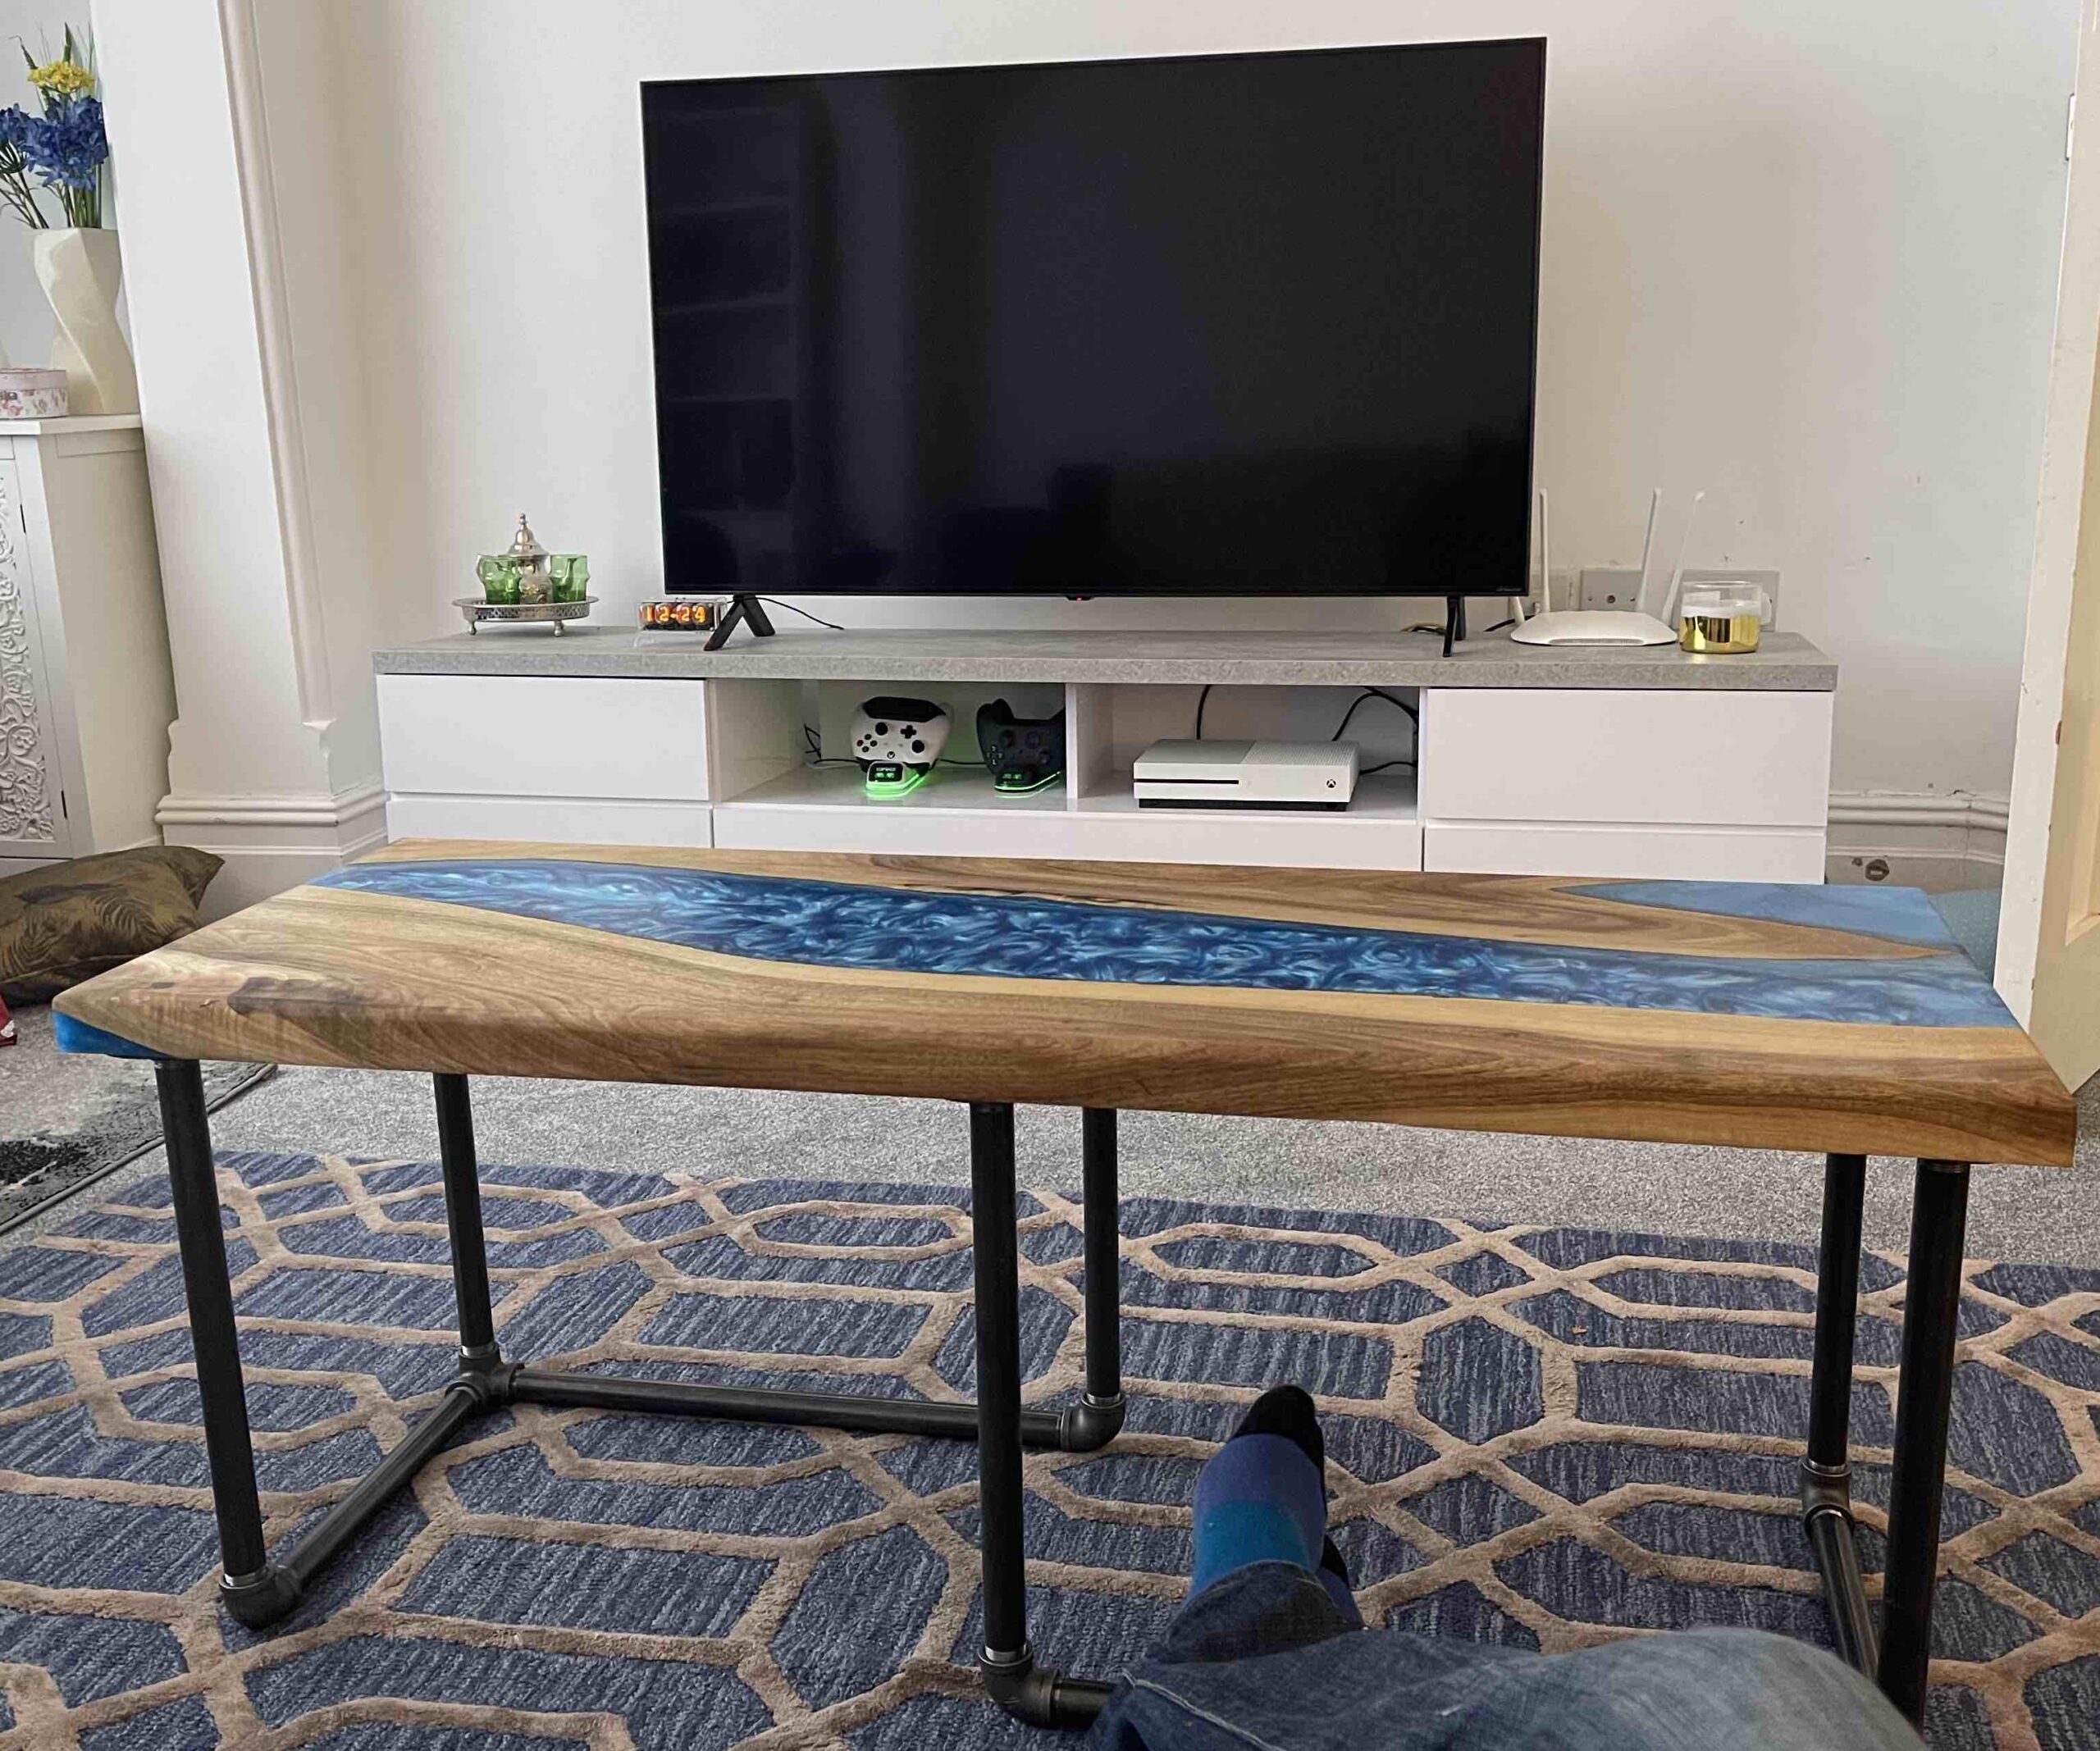
Final Images Satisfactory
Materials & Tools
Ryobi power tools mainly, but otherwise nothing beyond standard kit found on on an orthopaedic tray/tool shed. I will be making a case to get a table-saw though….
Before getting excited about price some items were thoroughly researched, others were convenient
- Walnut live edge slab – kiln dried 1200mm x 540mm x 50mm (eBay – £120)
- Plywood for mold 18mm thick (600mm x 1800mm) – £30
- Tuck Tape (Amazon – £21)
- Epoxy Resin (Epodex – £238)
- Rubio Monocoat – 100ml oil + 33ml accelerator (£35)
- Blow Torch