Convertible Picnic Table
[et_pb_section fb_built=”1″ _builder_version=”4.21.0″ _module_preset=”default” global_colors_info=”{}”][et_pb_row _builder_version=”4.21.0″ _module_preset=”default” global_colors_info=”{}”][et_pb_column type=”4_4″ _builder_version=”4.21.0″ _module_preset=”default” global_colors_info=”{}”][et_pb_text _builder_version=”4.21.0″ _module_preset=”default” global_colors_info=”{}”]
It just wouldn’t be a bank holiday in the UK without some DIY projects being started….and hopefully finished. This time though I wanted to build something for outdoors having spent a fair bit of time sorting out the garden! Having made a resin coffee table in 2022, I thought I’d focus on a simple bench until I found Construct101.com and downloaded plans for a Folding Picnic Table. I just couldn’t resist.
The prices of something similar were significant so I sought and gained permission from the relevant authorities within the household to proceed. I utilised my lads attention to detail to calculate how much wood I would need and then found a local supplier who was able to deliver all the treated lumber I needed within a week (volume at the bottom).
The most interesting/tedious thing about this project was having to work in imperial measures, but we coped…… 🙂
[/et_pb_text][/et_pb_column][/et_pb_row][et_pb_row column_structure=”3_5,2_5″ _builder_version=”4.21.0″ _module_preset=”default” global_colors_info=”{}”][et_pb_column type=”3_5″ _builder_version=”4.21.0″ _module_preset=”default” global_colors_info=”{}”][et_pb_text _builder_version=”4.21.0″ _module_preset=”default” global_colors_info=”{}”]
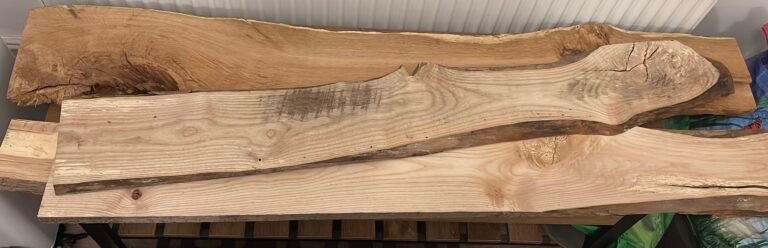
I got 20 piece of 2×4 that were 3.6metres in length. They are treated C16 lumber suitable for outdoor use. Once in, we marked all pieces from 1 to 20 and made our cutting plans while it was a bit drizzly outside! It was definitely worth doing and the lad double checked them before we went onto cutting. I found myself sharing that sage orthopaedic advice of measure twice and cut once…
[/et_pb_text][et_pb_image src=”https://u-ahmed.com/wp-content/uploads/2019/03/002-measuring-1024×557.jpg” title_text=”002 – measuring” _builder_version=”4.21.0″ _module_preset=”default” global_colors_info=”{}”][/et_pb_image][/et_pb_column][et_pb_column type=”2_5″ _builder_version=”4.21.0″ _module_preset=”default” global_colors_info=”{}”][et_pb_image src=”https://u-ahmed.com/wp-content/uploads/2019/03/001-Wood-scaled.jpg” title_text=”001 – Wood” _builder_version=”4.21.0″ _module_preset=”default” global_colors_info=”{}”][/et_pb_image][/et_pb_column][/et_pb_row][et_pb_row column_structure=”2_3,1_3″ _builder_version=”4.21.0″ _module_preset=”default” global_colors_info=”{}”][et_pb_column type=”2_3″ _builder_version=”4.21.0″ _module_preset=”default” global_colors_info=”{}”][et_pb_image src=”https://u-ahmed.com/wp-content/uploads/2019/03/IMG_6243-scaled.jpg” title_text=”IMG_6243″ _builder_version=”4.21.0″ _module_preset=”default” global_colors_info=”{}”][/et_pb_image][/et_pb_column][et_pb_column type=”1_3″ _builder_version=”4.21.0″ _module_preset=”default” global_colors_info=”{}”][et_pb_text _builder_version=”4.21.0″ _module_preset=”default” global_colors_info=”{}”]
I did the cutting in the garden so that a) I had the room and b) those who questioned my decision to purchase a mitre-saw can see how I was so right to do so… This project couldn’t have happened without it!
The most challenging part was getting all the chamfer cuts. There were a couple of errors but I had sufficient extras to manage.
Other materials were 2.5 inch deck screws to fix everything together.
[/et_pb_text][/et_pb_column][/et_pb_row][et_pb_row _builder_version=”4.21.0″ _module_preset=”default” global_colors_info=”{}”][et_pb_column type=”4_4″ _builder_version=”4.21.0″ _module_preset=”default” global_colors_info=”{}”][et_pb_text _builder_version=”4.21.0″ _module_preset=”default” global_colors_info=”{}”]
With all the cutting done, putting it all together was relatively easy. First I put togther the frames for the benches before fixing the 6ft long lumber pieces on for the seating.
[/et_pb_text][et_pb_image src=”https://u-ahmed.com/wp-content/uploads/2019/03/004-Benches-scaled.jpg” title_text=”004 – Benches” _builder_version=”4.21.0″ _module_preset=”default” global_colors_info=”{}”][/et_pb_image][et_pb_text _builder_version=”4.21.0″ _module_preset=”default” global_colors_info=”{}”]
Next the armrest/hinge mecahnism was cut and screwed on however, the hinges I got were pretty big so I had use my router to cut out small grooves to ensure that the fit. With the hinges in, the table top piece were fixed down too.
[/et_pb_text][et_pb_image src=”https://u-ahmed.com/wp-content/uploads/2019/03/005-Half-way-scaled.jpg” title_text=”005 – Half way” _builder_version=”4.21.0″ _module_preset=”default” global_colors_info=”{}”][/et_pb_image][et_pb_text _builder_version=”4.21.0″ _module_preset=”default” global_colors_info=”{}”]
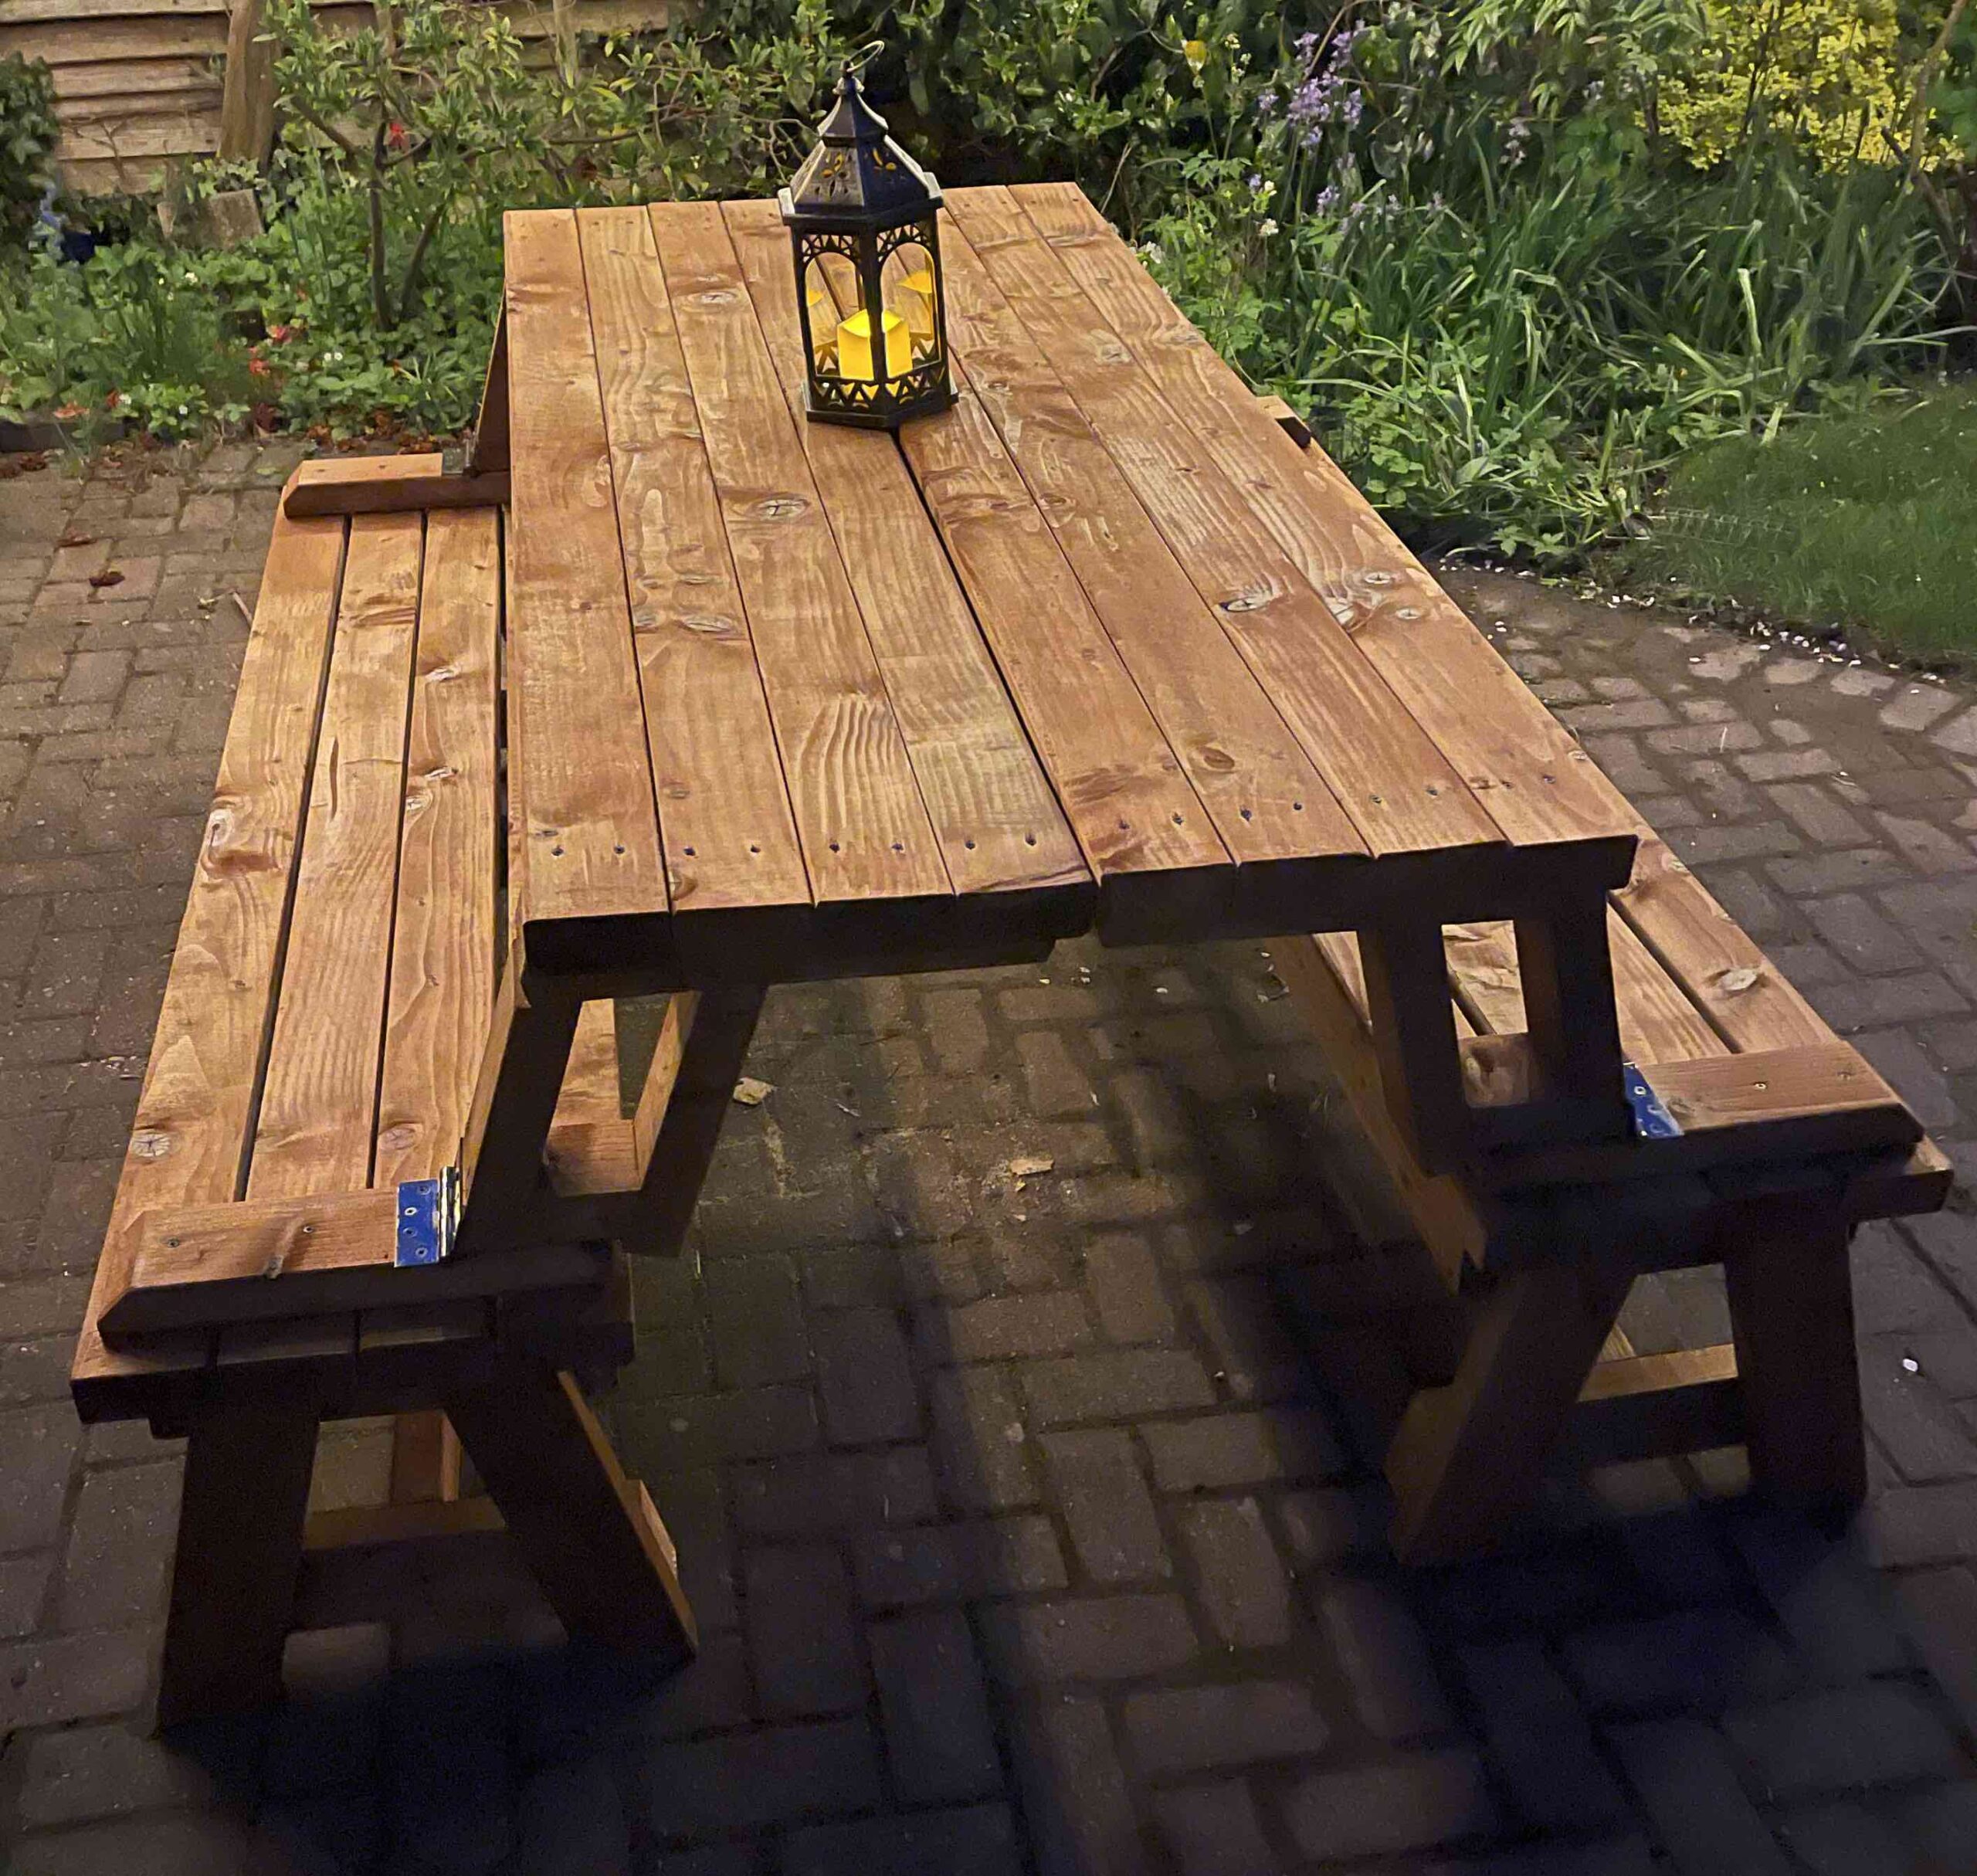
The final bench/table moved well and felt secure, but a few areas around the armrest needed a few more screws for reinforcement which I duly implanted 🙂
[/et_pb_text][/et_pb_column][/et_pb_row][et_pb_row column_structure=”1_2,1_2″ _builder_version=”4.21.0″ _module_preset=”default” global_colors_info=”{}”][et_pb_column type=”1_2″ _builder_version=”4.21.0″ _module_preset=”default” global_colors_info=”{}”][et_pb_image src=”https://u-ahmed.com/wp-content/uploads/2019/03/006-benches-scaled.jpg” title_text=”006 – benches” _builder_version=”4.21.0″ _module_preset=”default” global_colors_info=”{}”][/et_pb_image][/et_pb_column][et_pb_column type=”1_2″ _builder_version=”4.21.0″ _module_preset=”default” global_colors_info=”{}”][et_pb_image src=”https://u-ahmed.com/wp-content/uploads/2019/03/007-table.jpg” title_text=”007 – table” _builder_version=”4.21.0″ _module_preset=”default” global_colors_info=”{}”][/et_pb_image][/et_pb_column][/et_pb_row][et_pb_row _builder_version=”4.21.0″ _module_preset=”default” global_colors_info=”{}”][et_pb_column type=”4_4″ _builder_version=”4.21.0″ _module_preset=”default” global_colors_info=”{}”][et_pb_text _builder_version=”4.21.0″ _module_preset=”default” global_colors_info=”{}”]
After sanding down all the rough edges to make sure there were no splinters or rough patches, we had to shut down production for a bit due to rain but the minute the sun came out we started the staining process to further protect and colour the bench. We’ve got one coat on it so far but here are the final pictures and our first proper use!
[/et_pb_text][et_pb_video src=”https://youtube.com/shorts/LBydtl0yLYE?feature=share” src_webm=”https://youtube.com/shorts/LBydtl0yLYE?feature=share” _builder_version=”4.21.0″ _module_preset=”default” global_colors_info=”{}”][/et_pb_video][/et_pb_column][/et_pb_row][et_pb_row _builder_version=”4.21.0″ _module_preset=”default” global_colors_info=”{}”][et_pb_column type=”4_4″ _builder_version=”4.21.0″ _module_preset=”default” global_colors_info=”{}”][et_pb_gallery gallery_ids=”3523,3524,3525,3526,3527,3528″ _builder_version=”4.21.0″ _module_preset=”default” global_colors_info=”{}”][/et_pb_gallery][et_pb_video src=”https://youtu.be/W3DaVaCJQs4″ src_webm=”https://youtu.be/W3DaVaCJQs4″ _builder_version=”4.21.0″ _module_preset=”default” global_colors_info=”{}”][/et_pb_video][/et_pb_column][/et_pb_row][et_pb_row column_structure=”1_2,1_2″ _builder_version=”4.21.0″ _module_preset=”default” global_colors_info=”{}”][et_pb_column type=”1_2″ _builder_version=”4.21.0″ _module_preset=”default” global_colors_info=”{}”][et_pb_text _builder_version=”4.21.0″ _module_preset=”default” global_colors_info=”{}”]
Materials
- 2×4 C16 treated timber – 3.6m in length – x20
- 2.5 inch deckscrews – x350
- 4 inch hinges – x4
- Wood Stain/Preserver (Roxil)
[/et_pb_text][/et_pb_column][et_pb_column type=”1_2″ _builder_version=”4.21.0″ _module_preset=”default” global_colors_info=”{}”][et_pb_text _builder_version=”4.21.0″ _module_preset=”default” global_colors_info=”{}”]
Tools
- Mitre Saw (need to cut 90, 45 & 15 degree angles)
- Sander
- Trim Router
- Impact Driver
- Paint Brushes
[/et_pb_text][/et_pb_column][/et_pb_row][/et_pb_section]